Building up a good collection of tools takes time and money. Sexy tools such as compound miter saws, Kreg jigs, cordless tool sets, and table saws costs big bucks. But some of the best stuff isn't too expensive at all. This is especially true with, what I call support tools (maybe there's a better name?). I classify support tools as ones that don't to the actual work of cutting, screwing, drilling, and etc. Measuring, marking, and assistive tools are critical in successful projects.
I'm going to show my collection, collected from the last 15 years or so, some even at garage sales. There's plenty more stuff out there, I'd still like to pick up. As usual, I'm including sourcing links if you want to order them from Amazon.com, but you can likely find it at your local hardware store or home center.
In no order whatsoever, other than how I grabbed it our of my drawers:

(1) The folding rule is handy for laying on the ground a lot more rigidly than a tape measure. Plus it's a bit more accurate when measuring using the tip, since it doesn't slide around. I don't use it much, but occasionally it really fits a need. The kids love playing with it; it's mesmerizing fun. ($8-$18)
(2) A combination square is great for measuring and transposing measurements. You tighten the wheel to lock a measurement in place. I use constantly in the workshop and on my renovation projects. I have this little sibling, a 6" combination square that I keep in my nail apron when I'm in the shop. It's perfect for setting table saw height, or simply taking small measurements. These usually have both metric and standard units of measure. These get heavy use. (12" = approx. $10 - $15, 6"= approx. $10 - $12)
(3) Tape measures are critical, period. I usually carry a 25' tape for general use, but a small 10' tape is fine for working in the shop. Most wood stock is no longer than 8' so a smaller tape is perfect for carrying in my nail apron. You can buy either metric or standard, some even come with "cheater" measurements labeled, down to 1/16" of an inch. (approx. $5 - $25, I've even seen Harbor Freight coupons for a free one)
(4) Calipers are also helpful for making tiny, precise measurements. I just use these mini pocket calipers for occasional detail work. Since I don't do machinist type stuff, it's somewhat rare that I reach for them. They make nice electronic, digital ones as well. ($20 - $25)

(5) A carpenter's square is another workhorse. It's good for measuring, drawing lines, and keeping things square during assembly. It's also seen heavy use as a cutting edge for straight line cutting with and X-Acto Knife. In a pinch, you can clamp it and run a cutting tool against it, like a saw or router. This is a mid size one. (approx. $15)
(6) This odd looking rascal is a T-Bevel. It's good for copying angles for cutting or corners for mitering. The wing nut screw tightens, so nothing slips. I've used it quite a bit for moldings. ($10 - $15)
(7) Yes folks, it's pencils!!!!!!! Seriously, buy a whole stinkin' pack of these #2 elementary school specials and scatter them around your work area . It's an absolute pleasure to have pencils anywhere you reach. I loose them constantly, sometimes they are in my pocket or behind my ear. I hate looking around for something I've misplaced when I'm really on a roll. I do the same with 4-5 tape measures. It's nice to have a pencil sharpener out there too. (approx. $2)
(8) A compass is good for scribing lines and transferring regular measurements. An inexpensive type that takes a pencil is perfect. Mine is overkill, a relic of my days in art school. (approx. $5 -$14)
(9) A rafter square or speed square, is another heavy use item. Not just for rafters or stairs, its a quick 90 degrees. It's a quick straight edge of trimming a 2x4 with a circular saw. It has angles marked as well as a short ruler for length. This one just fits in my back pocket enough to not fall out. (approx. $18)

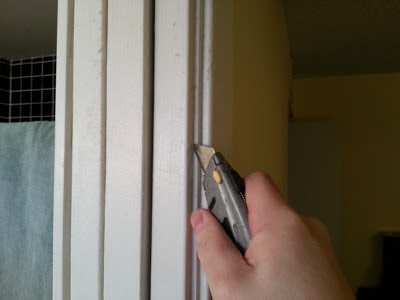
(10) A utility knife actually does do cutting work, but I still keep it in the support category. Mine is a Stanley quick change model, which is really convenient. Just another great, basic tool to have easily at hand. Careful, these demons send lots of folks to the ER for stitches, respect your knife safety. (approx. $5 - $10)
(11) A cutting guide or straight edge will make breaking down sheet goods with a circular saw a snap. Just clamp it down and run your saw against it. Its good for routing dados as well. I like this one because the two sections clamp together to make a 100" single edge. (approx $25)
(12) Mechanical center punches are excellent for marking an indent in metal, prior to drilling too keep the bit from wandering. (approx. $20)
(13) Scratch Awl is a basic utility tool good for marking, especially on metal. (approx. $3)
(14) I love the
Calculated Industries 8510 Home ProjectCalc Do-It-Yourself Project Calculator This little guy handles full mathematic function using fractions. I know it's easy enough to do calculations by hand, but this is just great. I use it constantly. ( approx. $20)

(15) Bubble Levels, get a lot of use on remodeling projects I use a 24" I-Beam Level and I have several torpedo levels for smaller work. Don't drop them or they loose their accuracy. You can check by holding two levels together and seeing if they read the same. ($10-$20+ for 24") and (approx. $10-$15 for a torpedo)
(16) Another one of my art school veterans, it seems like I reach for this T-square for various layout work. It's quick and handy. (approx. $10 - $15)
(17) I found this large carpenter's square at a garage sale. I like it's larger size for occasional use.
That's it for now. I'm sure this list will grow, as these things always do over the years. The deal is, you can get away with a tape measure and a pencil for most tasks, but it's quicker and easier to have some specialized support tools. Most are less than $20.