

I'm going to kill two birds with one stone, start the interior door upgrade project my wife asked for and cross one item off the to do list. The master bath door is constantly falling off the track. Several times, my poor wife or daughter has been trapped, hollering for rescue when the door has gotten wedged. I'll find the unfortunate lady, peering furiously through a five inch gap.
I initially wanted to replace the track with a two rail type, where the wheels cannot easily disengage. However, based on my research, removing and replacing the track requires highly customized tools to get at screws deep in the pocket where you cannot reach, or opening the wall up. I'd rather not open the wall and get into a bunch of drywall repair and painting. I'm going to see if I can simply replace all the hardware and tighten up what I can get to. I'm replacing the beat-up, scratched, over-painted, bleeeechh slab door.
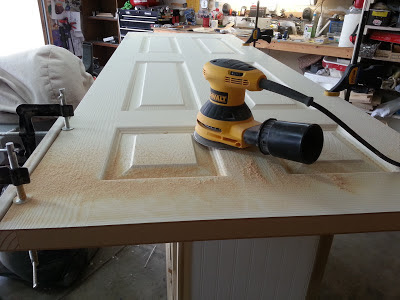
I picked up a 28" W x 80" H hollow core, six panel door at The Home Depot for $30 along with new hardware. Like all of our interior doors, the standard size was too big. I had bought a new tool, a handheld planer. I'd never used one, but I'd used a jointer, the same principle, just move the tool, not the work piece. I chose a Bosch 6 amp, 3 1/4 planer. (Maybe I'll review it after I've done all the doors in the house - so far, so good). It took a few passes to get the hang of it, but slowly felt comfortable taking deeper cutting passes.
 I took the door down to 27 5/8' W x 79 3/4" H, in multiple passes, learning the feel of the planer. It threw a fair amount of sawdust, but not a ton. The collection bag filled up twice. If it was green, it would have looked like Easter Basket grass.

I initially wanted to replace the track with a two rail type, where the wheels cannot easily disengage. However, based on my research, removing and replacing the track requires highly customized tools to get at screws deep in the pocket where you cannot reach, or opening the wall up. I'd rather not open the wall and get into a bunch of drywall repair and painting. I'm going to see if I can simply replace all the hardware and tighten up what I can get to. I'm replacing the beat-up, scratched, over-painted, bleeeechh slab door.
I picked up a 28" W x 80" H hollow core, six panel door at The Home Depot for $30 along with new hardware. Like all of our interior doors, the standard size was too big. I had bought a new tool, a handheld planer. I'd never used one, but I'd used a jointer, the same principle, just move the tool, not the work piece. I chose a Bosch 6 amp, 3 1/4 planer. (Maybe I'll review it after I've done all the doors in the house - so far, so good). It took a few passes to get the hang of it, but slowly felt comfortable taking deeper cutting passes.
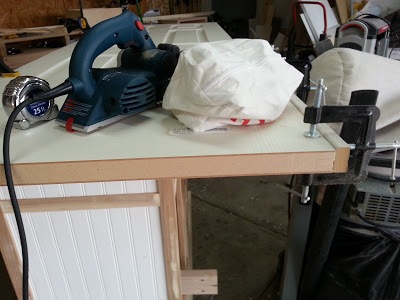 |
| Notice my work bench? Yep, that's the (still) unfinished hall organizer project. |
On my first couple passes, I got some splinter-out as the cutter leaves the surface, following the cut. I used a little trick I saw Tom Silva do on This Old House, although I think he was working on window casings at the time. I clamped a sacrificial strip of MDF to the exiting edge of my cut with three way clamps. The MDF took the blow-out and the snipe, keeping my edge straight. (shown to the right above)
I hit the freshly planed faces with the Random Orbital Sander and slightly eased the edges by a quick 45 degree pass, to keep the veneer from chipping out later.
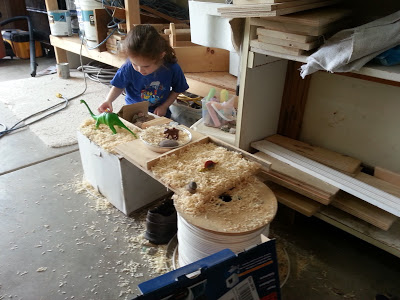
Grace always loves playing with my sawdust. These shavings took it to the next level. She made some sort of dinosaur / Angry Birds amusement park. It was a constant, "Watch this Daddy,...Daddy watch!,.. Look at this guy!,... Hey, watch this!,... Daddy look!...Daddy,..." She had an absolute ball,... then she tracked it into the house.
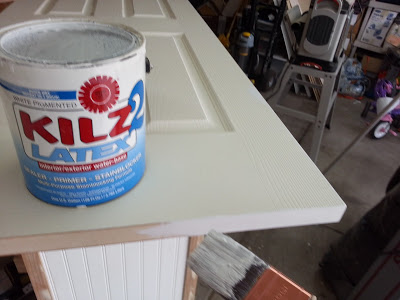
Since I had taken all the factory priming off the edges, I hit the bare wood edges with two coats of a good primer. Since this is a bathroom door, subject to moisture, I want too make sure it's sealed up really good.
I applied a couple coats of semi-gloss, white latex on the whole door and left it to dry. Well, at least I painted five sides out of six. Even though today was a beautiful 70 degree day, the paint was still a little tacky when I decided to clean up and head in for the Super Bowl.
I headed out to the shop and checked it at halftime. The paint took beautifully. I'll probably paint the reverse side tomorrow after work.
So far, this is a pretty easy, enjoyable project. Follow the exciting install next!
