

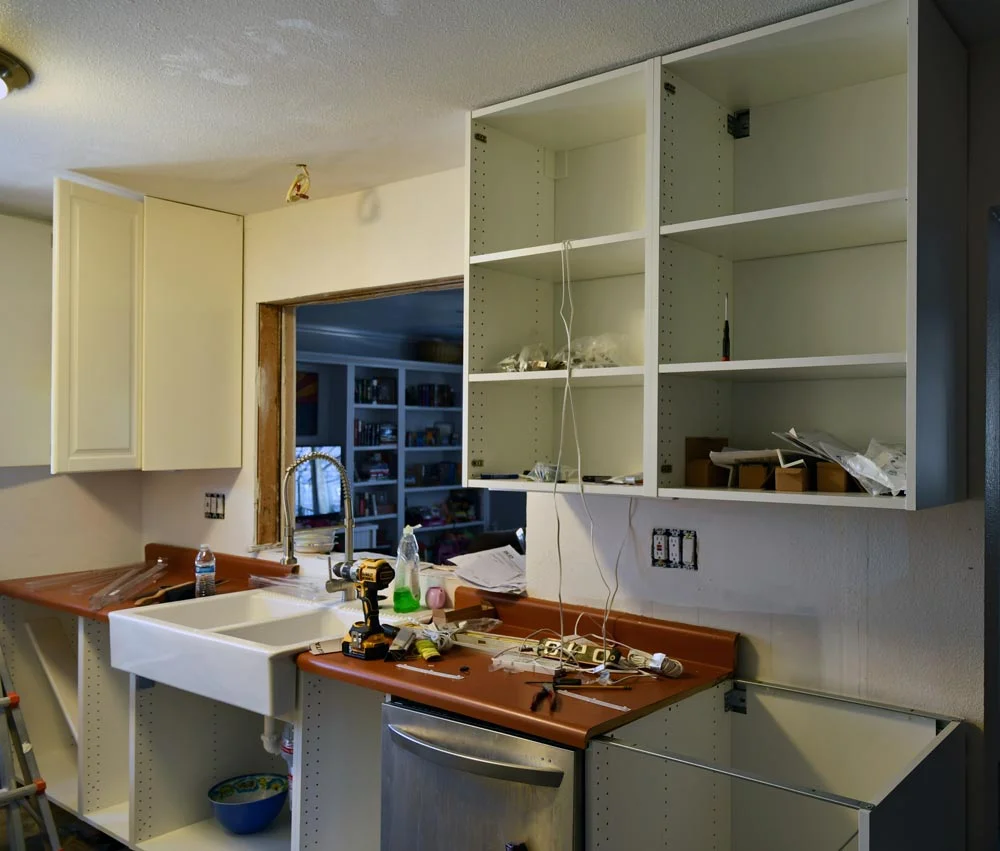
Burnt orange countertops. Need I say more?
We've been living with this unholy 1970's terror for over a decade. We've actually eaten food prepared on it, had guests see it, and <gasp!> opened our frosty beverages upon it.
Was orange ever a good idea for a countertop?

Don't miss the fun video at the end of this post to see the final day of these cabinets
Throughout the remodel I've been moving, and reinstalling sawed-up chunks of this monstrosity around so we'd have some semblance of a functional kitchen throughout the week to prepare meals (Full disclosure: mostly to set our carryout bags on).

Repairing the (New) Sink
Before I get to the countertops, I have to address the madness from our new sink. Once I had moved the plumbing and installed the new cabinets, the old sink no longer made sense. I jumped the gun and installed a new IKEA Domsjo Farmhouse Sink onto hunks of Ol' Orange. We were so happy to get one of the last ones available chain-wide since they would be replacing it with something new.

In a feat of dumb-assery, remarkable even for me, I managed to put the toe of my boot on the back of the sink while installing a light fixture. It was only the briefest of seconds and the lightest of touches, but it was enough.
If you follow my social channels, you've seen my pain:
After a bunch of research, I wish we had done before buying the sink, I learned it's common for this unit to break. I don't know what the long term solution is going to be, but I had to come up with a fix ASAP since the countertops were coming.
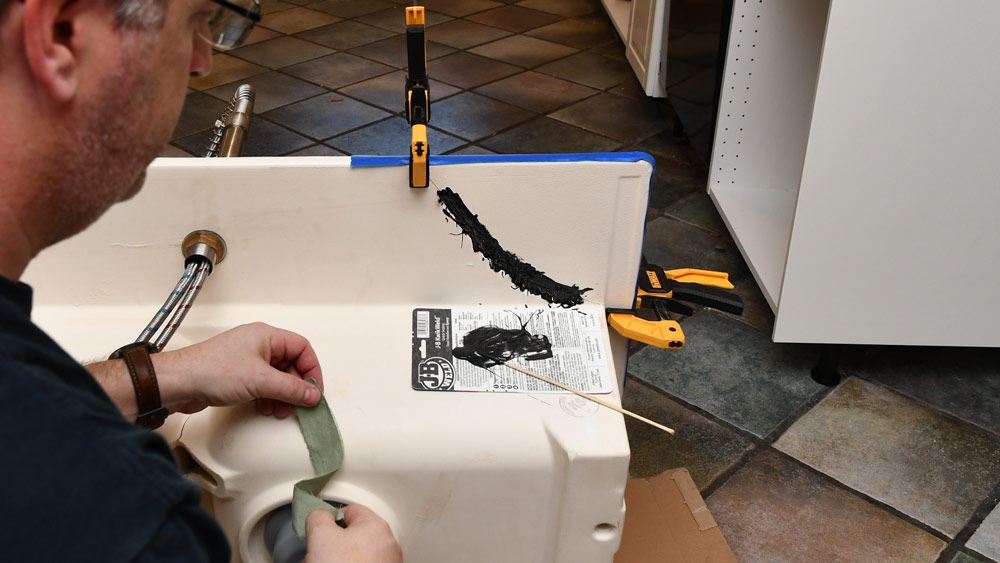
I lugged the heavy beast out of the cabinets. At least it was a fairly clean break instead of a full shatter. There was one big corner piece busted off, with a somewhat tight edge.

I lined the break line with a bead of superglue gel. I figured it would stay in place and not soak too quickly into the porous ceramic edge before I could get the two pieces togerther.

I taped the thing together, clamped it, and grabbed some 2-part epoxy to strengthen my repair from the backside.

I elected to use JB Weld for the back-side patch. It's tough stuff with magical properties. Since I was in a hurry with countertops on the way, I picked up the fast-setting variety, JB KwikWeld. It sets up speedily, in about 5 minutes.
Mix equal amounts of the epoxy and the hardener
I like to do a trick where I embed a piece of cloth in the epoxy while it's still wet. It helps bridge the pieces being repaired. I've never had a repair failure when I've added this hack to JB Weld.


It's not the prettiest repair, but it's never going to be seen. Repaired with 2,424 psi tensile-strength epoxy, it should be the strongest part of the entire sink now.

Brush your teeth!
Another item you never plan on needing, but is great to have in the tool box is a pick and probe set. I have this little three piece set that looks like something wicked from the dentist's tray.
The sharp, right angle pick was perfect for cleaning the slight squeeze-out of hardened superglue. It did the trick, but the tooth-scraping sound gave me the heebie-jeebies.

I'll fix your cabities for half price
It's a serviceable fix and not incredibly noticeable. It will do until we either replace the sink or I find some sort of filler/repair compound to cosmetically finish the repair.
Countertops!!!
On to the good stuff! We'd been shopping around for countertops for a while and finally decided to go with Soapstone. It's a little different and rarer than popular granite, engineered stone, quartz, wood, and laminate. It's a slab/stone product like granite. Although it can scratch, it's extremely heat resistant and holds up really well.
We chose a slab of Churchill Soapstone, with a lot of veining and character. In its raw form, its a soft gray, but it darkens when wet.
We brought some samples home to play with so we could check out the colors against our flooring and cabinets in different light. Soapstone is chock-full of imperfections. It has little divots, veins, and crack-like lines, and little flecks of color in the gray like green, gold, and white. That's the charm.

Soapstone is one of those products you can't usually find at the homecenter. In our case, we had to go to a tile / countertop / stone type showroom that only sells wholesale to contractors. Rather than pick a mystery installer off the list they gave us, I did what any self-respecting DIY blogger would do; I asked another blogger.
I'd started following Rise and Renovate a while back to keep up with a fellow Arizona blogger. When I spotted Hayley picking out their new granite countertops in this instagram post, I asked her for a recommendation. Long story short, I hired the same company. She did the homework.

They brought the beautiful pieces in and set them in place quickly. Since they'd come by a few days earlier to measure, everything was a near perfect fit.
We'd gone with a simple, eased edge. Nothing fancy. There was a certain chipped, aged look to it that we really liked.

Churchill Soapstone
The fabricators made cuts and adjustments on-site where needed to fit the unique protruding shapes at the front of the sink and the range. They did a nice, neat job vacuuming any dust as they worked.
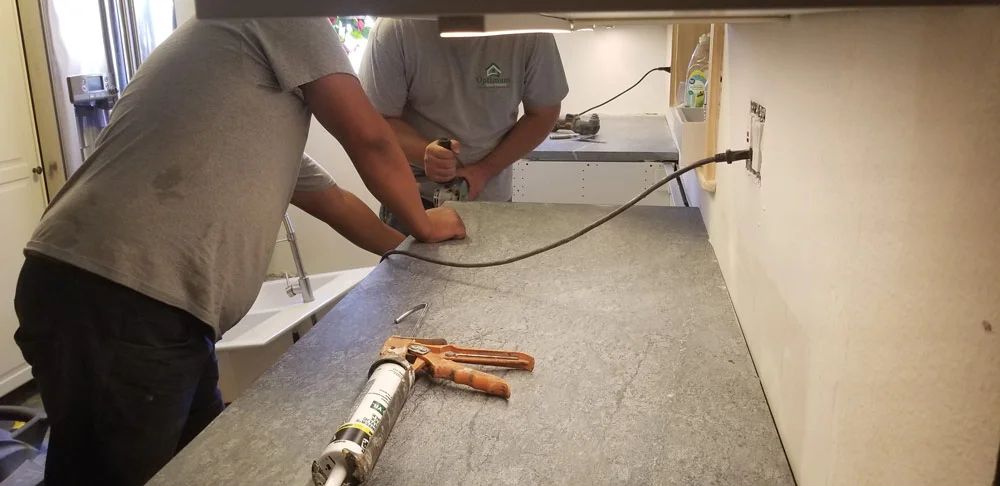
Cutting soapstone with a grinder
The corners that stick out into the traffic flow were a little sharp. I asked them to round them off.

The sharp stone corner would put a bruise on a passing hip wouldn't it?
A few minutes with the grinder and the guys rounded it off. They applied the first coat of mineral oil. The light gray disappeared and the rich, dark character emerged.
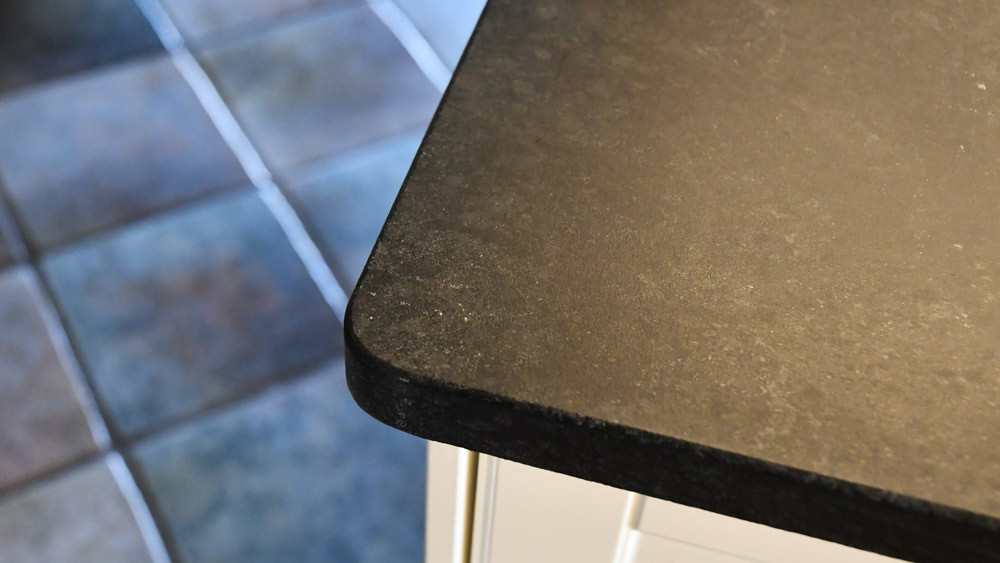
It's a textured natural look. It's not for everyone, but we really like it.


Next up, I have to finish trimming out all the cabinets with drawers, doors, pulls, and knobs. We're going with a subway tile backsplash.
But first...
Bonus Feature!
I don't do a lot of video, but I had a lot of fun with this one.
I tried to donate our old cabinets, but they were just too old. There was also some water damage around the base. I'd left them on the curb for a week in anticipation of our quarterly bulk-trash pickup.
The pickers took what they wanted for a few days and left the big heap of scraps. With the morning temps rapidly approaching 100 degrees, I marched outside with my reciprocating saw and some hard-toe kickin' shoes.
Honestly, I wore myself out in my race to beat the heat. The next day was ice-packs and heating pads. My back and saw-welding forearm gave me the most complaining. Wrecking stuff is fun.
