Remodeling from Teen to College Age Bedroom
Our oldest, Jack, is in college now. I can’t believe it. Luckily he’s mostly covered by an academic scholarship so we don’t have to sell blood to keep up with tuition. He’s staying at home and working part-time while he attends classes full-time.
He wants to remodel his room, partly to stop cracking his head on the ceiling up in his loft bed, getting showered by bits of popcorn ceiling, but mostly because he’s outgrown the kid years. You may recall this room from 2013 when I’d installed the oscillating ceiling fan so the blades of a normal fan wouldn’t pass hazardously through his sleeping area.
It was a pretty damn cool teen room.

2013: The Halo and Minecraft years
Now it’s time to make a change. He’s 100% the driving force behind it. He designed and even 3-D modeled what he wants to do.
I’m really impressed; he’s even buying all the stuff himself, although we’re going to cover the more permanent material.
Creating a Corner Desk
Since he was loosing the desk under his loft bed, he designed an affordable option for a corner of his room. He bought a couple Alex drawer units at our local IKEA and assembled them with his sister. (Which is awesome, since I’ve done more than enough IKEA assembly lately)

Master builders
Those drawers would be the supporting end pieces of the new desk and give him a bunch of storage he was lacking.
FLASHBACK
I found some photos of these two working together on another IKEA piece 6 years ago when we did Grace’s room, right before I started the blog.


We’re going to have to redo her room again soon, since she’s in middle school now.
The DeskTop
We couldn’t find a top that was the right size at IKEA and cutting a hollow-core (or cardboard core) desktop to size sounds disastrous. We opted for melamine coated 3/4” plywood, right off the shelf at ‘Depot.
The more you know (free labor edition)…
Most home-centers have big power tools in the lumber section and will cut for you at no cost.
I never paid attention to it before, but we found out the panel saw blade can also swivel sideways and rip full-size sheets of plywood.
I didn’t relish man-handling a big sheet through my table saw or trying to cobble together an 8 foot long straight edge, so I let the lad in the orange apron take a whack at it…

The melamine chipped out on one side, but it was a nice, clean cut otherwise.
My social media friends have already seen that I also picked up a nice addition to my bits and blades collection on this shopping trip. I upgraded the 16-tooth fast woodcutting blade on my cordless circular saw to a smooth-cutting 40 tooth finish blade.
Although Jack is a smart cookie and getting handier by the day, I still want to take the lead when it comes to the more dangerous tools for now. I want to take the time to teach him in hopes he can keep all his fingers. We sliced the plywood to size against a clamped straight-edge making sure to place the finish-side down to avoid chip out.

We also added masking tape along the cut line for later cuts.
In full teaching mode, I still managed to neglect to looking under the board to see where I had placed the Bench Cookies. Idiot.
With masking tape to mark the depth of the bit, Jack pre-drilled for table legs. He did it without drilling into my bench cookies, so he’s well ahead of his old man.

The IKEA adjustable foot legs he bought have a beefy flange with 5 screw holes. They’re pretty decent steel legs for the price. They were also perfectly sized to match those drawer units.

The legs come with hardware and call for a 1” thick minimum top, but for this 3/4” plywood we used 1/2” wood screws. I feel it’s fine since the IKEA tops the legs are designed for are lightweight, hollow-core material, not dense plywood. We got them on there good and tight. It’s going to be fine.

Look at those white legs!
Melamine coated plywood is clean and smooth looking stuff, on the top and bottom. The edges, however, tell the dirty secret that it’s multiple plies of cheap, filler wood in-between. It’s stable material, but it’s not attractive as it comes.
Naturally, I busted out the baddest-ass power tool in my arsenal. It wasn’t some weenie 20v cordless saw or hammer-drill, but a massive 120 volts of fully-corded, steam-spitting fury.
Yes, we own the finest-grade example off raw, flames-less heat 15 bucks could buy, 10 years ago at a Walmart. They don’t make ‘em like they used to, so you can’t get this one anymore. Don’t be jealous.

Power. Tool.
We used iron-on melamine edge banding to seal the visible edges up. It has a hardened, hot-glue gun like adhesive on the back. I had an old roll, so I had to tape it in place, but the newer stuff is peel and stick. Both kinds take a hot iron to melt the glue into the wood.

Bring the heat!
It was super easy with an extra set of hands. I did the ironing while Jack rubbed the edging down tightly with a smooth wooden block.

Top men for the job
We trimmed off the excess with a razor blade. I wish I’d known they made this special tool for trimming before hand. I would have bought it in an instant. It turned out pretty good anyway.
Taking a hard left turn
Since this was going to be an L-Shaped desk we had to fasten two pieces together at 90 degrees. I didn’t feel confident in a miter cut looking good. Since we wanted to make the desk easy to disassemble and move, we decided to screw it together with pocket holes.
I’ve been using a small Kreg R3 Jr pocket hole jig for years and love it. This time, I took advantage of an opportunity to break out the Kreg R5 system that I’d received for Christmas last year. It was easy to set up and learn to use.

Ohhhh, she’s a beauty, isn’t she.
I did some practice pocket holes on scrap wood and mounted the system to a board that could be clamped down, but beyond that, Jack had all the fun while I actually read the instruction manual.

But,… that’s my toy.
This newer jig is similar to what seems to be the more popular Kreg R4. I think I like the R5 better. The auto adjusting clamp with the handle on the same side as the drilling jig is super convenient. It seems a lot easier to use than reaching around a big panel for each hole.
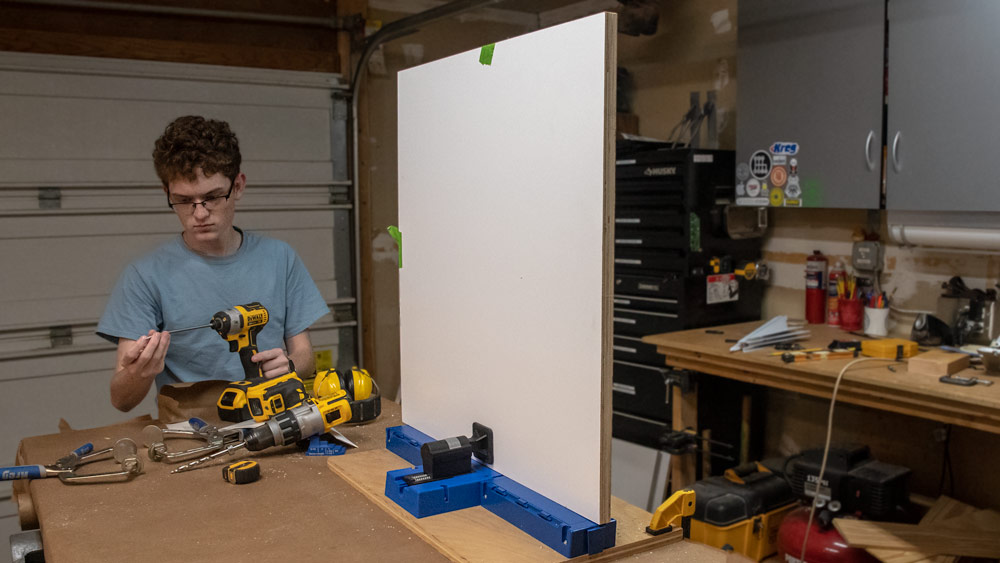
The Kreg Jig R5 in action.
We took the drilled panel back to Jack’s room and locked it in place with a couple beefy face clamps.

We drove a few screws in place to hold it together. We chose not to glue it permanently, just in case he wants to rearrange or take it with him when he moves out someday.

Pocket hole madness!!!
We built a back skirt out of the same plywood material by screwing two sheets together and standing them on end. It hid the legs but didn’t reach the underside of the desk. He’d be able to slip power cords over it and keep them hidden.

Simple Corner Desk
With the loft bed and desk gone, he bought a (almost) new bed frame through Craigslist to wrap up phase one of his remodel.

Just getting started.
Jack told me how much he enjoyed the planning, shopping, and building on this project. It seems like he’s has caught the DIY bug! There’s more to do on this room.
I really had a good time working with him. I know I need to enjoy it while it lasts. It won’t be too many more years before he wraps up college and moves out to start his new life. I probably won’t be able to do these cool weekend projects much with him anymore.

That boy is our last hope.

No, There is another.
Yes. There is another.