

You can actually fix expensive electronics? Sometimes it's as easy swapping a plug-in circuit board board; I had a buddy successfully fix a flat-screen TV that way. I figured I might be able to do the same and get our pool's salt-water, chlorine generator.
Thank you to Bernzomatic for sponsoring this post.
The opinion and experience is 100% my own.
Before winter, the water system stopped doing its thing. Rather than enjoying chlorine, generated through the salt system, I reverted back to the dark ages during the cool winter months. I used those hockey puck, chlorine tabs and granulated shock powder to keep the pool from going green with algea. I pretty much forgot about the problem until things started heating up around here.
Repair or replace?
I don't know much of anything about electronics, but I do know a thing or two about spending hard earned cash on things I'd rather not spend hard earned cash on. I hate expensive repairs. The whole control panel box goes for about $550 if I had to replace everything, not including labor.
Versus $550, I figured I could take some chances on a DIY intervention. Maybe I could replace a part or two instead of committing to the nuclear option of total, expensive replacement. What did I have to loose?

A lot of money for a dull, gray box.
After a bunch of Googling and YouTube-ery, I boiled it down to three likely components worth trying. I had no idea which which of the three could be bad. There was no visible damage. I hunted around and found the parts online for some pricing.
- Main Circuit Board Approx $185.00
- Display PCB Board - Approx $90.00
- Thermistor - - Approx $6.00

Can you guess which part I decided to try first?

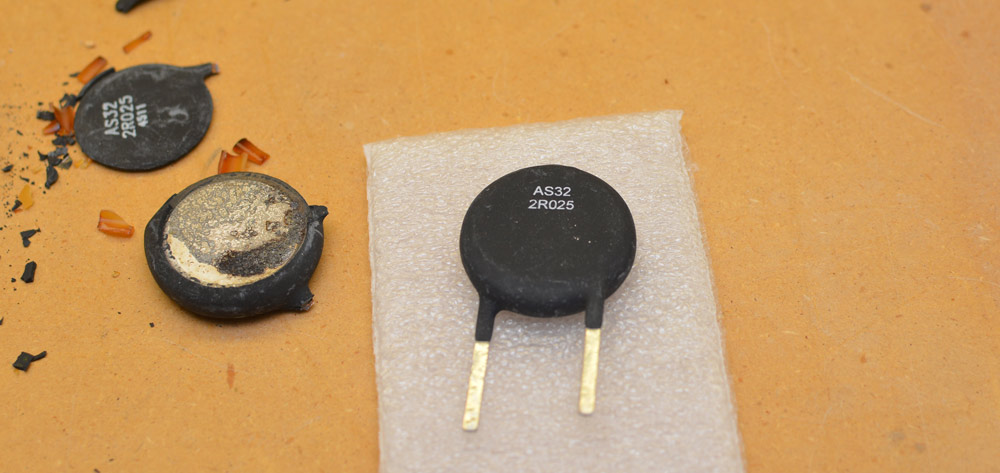
The venerable AS32,... in all its glory.
Six bucks. Exactly right.
If it worked, it would be a legendary win for my wallet.
I don't know what a Thermistor does, but I really wanted it to be the culprit. Since the circuit boards just plug into place, this particular widget attached directly to the motherboard would be the most difficult of the three parts to replace. If I failed, and wrecked the board, I'd get a new thermistor with the $185.00 main circuit board anyway.
Go time.
Removing The Circuit boards
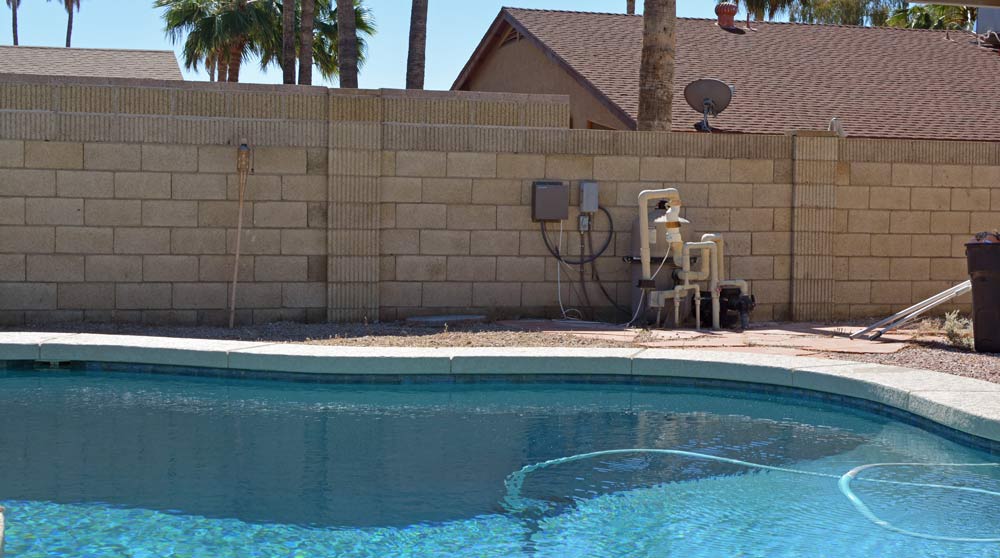
Our salt water unit was a retrofit to the original filter system; we'd had it installed somewhere around 2012-2013. They'd taken electrical power off the old filter pump's time clock. I killed the electricity right there, no need to go to the electrical panel and flip the breaker to power it down.

Power = OFF!
Without power, it was safe to pop the cover off and reveal the electronic guts within.


The circuit board had a plethora of colored wires plugged into it, so I did the smartphone photo trick to save a record of the original configuration, just in case.

The guts of a Hayward Swimpure Plus Panel
I pulled all the control wires and 120 volt power from the card and popped it out. The next step, the repair, was a workbench task.


RepairING THE CIRCUIT BOARD
Look at this beauty, this confusing-as-heck piece of modern wizardry. It's just so,... blue.

Hayward Main PCB Printed Circuit Board for AquaRite Salt Chlorination Systems
I gingerly took a pair of diagonal cutting pliers and snipped the spindly legs, one then the other. The piece I was removing, the original "thermister", crumbled into pieces. Crispy, dry bits of chalky plastic and corroded metal bounced onto the my work bench. So much for precision.


I'd ordered the new part ahead of time from Amazon, so I had a beautiful, new AS32 Thermister ready to roll.
What are you asking Santa for this year kids?
To attach it to the circuit board, I'd make my first attempt at electronic soldering. Precision stuff, I couldn't lay a blast of flame one these sensitive pieces. Overcooking circuitry is a dead end path if one wants to ever use it again.
For this job I used the smallest torch in my arsenal, the mighty butane powered Bernzomatic ST500 Cordless Soldering Iron.
I'd used this torch to do crafty stuff in the past, like some light wood burning on my Distressed Arizona Flag and decorative soldering for Stained Glass Christmas Ornaments, but never for actual functional work, like electronic repair.

Bernozomatic ST500 3-in-1 Micro Torch and Soldering Iron
To prepare this rascal, I dipped the legs of the in paste flux, clamped it in place with a pair of long nose locking pliers, and trigger-lit the soldering iron.
Once it was heated up, I touched an extended piece of electrical solder to the tip. It quickly liquified, melting to a tiny bead-sized dollop. Somehow, magically, the molten metal stayed put on the tip of the super-heated soldering iron.


When I touched the molten solder to the legs it flowed off of the iron, into the slight space between the joining metal. I guess I kind of "painted" it in place, drawing solder around the mating pieces.

I was able to gently retouch my work, smoothing any messy bits in my soldering after the piece was stuck in place.
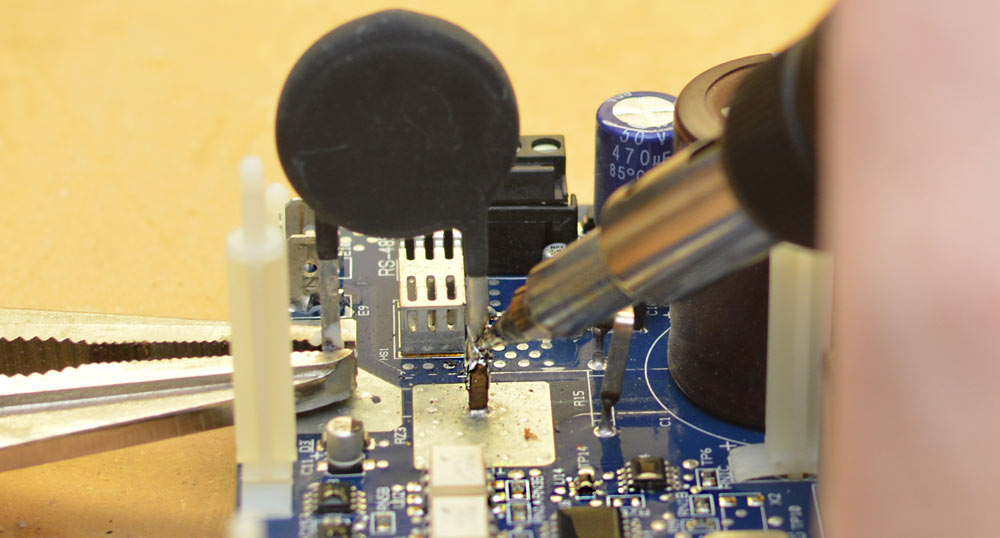
It felt successful, meaning the new piece was stuck in place. Both legs were encased in freshly cooled, silver solder. I had managed to do the operation without dripping on or causing any visible damage to the delicate circuit board.
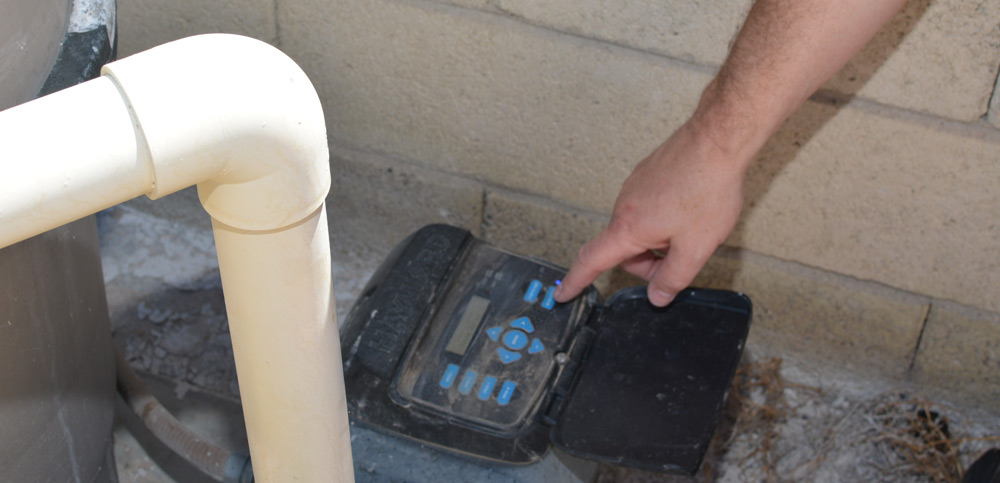
The only thing to do was to march it outside and hook it up. I took my time making sure all the control wires were reattached properly, plugged in the connection cables to the salt cell, reconnected the 120 volt power, and triggered the power back on.

The panel lit up and the digital readout came to life. I opened the pump control panel and started a short cleaning cycle to get the water moving through the cell. Sensors would be able to report salt levels and diagnostic information with the water flowing. Initially, they were giving me red light errors, so I reset the panel and went inside for a drink, hoping it would sort itself out. My confidence in success dropped,... but at least I had gotten some electronic soldering experience, right? That was fun.
When I came back,...
Holy cow! Success in the first try! The system was doing its job again after months of down time, generating chlorine, with no errors! Perfect readings!

Super Chlorinate engaged!
Unbelievable! A few minutes with a sweet little Bernzomatic torch that runs about $25 and a $6 piece of electronic whatzit saved us potentially hundreds of dollars. No new circuit boards, no repair technician charges. I love it!
Temps are climbing, we'll be enjoying the pool again in no time. The best part is, I won't be spending a fortune in pool chemicals this summer

Some of us will be swimming before others...
The Bernzomatic Torch Bearers are a group of tradespeople, DIY'ers, culinarians, adventurers and artists brought together to create projects using Bernzomatic torches and share their knowledge and ideas with you. Check them out and get inspired to create with fire. Thank you for supporting my sponsors!

Visit the Bernzomatic Torch Bearer Site and see what the other awesome Torchbearers are up to.