

I was planning on replacing this crusty, now rusty old light fixture before we had out-of-town family visitors recently. Staying true to my complete inability to meet a schedule, I'm getting at it now, well after they'd come and gone.
While I'm at it, I've got a cool new product to share with you that's going to save some money and look good doing it.

Crusty and rusty
The existing light fixture was actually mounted upside down. The glass shades couldn't quite clear the top of the mirror frame, so they were sticking upwards. These frosted bell shades were ribbed, evidently to catch plenty of dust.
Even with the lights turned on, it looked just awful.

Rip out the Old
It had to go alright.
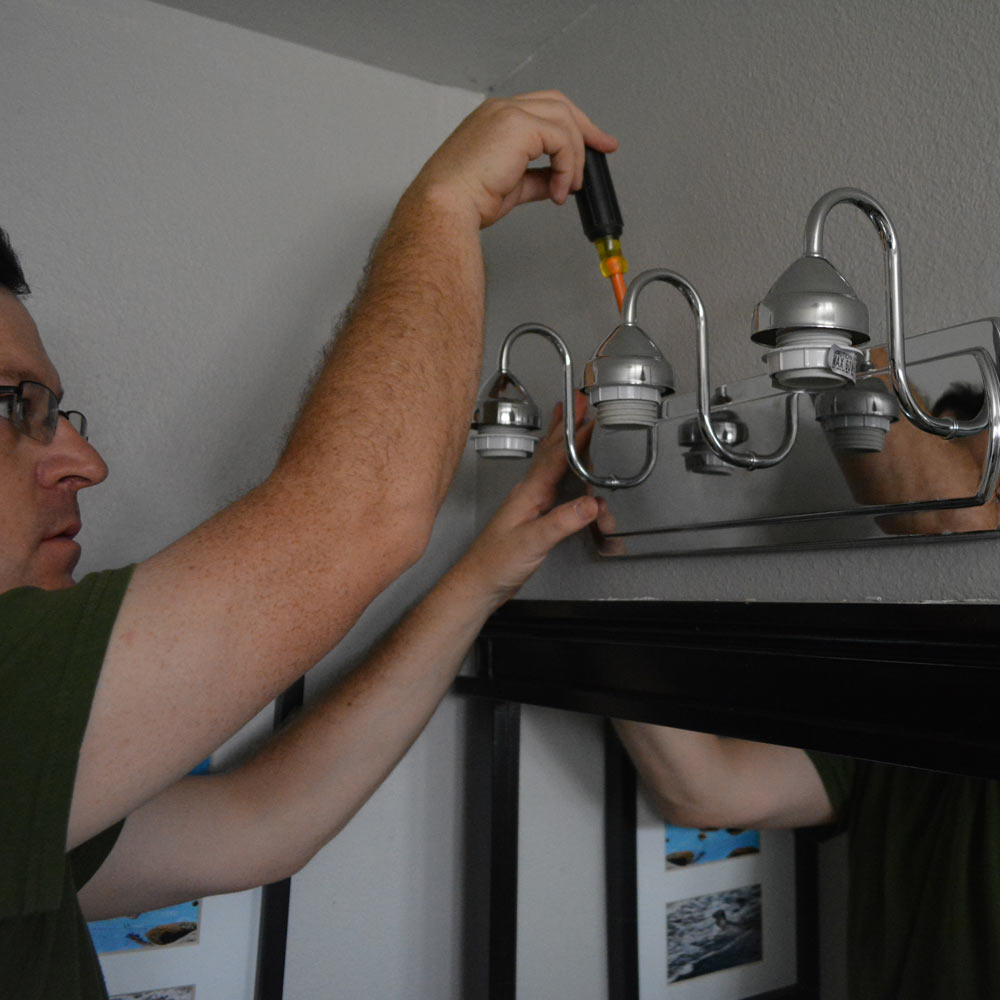
I started by pulling the existing bulbs. The haul included a 60 watt incandescent bulb, a 14 watt-corkscrew compact fluorescent, and two early generation 7.5 watt LEDs with plastic lenses and ugly finned bases. 89 watts. I guess I kinda chucked whatever I could find in the cabinet in there like a light bulb goulash.


Off came the old, frosted shades, held in place by set screws. This thing was looking rough. For whatever reason that brushed nickel finish just didn't hold up.

This particular old fixture was attached with a couple nuts on the face. With the power off, I unscrewed the nuts and popped the thing down so I could get at the wiring and remove it.
HEY! Doing your own electrical work is serious business. Check out my scary electrical warning before doing any work yourself.

Installing the new fixture
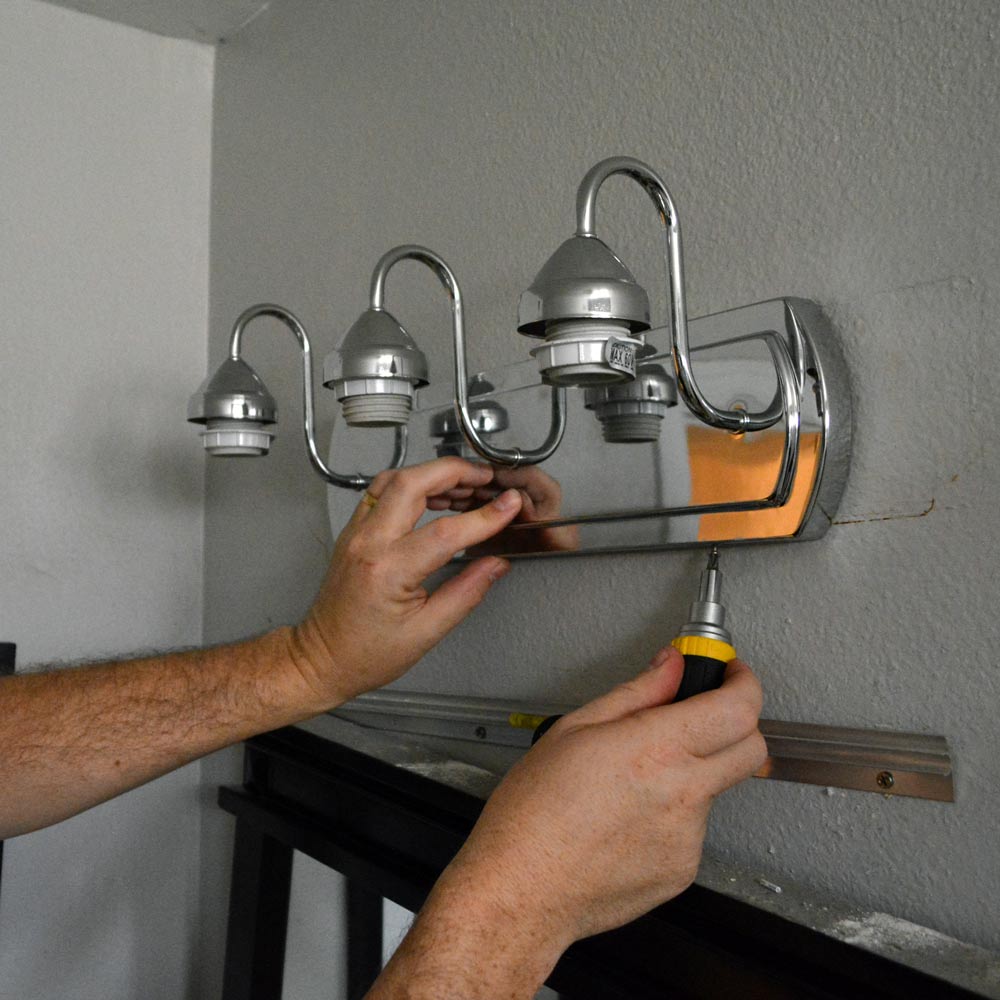
We picked up a crisp new fixture and some new shades at Home Depot. It was a different size, three lamps instead of four, but it would fit just fine over the mirror.
The in-wall electrical junction box was way off center. The new fixture's backplate covered the box completely over. I'd need to do some customization with a pair of tin snips to get the wire into the light. I cut the hole extra wide to make sure no sharp edges could scuff up the wires.

The new fixture mounted to the drywall through holes that didn't line up with the old anchors. I drilled new holes, tapped in some new plastic anchors, and screwed the new back plate to the wall.


Wiring was standard stuff, white to white, black to black, and bare copper to bare copper.

The new fixture slipped over the back plate and locked down tightly with screws. The new shades were held in place by threaded collars that spin up tightly around the lamp sockets.

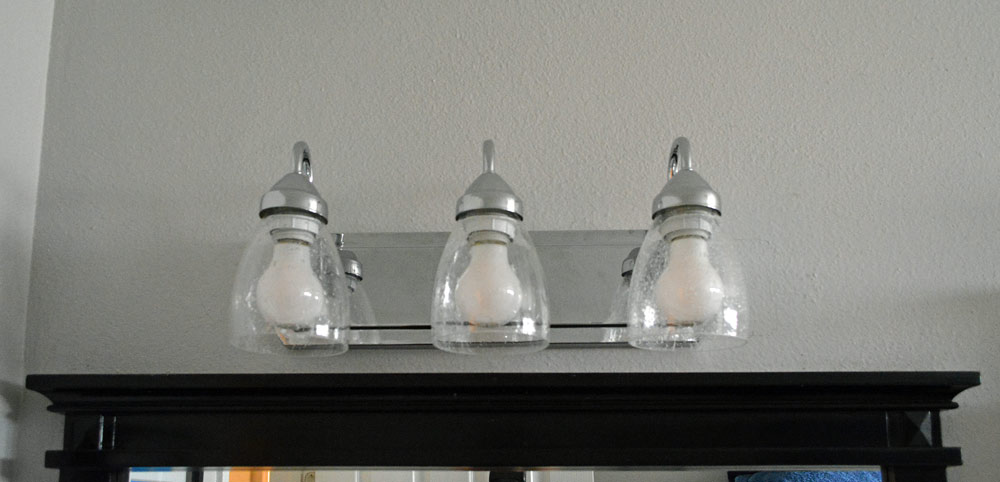
With a little light on it, you can see the antique-looking bubble glass pattern in our new shades. Even though they have a cool visual texture, they are smooth and will be easy to dust.
Bubble-icious
Light it up!
This fixture doesn't hide the lamps like the last one. They'd be highly visible inside the open-bottom, clear shades against a chrome backdrop. They'd be positively on display.
While I wanted the energy savings goodness of switching from old-school 60 watt incandescent light bulbs, I didn't want to use corkscrew florescents or plastic-looking, techy LEDs.
Of course, I wouldn't have switched to this style of fixture without a plan. Check out what my friends at Philips Lighting sent me. These are classic-looking, real glass light bulbs, but with the benefits of modern LED technology.
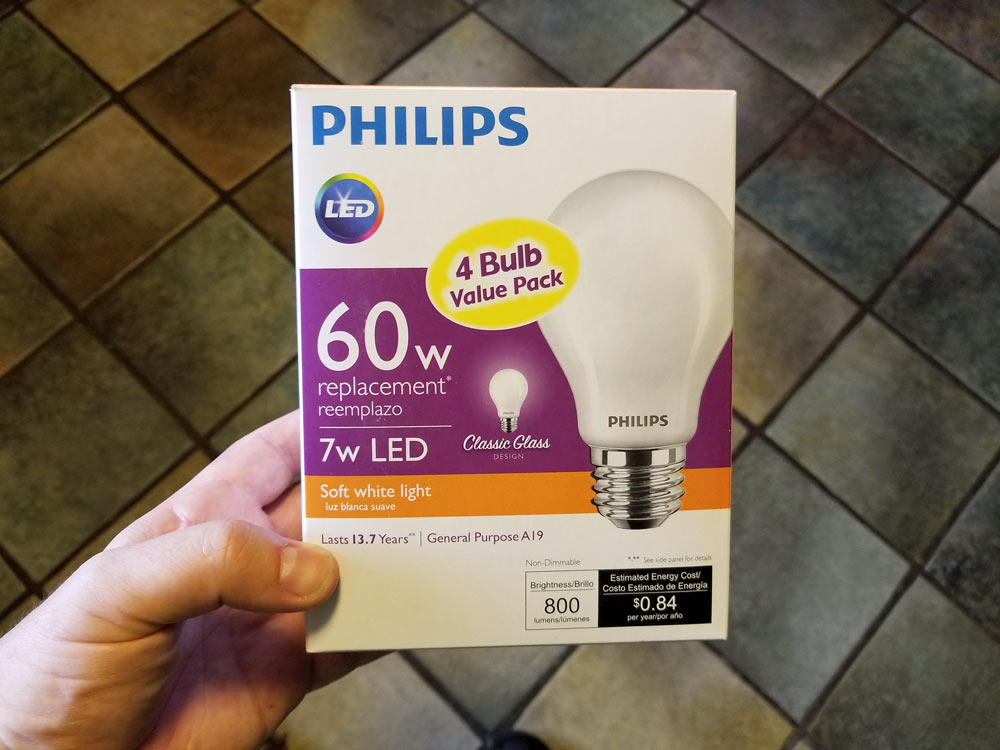

I chose the Soft White Light over the whiter Daylight, because they were getting installed in a bathroom. I think warmer light is more kind to my skin tone, like when I'm shaving my weekend-stubbled jawline on a Monday morning.
Just check out this rascal. It looks exactly like the standard A19 shape bulbs we grew up with. You gotta love the classics. It's glass, just like our old-school incandescents, but 85% more efficient. Incredible.

You might want to take notes on the screw-it-in, installation step because you probably won't see me doing it again. These high-performance LEDs are rated to last nearly 14 years. No more mixed salad installation of whatever flavor of the moment bulb I can lay my hands on.

I'm going to keep a box or two of these around the house and continue upgrading.
I'm pleased to get my hands on something with the same light I'd become accustomed to my whole life but with an energy-savings upgrade. No more of the sci-fi lighting you associate with early-generation LEDs or the flickery, short life of compact fluorescents. I'm getting rid of more of those corkscrews and finned Buck Rodgers, plastic-looking things.
A box of 4 goes for about $9.97. With the long life-span these have, I'll be saving money, even without the energy-savings.
Speaking of energy-savings, with three of these installed, it would take only 21 watts, versus that nonsense mishmash of 89 watts I'd jammed into the old light fixture over the years. Heck, if I was still using the original 60-watt incandescents, there would have been 240 watts in that original fixture.

How many AZ DIY Guys does it take to screw in a light bulb?
One
Much better eh?
With this setup, it's got kind of a antique-ish, modern-classic, semi-industrial vibe.
Yeah.
That's a thing.
An antique-ish, modern-classic, semi-industrial vibe
The bulbs threw some incredible light. Those three lamps were brighter than all four in the last fixture.
It'll be much easier to shave my chiseled mug in the morning.

My wife keeps commenting how much she likes the tone of the new light. She was the biggest critic of the ugly, cold blueish-light LEDs I'd started sticking around the house. Now I'm going crazy swapping everything out.
You can pick up a Philips Classic Glass LED four-pack at Home Depot. Check them out:
- Philips Classic Glass LED light bulb – Soft White version (which I used)
- Philips Classic Glass LED light bulb – Daylight version (a crisper shade of white that works well in the laundry room, closets or desk lamps)
What do you think?
Thanks for reading friends!