

You’ve seen me doing various projects in my garage workshop for years. I’ve done a ton of cool things, in front of horribly-stained walls. This ugliness is blotchy, with lumpy curds of ancient drywall compound, pitted with holes, and stained by God knows what.

Now that’s an ugly workshop
I don’t know why previous homeowners massacred these walls, and left them. I also don’t know why I’ve waited so long to do something about it myself. They are truly, certifiably hideous.
I’m decided to do something conceal the mess, but I wasn’t going to fill, sand, and paint it either. Surely, I could do better than that right?
I would put up a quick and easy-to-install wall finish, worthy of of being in the background of my workshop adventures for many years to come. Rather than the common, DIY pallet-wood plank wall I’d been seeing everywhere, I’d be putting up a textured, PVC product and make something really unique out of the space.

Put the coffee down and get to work.
Clean up
I started by removing my license plate collection from the grossest of the walls and pulled some odd nails and staples. I wiped it down with a damp sponge to clean it as best I could.
My cordless tool chargers and other knickknacks got popped off the back as well.


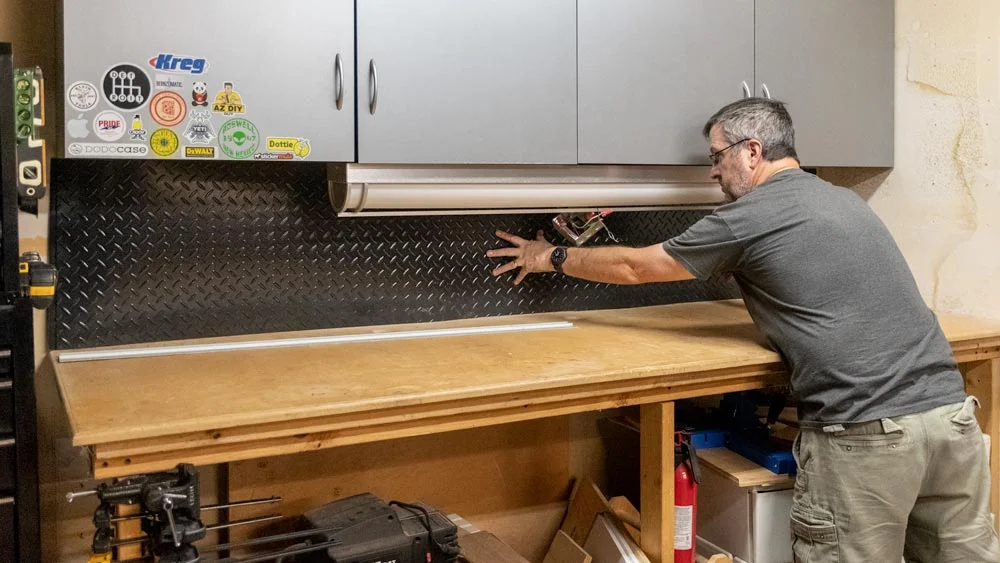
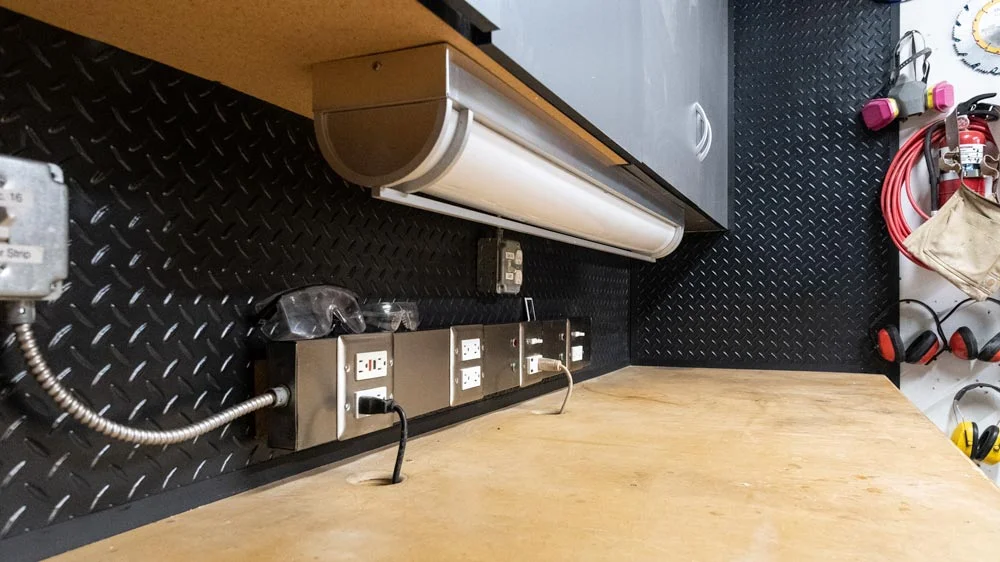
The back wall was still dominated by my custom Ultimate Workshop Power Strip. It was certainly going to stay, because it’s a bad-ass workhorse, but it had to come down temporarily for this project. I shut off the breakers to kill the power.

More power!!!
I popped the extension boxes off the wall, opened the wire-mold covers and unscrewed the power strip from the wall. I wire-nutted all the conductors and tied a light switch box out of the way.


The chunky, high spots needed a good scrape down with a painters tool to get somewhat flattened. It was the weirdest application of drywall compound. It’s like they laid tape into wet mud and just left it at that,... no additional coats,… no sanding. It was “garage good enough” I guess.

The Coolest Wall Covering
AZ DIY Guy's Projects participates in the Decorative Ceiling Tiles affiliate advertising program. Purchases through these links allow a modest income to help run the site at zero cost to you. Honest opinions and experiences are products are 100% my own. Thank you for your support!

I looked through a bazillion of the available designs. There were a multitude of of patterns, materials, and colors available, even metallic finishes. I considered classic, rustic, or modern designs.
Since I was doing a workshop, and I already had somewhat of an industrial look going, I ordered a couple 2 ’x 2’ tiles in a diamond-plate design, black for contrast against my silver faced cabinets and power strip.


They looked awesome! I loved the way the pattern caught the light. It would make an awesome backdrop.

Don’t you love coming home to presents at the front door?

Using the MirrorFlex Wall Panels Pack
After I unrolled the panels. I laid them out in the garage to flatten and acclimatize the day before starting work.
I started by taking measurements and making cut lines for the first sheet. It’s was PVC plastic, but a white, colored pencil worked perfectly for marking. It marked bright enough to see and wiped off easily with my finger.

Yes. I raided my daughter’s art set.
I measured for each line in two locations and connected the marks against a straight edge to keep things neat.

A straight, but bumpy line.
This is robust stuff, but it’s still flexible and can be cut with a normal pair of scissors.

Yes. I raided the kitchen.
I popped the first piece up for a quick test fit, and DAMN! This was going to look great.
Laying the sheet back down on my workbench, I transferred measurements for the electrical outlets, keeping the lines straight with a small framing square.
This time, I used a utility knife. It did well with a sharp blade, but I think I prefer scissors. I felt a little more in control of my cuts with them.


You can get this adhesive directly from Decorative Ceiling Tiles with your order.

I popped a piece of the J-channel edging on the bottom and carefully eased the panel up against the wall. It was a little tricky to maneuver it alone, trying avoid getting adhesive on myself, the cabinets, or the light fixture. It would be easier with another set of hands.
The adhesive grabs quickly, but allows some slight sliding to adjust the placement before it gets permanently pressed into place. I worked my way around the entire sheet, pushing it firmly in by hand. I didn’t scrub it down too hard because I wanted those adhesive beads to remain somewhat substantial.

That looks AWESOME!!!!
That first panel made an instant improvement to my room. I could already imagine how the project would going to turn out. I just had to take my time and not screw up any of the measurements. I wouldn’t have any material to spare in the event of a cutting mistake.
The right wall was next up with its tricky, tricky cuts. It was an absolute puzzle piece.
Good News / Bad News
The good news is actually great news. I managed to cut the difficult pattern without making a mistake. That’s a rare event for me. The thing fit in place perfectly, first try!


The bad news was frustrating. The dang thing wouldn’t stay stuck to the wall. It flopped back off in minutes. It was my fault, I didn’t pay attention to the poor wall condition before I made my attempt. The adhesive stayed on the panel, but pulled right off the wall.
I wiped the residue off the back of the panel with paper towels while it was still wet.

There was such a huge amount of raw drywall texturing and old water damage that the entire surface was chalky with old residue. I buffed and scrubbed it with a damp sponge.
After it dried, I wiped my hand across it and still came up with a dusty, white residue.
I had to roll some primer on and let it dry before I could install the sheet again. It was merely a momentary setback, my friends.

Just a momentary setback.
While the primer dried, I continued wrapping along the left side. Most of it would be hidden behind my tool chest and a bookshelf full of assorted project leftovers. On these walls, the sheets gripped right away. Once I pressed them in place, they stayed the heck put, without any of that nonsensical peeling or sliding.

After the primer dried, I returned to the right side and popped the sheet back up with a fresh application of adhesive. It was an entirely different experience that time. It was back up and done in a quick minute.

Sweet success!
Beneath the work bench was a horror-show of ferocious stains and raw drywall compound as well. It wasn't too visible before, but would stick out like a sore thumb against the awesome new upper section. I gave it a thick coat of black, semi-gloss paint to hide it.

I see a stained wall and I want it painted black. No colors anymore I want them to turn black.
- The Rolling Stones
As the paint dried, I started putting my workshop stuff away. It already looked incredible.

The Ultimate Power Strip and switches had to go back, on top of the new wall covering. The bright, silver finish really pops against the black, diamond plate texture.


New and improved.
I decided not to put my license plate collection back on the right wall. That wall shows up more often in my workshop photos and the reflective nature of the plates sometimes messes with my photography. The new wall looks so good without them that I moved them to the far, left wall where they could be be the star of the show.


I just couldn’t bear to drill holes and install wall anchors through this beautiful stuff to reinstall my cordless tool battery chargers. Instead of twin mounted chargers on the wall, I made a quick, triple-charger “easel” and skinned the face of it with a piece of scrap diamond plate sheeting.

The triple charger!
That’s was it, the project was done, super quick.
I’ve got one myself one sweet-looking man-cave / workshop / photo backdrop in the garage.

Lest we forget,…
Before

After

I'd love to see what patterns and colors you might choose. Send me your photos if you do it!
