


If you've followed this blog for any length of time, you know I'm a hopeless gadget nut. If you know anything about home-renovating, tool-loving, DIY gadget nuts, then you know that home automation is the holy grail. Until now, his pinnacle of DIY technical wizardry has always been out of my reach, both technically and financially.
When I got a chance to work with Build.com, I jumped at it. Being the gadget dork I am, I immediately pursued their expansive site for automation products. Not only did they have it, but they had a sub-page dedicated to the stuff. When I found a line of products by Insteon that was both economical and user friendly, I immediately placed my order.
I'd picked out a starter kit with several sensors and controllers. After I placed the initial order, I lost myself in exploring the Build.com site. It's full of cool tools and materials, as well as learning articles and resources, I have new inspiration for several future projects. In fact, before my order even arrived, I had already added more stuff to my shopping cart.

I didn't have time to start the project when the box from Build.com arrived, but I sure found time to open it up and explore the treasures. The cool thing about this particular setup is that you can program it to be controlled via your smartphone / tablet, using a home Wi-Fi network.

““... a golden, tinkling display of mechanized, electronic joy.””
Before long, I was gadgeteering the house. This system works though the use of the HUB, a sleek, little white box that connected to the home router. Through this connection, radio waves, and home's electrical system wires, the HUB communicates with a never-ending array of widgets that can be plugged in and arranged into countless configurations and scenes. The best part? It has the ability to monitor, program, and control using a smartphone. It simply doesn't get any more tech-gadget-dorky than this.
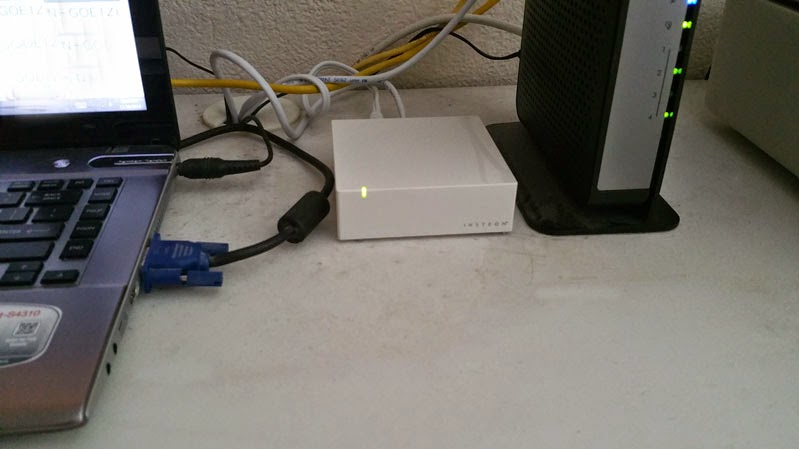
Maybe I need to do a cord management project, eh?
I installed a sensor at the front door first. It went on quick and easy with included, double-sided tape, One part installed on the door and one part on the casing. This one is powered by a AA battery.

Not only can I check if the door is open on my phone, but I now get a text message every time it is opened. It can be programmed to interact with other gadgets as well.
The next item I installed was the leak sensor. You may recall me mentioning we had a house flood a few years ago when a toilet water line broke. This rascal could have alerted us via text message while we were at work, saving about six hours worth of home destroying horror and reduced the damage. I tested it on a wet sponge.
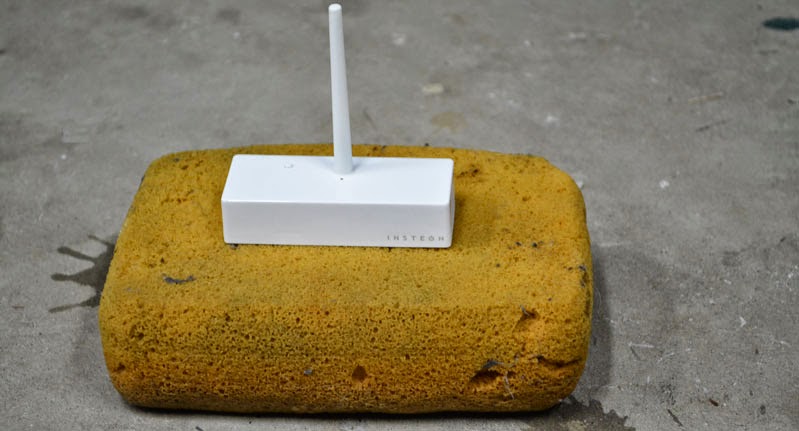

I placed the leak sensor behind the guest bath toilet. A nice hiding spot, roughly in the center of the home, near a lot of plumbing.
Post Installation Update: The geek in me was super excited a couple days later to get a text message, signalling that our daughter had overflowed the toilet. However, the guy who has to mop the bathroom and carry dripping rugs out to the laundry wasn't so super excited.
The kit came with two dimming / control modules. I installed it on the front room lamp. It was simply a matter of intercepting the lamp cord at the wall socket and adding it to the system with the smartphone app.

It's a slick idea. We can operate / dim the lamp remotely and even set up a timer schedule from the smartphone. It can also be programmed to work with another sensor. For example, it can be set up to turn on when the front door opens. It's a weird setup now, because we can only control the lamp with the smart phone. That's kinda silly, so I'm going to remove it, until I pick up a few more items to make sense using it.
The final item in the kit is a motion sensor. I enjoyed playing with it for a while, but again I'm going to order some more doodads before I install it.

““Sweeeeeeeeeeeeeeeet Eeeemooooooooootion...””
I saved the best for last. It didn't come with the starter kit, but I had ordered this Queen Mother of cool gadgetry, a remote camera at the same time. This rascal can also be controlled with a smartphone, including motorized pan and tilt control. Of course it got installed in my garage / workshop. I need to be able to monitor my beloved tool collection at all times.

I played with it on an iPad, since there was a hiccup in Android support over the holidays. Once they fix it, I'm setting my phone up to receive a photo from the garage, each time the camera's motion detection picks something up,

iPad view of a certain Arizona based DIY fellow.
I also borrowed an iPhone. I used it to try out the infrared night vision capabilities. Yeah, that's right. Night vison!

Now that's one goofy looking ghost out there,
I'm excited about the camera. I can't tell you how many times I've gotten out of a warm bed, just to check on the garage door, one more time, to make sure it was closed. I've even turned around, on my way to work, to do the same. It's always a false alarm. Despite all the extra checking, I've still suffered that sick feeling in the pit of my stomach, upon discovering the door actually had been left open all night. We've just been stupid-lucky not to have been robbed. Now, I can check remotely, from bed.
I plan on expanding this automation system over time. Of course, I'll share it with you as I go and give more in depth details with the how-to steps. I love this concept, not only for the inherent gadgety-ness, but also for energy savings, security, and convenience,...ok seriously, it's mostly the gadgety-ness.
For reference, here are the products I've installed so far:
Insteon 2522-242 Assurance Kit II with HUB, Two Dimmer Modules, Leak Sensor, Motion Sensor, and an Open/Close Sensor (they also carry a Comfort Kit option with HUB, Two Dimmer Modules, and a Thermostat, rather than the sensors. I'm considering adding the thermostat later)
Insteon 75790 Wireless Security IP Camera with Pan, Tilt and Night Vision
All the pieces can be purchased individually as well from Build.com. I encourage you to check out their site. Not only is it a first class online shopping experience (that accepts PayPal and Amazon.com payments), with a healthy dose of DIY resources, but their customer service is outstanding. It's outstanding because, you can actually, easily talk to a real human being.
I had a great conversation with one of their reps who walked me through their rewards / discount program, offered actual technical project knowledge, and showed genuine appreciation for my business.
Build.com was kind enough to offer a discount code to my readers. Enjoy!
Discount Code: AZDIY3
I'm logging into my new Build.com account now and ordering a couple more widgets to plug into the system. You'll see them soon!
Thank you to Build.com for making this post possible with some credit to choose something from the site. Opinions are 100% my own. I'm funding the additional purchases on my own.