

We truly do like to decorate for the holidays. It includes garish lights to be sure, but we really don't go to the full Clark Griswold treatment when we make the desert glow with holiday cheer.
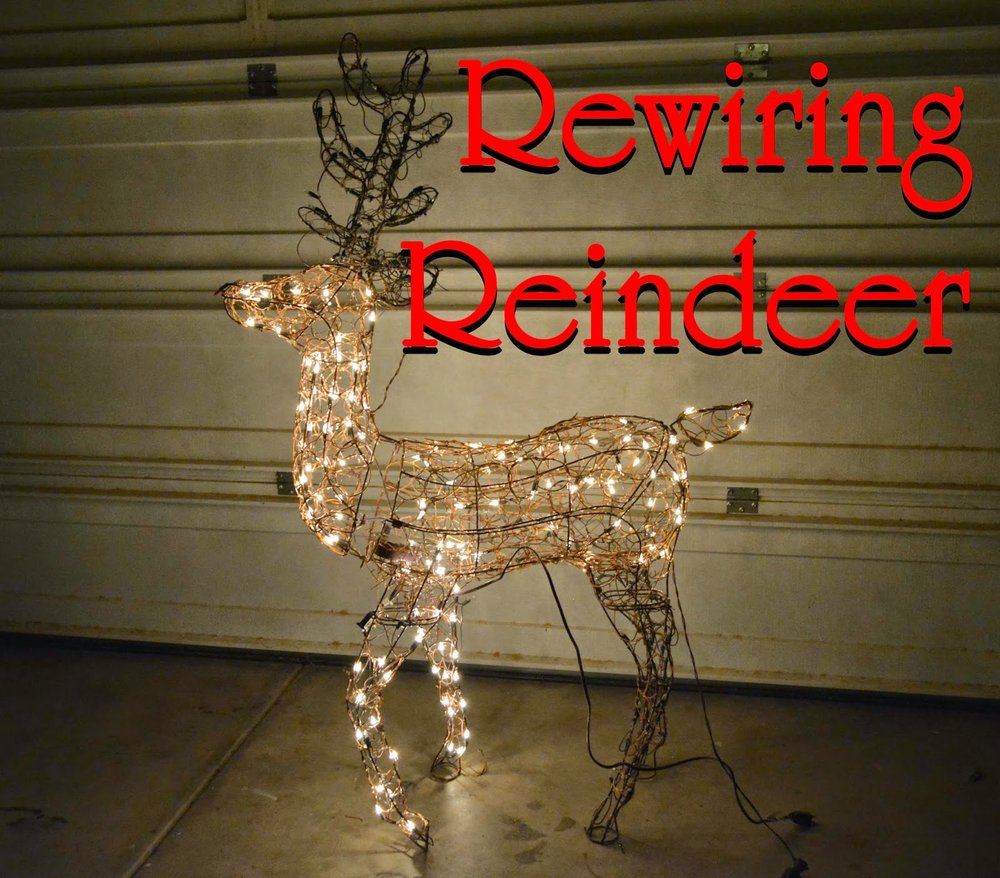
One of our "lawn" decorations, a lighted "grapevine" deer is a two years old, and half burned-out upon being unpacked this year. I couldn't find the problem easily, nor could I find replacement lamps. These things deer cost almost 100 bucks, so I thought I'd take a crack at rewiring it for about $20, rather than shelling out for a new one.
Since I'm in love with the energy savings of the LED revolution of the last few years, it was only natural that I replace the old incandescent strings of lights with modern upgrades. I picked up a couple boxes at the home center and started the project.
The existing lights were clipped onto the metal parts of the frame. I popped them off by hand and trimmed any plastic ties that I found with my trusty diagonal cutting pliers. Come to think of it, these pliers are the only tool I used for the whole project.

I started with the dead antlers and ears, removing them and setting them aside for later. It was fairly tedious, since the wiring was inside the structure.

Just a light trim
After a while of picking away at the stings like a dainty princess, I switched tactics. When I opened up the carcass and could see which wired fed the motorized turning head, I used a propriety method I like to call, grab a handful of wire and yank.
Believe it or not, this method proved to be much more efficient way to gut my reindeer.

I think rewiring a reindeer was exactly what Martha Stewart had in mind when she lent her name to these strings of LED Christmas lights. I picked them because of the color and the fact that the whole string wouldn't burn out with one bad bulb, something that Mr. Reindeer's former innards were unable to do.

I started with the removable antlers and sloooooooooly started winding the string along the edges. I used 4" cable ties to secure both the bulb sockets and the wire along the metal frame.

NOTE:
It's important to pick out Indoor / Outdoor rated cable ties if you want them to last any length of time, especially here in Arizona, where, believe it or not, there's a bunch of sunshine. An outdoor rating is gained from UV resistant material.
It took longer than I thought to do the antlers and ears, probably about 45 minutes.

NOTE II:
Plug in and test the lights before you spend 45 minutes painstakingly wrapping and tying them to your reindeer. For once, I was lucky; everything worked just fine.
With the antlers, ears, head and neck done, I'd run through my bag of 100 cable ties. I was close to the end of a second string of lights. I did a quick, loose body wrap of the rest of the string. After spending well over $700 this weekend, having the brakes on my truck fixed, I'm not going out to the store to buy more pretty lights. Nope, this close to Christmas, a floating head and torso will have to do. We'll see how it looks in the yard, tucked up to a young cactus.

I re-connected the motor to the head so we could treat the neighborhood to an LED reindeer in its full animatronic glory. Ohhhhh yeah, the head slowly turning, causing the entire deer to shake at each end of the movement path,... minds will be blown on the street tonight!!!
I lugged Mr. Reindeer out to the front hard and planted him among the spine-covered desert plants.
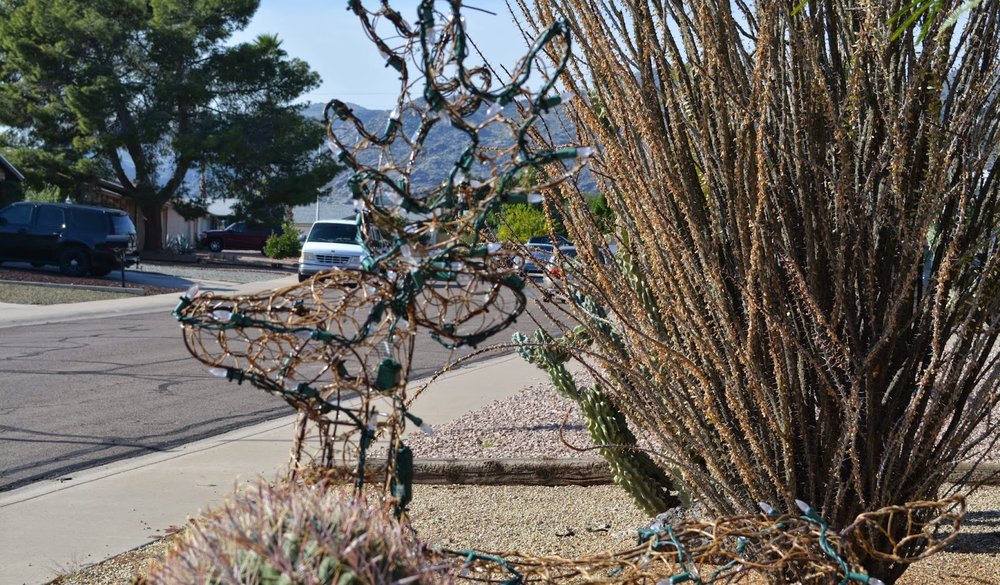
As the sun goes down, Mr. Reindeer can proudly let his true identity be known. With kids, there's really only one reindeer that matters anyway.

...with your nose so bright,.. Although,... a strong case is being made for Blitzen by Sarah over at the Ugly Duckling House.

Merry Christmas!
