A Visit Home and the Old Stump

I took a quick trip back to Michigan recently. I left Sweetie and the kids behind in Arizona and crashed on my parent's couch for a week.

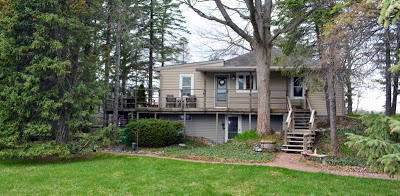
This is where I grew up, an spectacular place to be a kid. Plenty of adventures were had at this peninsula house, surrounded by a lake. This was the  location for the neighborhood kid's countless hours of army battles, Star Wars adventures, fort construction, swimming, fishing, and boating.

The trip really wasn't a vacation thing. It was a trip to hang out with my Dad and give him a boost of support, since he's just been wholloped with a serious health challenge. It's cancer, some serious shit too.

The old man is a tough dude; he's going to fight this with gusto and humor. His attitude remains absolutely incredible, even as the battle saps at his strength. We had a really good time together, talking, joking, eating, and zipping around town in his sporty convertible. We hadn't spent this much time together, just the two of us, since I left Michigan nearly 17 years ago. Since he's slowing down a bit and focusing on his health, I got a chance to bring some DIY skills to bear and help my folks with a mini-blitz of home repair projects while I was there.

The house is an old cottage with with God knows how many additions over the years. My folks have been working on it for about 40 years. I remember "helping" my dad on his projects, from munchkin age, well into my teen years. I'd mowed this lawn for hours and raked tons and tons of leaves here, as well as getting my first taste of home renovation by my Dad's side.

I still have a vivid memory of my dad working on the lower deck. He'd managed to catch a horrible case of body-wide poison ivy. The Doc had given him a healthy dose steroids to fight it. I recall looking out and seeing him with two, extra long 2 x 6's on his shoulder, literally sprinting past the window. He was so amped up on steroids that I swear I remember him building that deck in an hour, with no nail-gun. I don't even think he used a hammer;  just punched the nails into place with his raw 'roid power. 

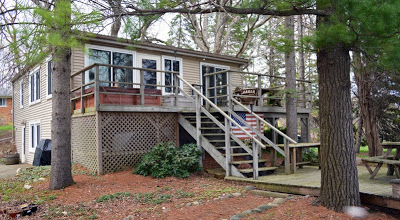
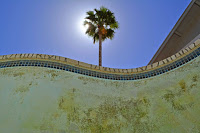
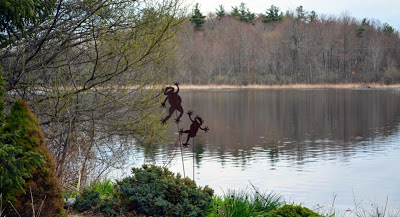
The deck facing the "beach" It's a beautiful piece of land the old house sits on, with beautiful water, reflecting the trees on all three sides. 

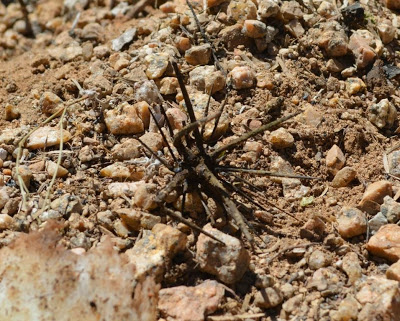
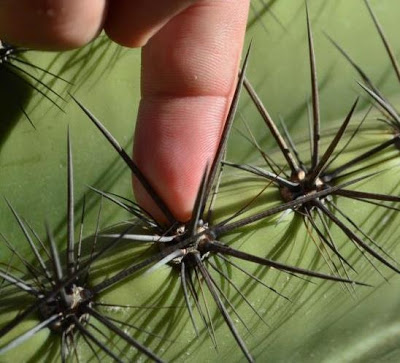
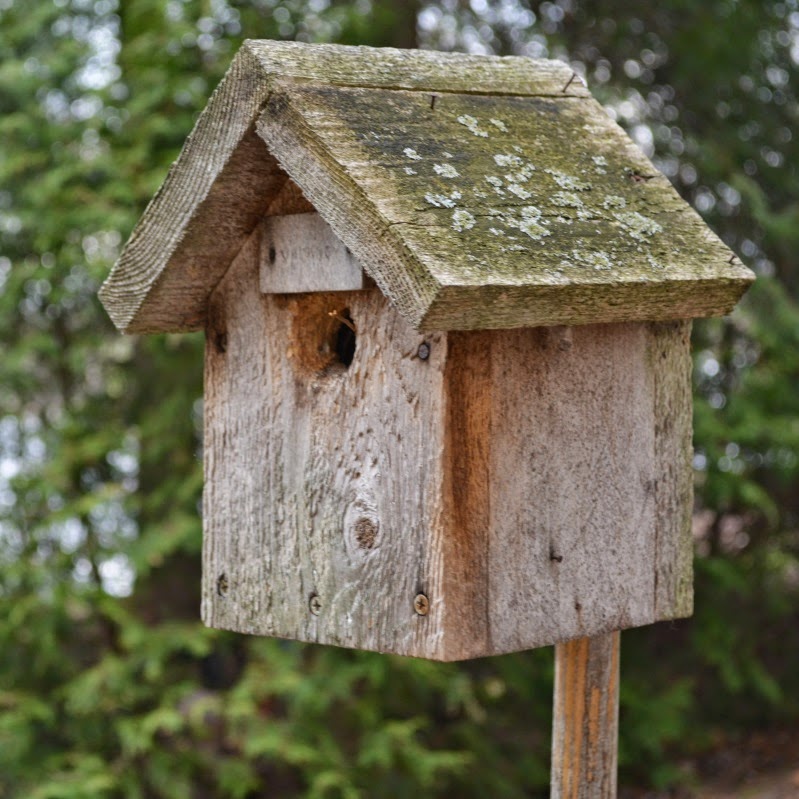
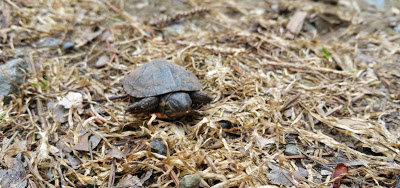
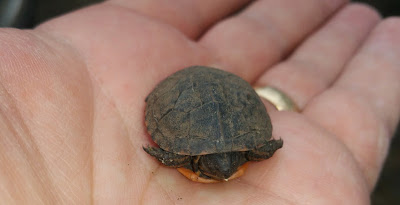
It was absolutely teaming with wildlife, bugs, fish, birds, muskrats, frogs, and this little sweetheart:

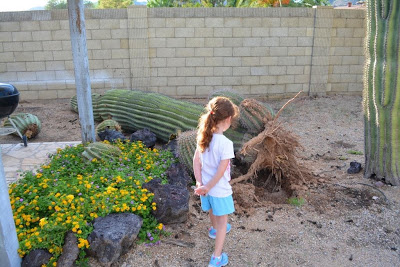
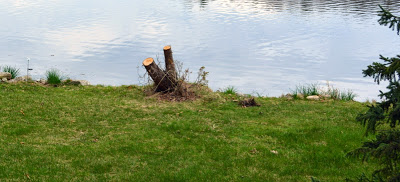
Muskrats, ice storms, and strong winds have done their worst to the beautiful trees over the years. Although the loss of a tree is sad, at least it opens more views of the lake. Unfortunately, it leaves ugly stumps like this one, smack-dab in the middle of the front yard, a cedar lost in the winter. 

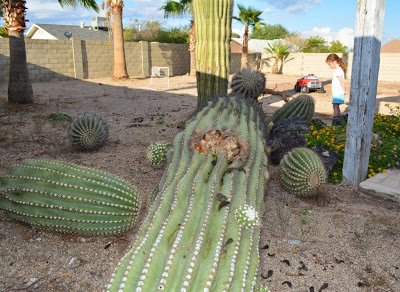
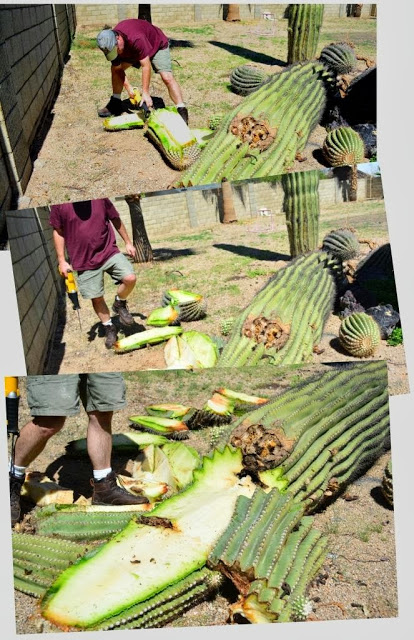
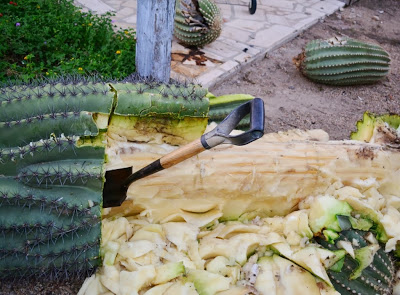
A fun little project to help out with, eh? You know I don't saw up trees back in Phoenix, just the occasional giant sugurao cactus.

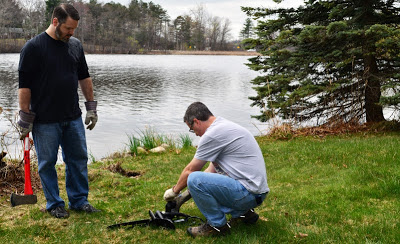
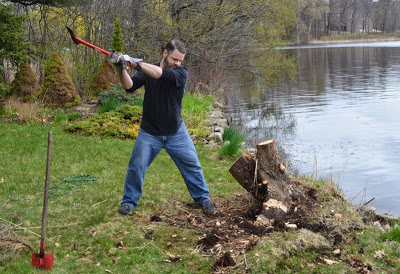
My brother Jim took the day off and joined me, with his trusty, red handled, macho-man ax from home. I found a matching pair of sweet, wee electric chainsaws and a mismatched pair of gloves in the basement (The Indiana Jones, Fortune and Glory T-shirt was all mine, 'cause that's how I roll when I'm choppin' wood).

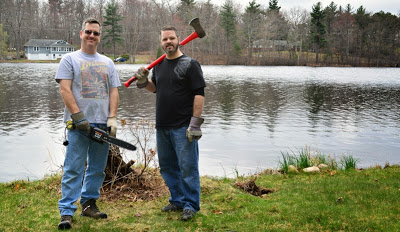
Top men for a serious job.

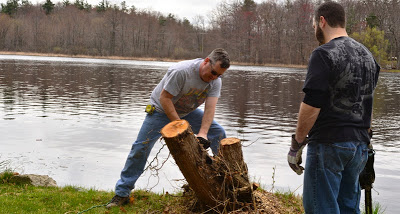
We decided to lop it down to size with the chainsaws first. We thought, maybe we could cut it down, just below ground level, perhaps drill some big holes in what was left, and let it rot away. 

We topped both of the lil' saws up with oil to keep the chains in good order and got to work.

We took turns with the diminutive chain saws. There was no point in overheating their motors when we had two on hand. Just like with unlicensed nuclear accelerators, we carefully kept our distance from each other,.. 

... because crossing them would be bad.

Dr. Peter Venkman:I'm fuzzy on the whole good/bad thing. What do you mean, "bad"?

Dr. Egon Spengler:Try to imagine all life as you know it stopping instantaneously and every molecule in your body exploding at the speed of light.

 Dr Ray Stantz:Total protonic reversal.

Right. That's bad. Okay. All right. Important safety tip.

                                      - Dr. Peter Venkman

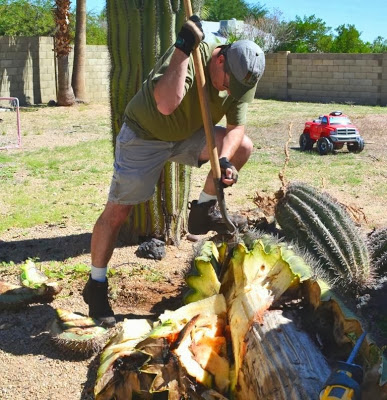
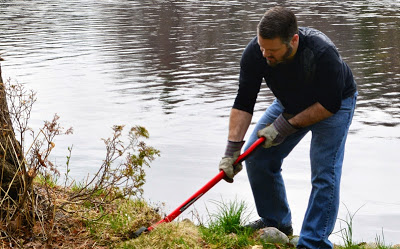
After a while, we decided the chainsaws just weren't cutting the mustard (or the stump). Jim brought his mighty ax into the fray. 

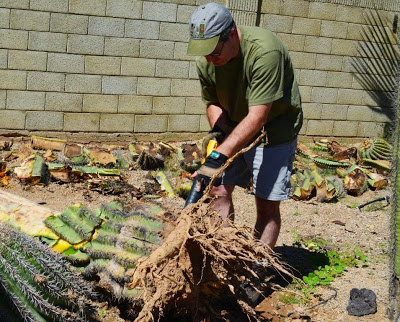
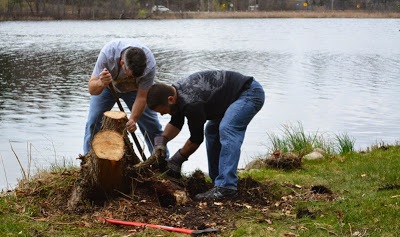
We switched our focus to the roots. This whole tree had tipped over at one time after all. Surely there wasn't a beefy tap root to contend with. We'd chop all the surrounding tendrils and hopefully rip this entire monstrosity from the ground. 

Chopping like a warrior poet.

We took turns swinging that ax, cleaving root after root and prying   Needless to say. It wore us the hell out.

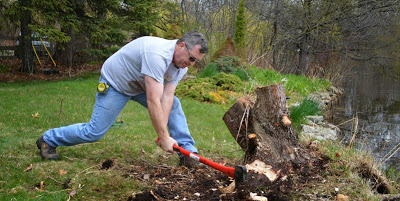
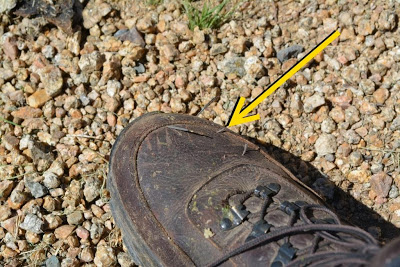
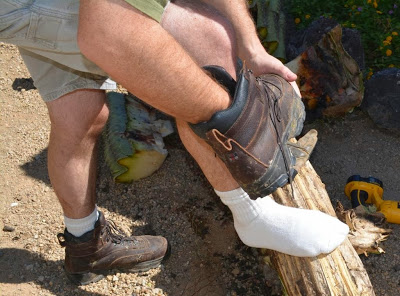
Yes. I'm wearing steel toe work boots

No, he's not wearing steel toe work boots.

Expletives deleted.

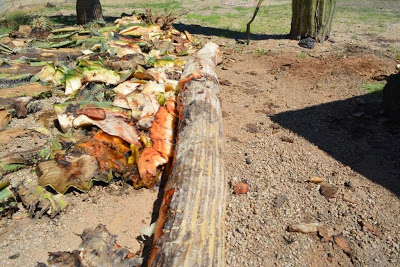
In the end, we ripped that tenacious beast from the grasping clutches of the moist, root-filled earth and wrestled it into the wheelbarrow.  The initial victory was very sweet, but the following three days of aching muscles, dulled the feeling.

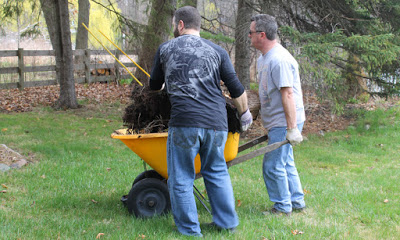
My dad came out to join us for the victory lap as we wheeled the beast to its final resting place in the woods. 

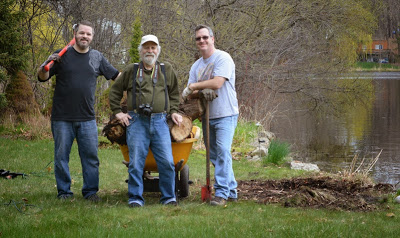
I simply must get a dual-wheeled barrow like this. 

Good riddance, Beast. 

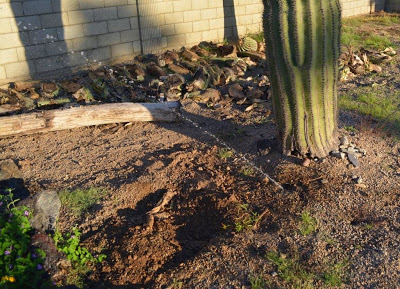
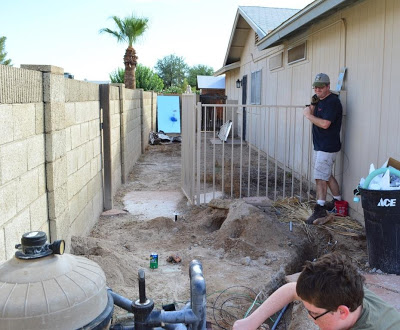
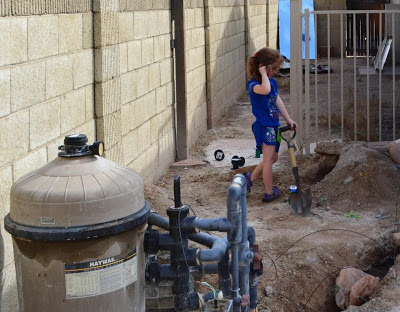
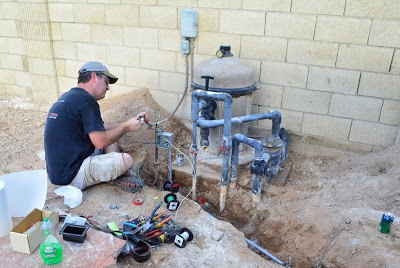
I'll share more of the DIY blitz projects Jim and I fiddled with at the old homestead soon. 

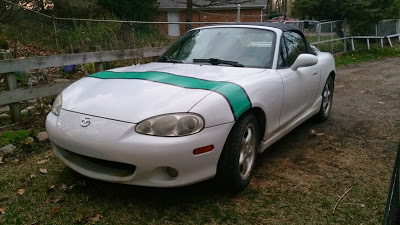
I'll close by sharing the ride that replaced my truck for the week. It's been a long time since I drove a small car or a stick shift. Heck, I don't think I'd ever driven a convertible before. It sure was fun sprinting about town with my old man, our hair blowing in the wind as I slalomed round Michigan's never-ending minefield of bottomless pot-holes.

Join us next time for the thrilling conclusion of the Michigan DIY blitz! There will be a much better view of Jim's legendary sideburns. Promise.

UPDATE: Here it is:

Michigan Trip DIY Blitz

Pool Project Update: Analysis Paralysis and The Big Draining

To sum up the state of our pool remodel in one word:

Aaaghhhh!

After three contractor quotes, with three different approaches and much study and comparison, I'm suffering a positively ferocious case of

analysis paralysis

. For one reason or another, I'm not comfortable pulling the trigger with any of them. I'm stuck spinning in circles.

For the most part, the defining issue for our preference in contractors is the pool deck. The three solutions we got were completely different from one another:

  1. Tear off the surface stone, mechanically grind the concrete / grout residue down and re-coat it with an acrylic "cool deck" type deck coating.
  2. Tear off the surface stone and install nice, concrete paver bricks. 
  3. Demolish the deck completely, form and pour new concrete, and coat it with an acrylic "cool deck" type coating.

Other than the complete demo, there were positively going to be some ugly unknowns lurking beneath that God-awful stone surface. After my hammer-drill / grinder assault, at least we know

it's possible to remove it

without destroying the deck below.

But, there's is also a drainage issue, where water pools against the house. We'd like to fix that. Surprisingly, all three solutions were in the same price range, so naturally, we're leaning towards the complete demo and re-do.

Ugly Pool Deck

It's gotta go.

Interior renovation proposals are virtually identical in scope, while the pricing is only

somewhat 

close. I had to build a spreadsheet to compare it, because the quotes came in so varied in layout, inclusions, and item-by-item price.

I even compared Better Business Bureau ratings and Registrar of Contractors, along with Yelp and Ripoff Report too. I felt good about all three of the guys that came to do the estimate,

despite the fact that all three of them missed their appointment time and arrived significantly late. 

The Official Analysis Paralysis Spreadsheet

The Official Analysis Paralysis Spreadsheet

The Official Analysis Paralysis Spreadsheet

Considerations

The problem with our favorite proposal (the one with the demo and new deck), was a huge demolition charge for the pool interior that the others didn't have. The others included demo in their price. Each line item varied in cost between the three, but this one charge took the price about $1400 higher than the others, not chump change. They  appear to be a very new company, but have little or no complaints. (Highest Cost)

Our second favorite guy, the tear off, grind down, and re-coat guy had good ideas and I liked him, but his contract was spooky scary; it was not consumer friendly at all. He also had the most complaints on the ratings sites. They were nearly all marked resolved, but I got the impression he wielded his contract like a hammer. He also volunteered a lot of negative views about  other contractors. I really want to use him, but my radar is going off. (Lowest Cost)

The third guy's pricing was in the middle, he seemed trustworthy, but he was the one with the pavers. We're just not loving that idea. (Middle Cost)

How can we spend enough to buy a nice used car when we're not comfortable with the plan? So we're stuck.

Well, not entirely.

One of the contractors had a good idea. Why was I paying to run the pool equipment when we were not using the pool. Why not drain it? We're not using it. So what if the plaster cracks in the heat, we're tearing it out anyway.

So we drain. I turned off the equipment for a week before the big drain, so naturally, the pool returned to it's favorite state of 

full Dagobah mode

again, a delightful swampy-green.

I rented up a pump and hose from my local Ace Hardware store for 24 hours. They had an incredible amount of stuff crammed in that rental room. I'm going to go back and check it out when I have more time.

Renting a submersible pool pump

These pumps are a piece of cake to use. You hook up a hose, plug it in, and

ker-plunk.

It turns on and starts flowing as soon as it submerges and an attached float switch engages. 

Renting a submersible pool pump

Depth Charges Away.

Rather than draining into the street or sewer clean-out, which probably would have sent this water on a path to some treatment station somewhere foreign and far away, like Texas, I gave it back to our local environment,

really local,

 the back yard. It was also cheaper to rent just 50' of hose rather than the 250' I would have needed to make it out front.

Renting a submersible pool pump

That little pump quietly gulped from the pool and spat a steady stream of water out. I wasn't worried about chemicals or salt water because the content was so low. The trees and weeds should love it.

The birds sure did.

Pumping the swimming pool into the yard

"Saaaay,... I wouldn't mind a quick drink and a little bath"

- Mr. Bird

A swampy pool doesn't interest anyone around here, it has no pull against the siren song of toys and video games. But start flooding the yard, all manner of creatures emerge.

Pumping the swimming pool into the yard

Yep, there's nothing like the novelty of a deep algae-covered cement hole in the ground to lure them from their cave.

Nasty Swimming Pool with Algae

Catching some rays out by the pool

These kids are definitely taking baths tonight. Definitely. 

Nasty Swimming Pool with Algae

Sitting Down on the Job

After several hours, it was done. We are now the proud owners of an ugly cement pit. 

Empty Swimming Pool with Yellow and Black Algae

There is absolutely no doubt, this pit needs to be resurfaced. The surface is so rough and pitted that it's no wonder the ongoing fight with black algae was futile. It had sunk it's roots in too deep.

Empty Swimming Pool with Yellow and Black Algae

So what do do with a big empty pool on a beautiful weekend?

Diving Board over an Empty Pool

"CANNON!,..ummmm.... ball ?"

We're not skate boarders around here, but we had some other good ideas. If you follow on Facebook, you might have seen some of this, but the night time Colosseum of Battle Ball  is probably the best. 

Enjoy:


UPDATE: After this experience with hiring a contractor, I was invited to return to the Thumb and Hammer Home Improvement Podcast. Check it out here: 012: The AZ DIY Guy returns to discuss contracts, contractors and pool repair


There's Always a Bigger Hammer - The Paving Stone Demolition Experiment

'm trying to remove the cemented-in mystery stone from our pool deck. The same stuff is on our patio, so if I'm successful, I may go after that area too. Why would I do that? Cause it's ugly, bad stuff.

You can read about this delightful stone in my last post about our upcoming swimming pool renovation if you like, or you can stay here for the hard-core, hammer-slammin' action.

To update progress on the renovation, I've had two pool contractors give renovation options and quotes for a total pool re-do / repair. The first contractor thought we could remove the mystery stone from the original deck, and cover it with brick pavers. The second promoted jack-hammering the deck down to dirt and starting from scratch, with a new acrylic coated concrete cool-deck.

We're considering both approaches, but the paver idea hinges on successfully removing the stone, and they want $2,000 to do that.

Just to remove the stone, not to buy or install the pavers. Holy crap!

 I decided to see if I could do it myself. I didn't think I had the proper tools for this operation, but a test run with what I had, could determine if it could be done at all. Of course, this job was too big for Sweetness, my trusty electrician's hammer, so I upgraded to a mini sledge and a mason's chisel. I'd used the duo years ago, to split bricks for a mailbox project. I figured they should at least get me started with the necessary destructive experiment.

Mini-Sledge and a Mason's Chisel

It was easy enough to chip the concrete off the edges of the original deck slab, but it was seriously tough going to get the stones to release. I had to chip along as much of the edge as I could, before driving the chisel under the stone. Finally, I'd give it a few solid whacks to break it free.

"tink,..tink,.tink,..tink..crack..."

After a while, I got a small area cleared. A few stones were up, broken to bits, but there was some concrete bedding left behind. It probably wasn't the best hammer and chisel combination to be using, but it proved that the stone could be removed. It would only take a "short" 3 years of solid evening and weekend work to plink my way through all of it. 

I chose to move up a level in hammer options. Tucked in my arsenal of hand-held concussive forces is Mjölnir, my mightiest hammer option. It is truly a hammer worthy of a Norse God, and it came to my possession through a character of mythological proportions, and I can't believe it's not been featured on this blog yet. 

Mjölnir, next to a mere mortal's hammer.

Mjölnir is actually a weathered, full-size sledge hammer with its handle sawn off for one-handed use. It was given to me years ago in my brief tenure as a construction worker, by Joseph, a foul-tempered Lebanese construction electrician, with muscled, fur-covered forearms the size of gallon paint cans. He was an intense, scary dude, physically incapable of rendering a single sentence without at least four curse words. In fact, sometimes his sentences were artistically woven entirely from curse words. For some reason, he liked me and let me keep this bastardized sledge. I think he wanted to craft a larger one for his own use. I don't know why; he could slam an eight foot grounding rod all the way into the ground as fast as you or I could push a thumbtack into a bulletin board.

Just like the God of Thunder, eh?

Mjölnir does its job. It hit with a tremendous impact, driving the chisel under the stone with only a few swings. It was horribly unwieldy though. Swinging a full-size sledge with one hand is a little more intense than swinging a tack hammer. I even managed to treat myself to a ricochet shot that slammed the mighty hammer into my foot, nearly knocking me over. It didn't hurt a bit at all though. It didn't hurt because I am one tough DIY'ing action hero of a man,... who just happened to be wearing steel-toe boots.

Steel-shod toes are happy toes.

I proved it was possible to remove the stone with a chisel and hammer, even a big damn hammer, but it was slow going and tough work. It physically wore me out. I thought perhaps I needed a better chisel, so I called it a day.

I had muscle aches on top of muscle aches the next morning. I'm out of shape for sure, but swinging an overweight hand-sledge in a crouched over position for hours and hours, days and days was going to be miserable. I clearly needed a better setup.  Luckily, I'd won a Home Depot gift certificate at work and it was positively straining to free itself from my wallet. I headed over to my friendly neighborhood, big orange box store to check out the tools,... and visit Bad Dogs in the parking lot, of course.

Naturally, I came home with a new power tool. Enter a big hammer drill, featuring 2.1 foot pounds of impact, 4,500 beats per minute. That's a pinch better than I can do by a hand. This bad boy is a beefy Makita HR2621 1" Rotary Hammer, with anti-vibration technology.  A new self-sharpening SDS plus chisel bit came home with it.

An example of a well chiseled physique.

Unlike my 1/2 inch cordless hammer drill, this roto-hammer has a third setting:

  1. Drill Only - spinning for standard drilling through wood, etc.
  2. Hammer Drill - spinning, plus impacts, for drilling through masonry
  3. Hammer Only - the chuck does not spin at all, for chipping /digging, etc.

For this adventure, it was hammer only mode, the setting my cordless hammer-drill does not have.

Makita HR2621 1

Stop. It's Hammer Time.

Ohhh, hell yeah. This thing rippped up the "mortar bed" (?) of concrete the stones had set in much faster than the ol' hammer, chisel, and brute force I had been using. Unfortunately, it still took forever to pop the full size stones off, but it did it with a lot less effort. My visions or ripping through like a bulldozer, sadly, did not come close to reality. It was still slow going.

Makita HR2621 1

I switched to a stance I've learned from every single movie and TV show I have ever seen set in the streets of New York City, "jack hammering construction worker."  I believe all aspiring, male actors in the city get their start in this role, well either that or "construction guy eating a sandwich, next to jack-hammering construction worker.

Either way, it was fun. It did make it easy to chip a few inches from the edge, fairly quickly.Still slow going, but again, less effort than swinging an oversize hand sledge.  I even began thinking about a sandwich myself (I could totally nail that acting thing). 

The "Construction worker with a jack-hammer" stance.

A friend at work had given me another idea to try. He'd thought that I should use a masonry blade in a circular saw to slice the top layer into pieces that would be easier to pop off. Maybe that would help. Of course, I didn't have a masonry blade on hand for the circular saw. I did, however, have a diamond blade mounted in my Cordless Cutoff Tool 

DEWALT Bare-Tool DC411B 4-1/2-Inch 18-Volt Cordless Cut-Off Tool

It slices! It dices! It can even cut a tomato!

I did a decent sized section, but it really chewed through my batteries in the process. I guess the cheap blade and the heavy resistance of cutting a 3/4" thick stone and concrete really put a draw on the power. I emptied all three batteries. I had one on the charger as I tried whacking again with the big sledge and chisel, thinking I could simply pop the squares I had cut out. It was a little better.

That quickly led me to try sitting on the diving board breathing hard and drinking vitamin water, which worked nicely for me, but didn't accomplish any actual work.

Success at last!

The roto-hammer, made short work of it. I finally had the winning approach. The problem was, I couldn't charge batteries in the cut off tool fast enough to keep up with the cuts I needed. I'd need also to make more cuts to get the pieces to the best size. 

In the end, it wouldn't be a problem, because fate had taken me by the hand and led me to the solution. Let me take you back in time to my the shopping trip, when I was literally standing in the checkout line of Home Depot with this:

After a few moments, the lady at the Pro Checkout called me over to her station, with no waiting in her line. As I walked over, I saw this:

Makita HR2621 1

Waszzat? A grinder included?

A speedy check of online reviews later and I'd added the first two Makita tools to my arsenal. At the time, I didn't know I'd want a grinder for this project. Sure, I've wanted one for a while, but "free" really closed the deal for me.

I switched the blade over from the cordless, and let this bad dog run free. With an inexhaustible supply of electricity and a much higher RPM, it tore through stone, rendering it into flying dust.

"All we are is dust in the wind,..dude."

                                                    -Bill and Ted

This was an easy tool to use, especially considering the incredible amount of work it does without much muscle power. It cut stone and concrete with almost no effort. I really like the second handle to keep it under control and prevent it from tasting human flesh. Its going to be active on lots of future projects around here. 

Makita GA4530 4-1/2-Inch Angle Grinder

I cut a grid-like pattern on both sides of the diving board, taking care not to cut too deep and damage the slab below. In hind-site, I think I'd make a good dentist. This is pretty much what they do right?

I had finally, finally arrived at a good demolition solution. I'd cut the grid roughly into 6 inch squares. The roto-hammer slid right under the corners at a low angle. Within just few seconds, I could hear the sound change and the "tile" would pop up, usually in two pieces. 

It was way easier than the sledge hammer approach. Still it was hot work. I really wanted to jump in that pool.

After a quick clean-up the deck was exposed. There was still a fair amount of mortar, but it could be cleaned up later if we decide to go this route. I figure I'd chip up the high spots with the roto-hammer and then get one of those cup grinding-wheels to clean up whatever was left. It can be done.

With the final process discovered, I think I can at least get the stone up in a couple weekends. But, for now, I'm going to stop, until we decide if we are going to resurface this with pavers or a coating or if we are going to have the entire deck demolished.

That I'm not going to do. Sure, I could get my hands on an electric jack-hammer and bust it up, but I don't have the expertise to avoid damaging any underlying structure that may need to stay intact. Plus, that is a lot of material to cart to the dump. 

For now, I have this little heap. I'll smuggle a little out each week in the trash if I have to.

The Next Big Thing - Swimming Pool Renovation

Necessity has once again led us to fail in keeping to our Strategic Doctrine of Inside-Out Home Renovation. The swimming pool continues to be unusable. First world problems right?

Wrong.

Access to a swimming pool is a requirement here in the fierce desert southwest. In fact, when you get off an airplane, they check your luggage, just to make sure you have your suit with you. The Border Patrol prowls the edges of the state, making sure anyone attempting to enter without towels, inflatable float toys, squirt guns, and a pair of swim goggles is promptly sent back the other direction. God forbid you try to bring children here in the summer without intending to routinely hurl them into the cool, refreshing embrace of a sparkling, chlorinated aquatic wonder at least once a day.

Whist most of the country is emerging, bleary-eyed, from their winter hibernation homes, blinking at the sunlight like pale zombies, basking in temperatures approaching 60 degrees, we're eyeballing the pool, with temperatures already tickling the low 90's. Oh, it's time.

Here's our issue. Our basic tract home was built in the late Classic Rock era, in 1979. We believe the pool was put in at that time, with a cassette tape of Pink Floyd's The Wall blaring on the boom box as the hole was dug. Approaching 40 years later, time and idiocy have taken their toll on the ol' swimmin' hole in our back yard.

I did win the battle of Dagobah, where the pool was regularly turning into a fetid swamp of yellow and green algae; we installed a new cartridge filter, an energy efficient pump, and a high-tech salt water chlorination cell. I can keep the water clear, so that is battle is indeed won. Unfortunately, the overall war has been lost. Black algae, the supreme force of the dark-side has taken over. Despite my efforts, it has multiplied and cannot be eradicated. It's a rock-hard bastard. with its tendrils sunk deep within the porous, aged pool walls. The pool itself is starting to disintegrate and the decking is a mess. I surrender.

Swimming Pool Black Algae

Black algae. The bastard of the deep. Once you have it, you have it for good.

The white plastered finish is really only supposed to last about 10 years or so. This is in such bad shape that we think it my be original, or perhaps a late 1980's application. It was bad when we bought it, and we've been here 9 years. It's no longer smooth, but pitted and chipping away.

Swimming Pool With Cracked Plaster

I found that Sylvan Pools  isn't even in business anymore.

That's not all folks. The pool deck is a big problem. If we're going to fix the inside, it only makes sense to fix the deck too. As you may have noticed, some previous owner / mental giant who was my DIY predecessor around here, decided to cover the "cool deck" with a not-so-cool-deck. They cemented some sort of porous stone over the original, professionally installed deck.

Ugly Swimming Pool Deck

Fugly. Just plain fugly.

This mystery stone, has exciting benefits:

  • It looks like it shouldn't be slippery, but it is.
  • Also unlike Cool-Deck, it's actually so freaking hot that you can fry an egg on it in the summertime. Of course eggs are so much more susceptible than tender, bare human feet. Conversations that take place as we approach our pool for a swim normally start like this, "Ouch! ouch! ouch! ouch! (SPLASH!)" 
  • It's not the stone's fault, but it's poorly installed. There are surprise trip hazards, weird uneven edges, and as an bonus feature, it slopes towards the house so water can pool there. You know how great it is for a house to have water wicking into wooden walls. This slope also offers the excitement of pooling water near the egress gate, just to ensure exiting is a slippery challenge.

My wife even slipped trying to go though the pool gate recently. She was wearing tennis shoes, but still lost her footing. She caught herself, but cut her hand on the latch.

This mystery stone is even wrapped over the edge of the pool. Just like the walking surface, it's poorly done. Like our roof, it's likely the product of weekend warrior DIY'ers like myself, but also under the effect of gallons of cheap beer.

Ugly Swimming Pools

Just a sharp enough edge to avoid bruising by splitting the skin. Handy.

I know there's some semblance of an original deck below this covering. I can see it at various points on the outside edge. It's sort of an orangey-pinkish color. 

Another item is the diving board. We use it; we love it. But, it's probably a death trap. Diving pools are rare around here, most new installs are shallow "play pools". Our pool is really too small for proper diving, even though it is ten feet at its deepest. It's fairly old. The fiberglass creaks and the base is loose and rusting.

We'll miss it, but it's best to get the liability out of our yard. The last thing we need is someone getting hurt on it. It's been almost a year, but I'm confident I can still produce a proper cannon ball, even without a diving board.

C' Ballin' like a Boss.

Like a Boss.

We really don't have the funds ready to take on this project right now, but it's only going to get more expensive as it degrades. Plus, the pool is a huge part of our summer cooling and entertainment around here. So much for a kitchen remodel this year, We're going to have to figure it out. I'm starting by bringing in the experts for ideas and price quotations. That's right, it looks like we're going to hire a pro for most of this. We've done it before. From my research, a lot of this is best done at the same time, saving tons of money in re-work and preventing possible damage to whatever was done first.

Pool Interior:

  1. Get rid of the black algae for good. Is that an acid wash thing?
  2. Repairing or resurfacing. There may be some sort of coating available. Perhaps it's a tear out and replacement with the same white "plaster" coating, or maybe we'll try some of the pebble finish products.
  3. We're going to get information about replacing the water-line tile that's calcified, and ugly. 
  4. Perhaps an auto leveling device can be added. These widgets keep the pool full when the summer is evaporating the water at an unbelievable rate.

Pool Exterior:

  1. Pool Deck. It needs to be fixed so it's not so hot and slippery to walk on. It's a hazard and it's hideous looking.
  2. Remove the diving board. We thought a slide would be fun, but we can't have anything visible above the fence line that will block the neighbor's view of the mountain.
  3. Landscaping / entertainment features. We'd like to add some furniture, an umbrella stand, and who knows what else to beautify this stark area. We need some good lighting for evening swimming as well. 
  4. Equipment Screen. We need to come up with some kind of screen to hide the mechanical equipment. Not only is it kind of an eyesore, but it needs to be protected from the sun.

A gorgeous piece of landscaping art, right?

I'm ready to dive in to this project. The patio roof is about cave-in too, so I think I'm going to be on outdoor project mode for a bit, just in time for triple digit temperatures,   too. 

I get that many of my dear readers don't have giant money sponges swimming pools, but this project should still be chock full of fun. I'm hoping to put some hand's on sweat equity into the project to get the cost down.

How to remove a fallen 16' cactus from your back yard

Can the world of DIY / Home Renovation blogging handle yet another post on how to remove a fallen 16' cactus from a backyard? I'm pretty sure all my peers have written similar posts on demolishing a towering saguaro, probably just about as often as they've come up with interesting new uses for pallet wood. No? Haven't seen any? Don't live in the Sonoran Desert? Well then, settle in for an adventure of a lifetime, because here's how it went down.

The grand inspector, surveying the scene.
We'd lost one of our four big saguaros in a windstorm a couple weeks ago (Oh How the Mighty has Fallen). Now I've determined that a leak in our drip irrigation system completely saturated the soil, weakening the grip of the surprisingly small root mass. About a thousand pounds of waterlogged, spiny monolith crashed to the ground, leaving its severed appendages strewn across the landscape.

The irrigation leak beneath our cactus

Now, how to get rid of it? I'd read about using a chainsaw to lop it into logs that look like giant sushi rolls. Of course, my chainsaw is merely a 9" electric pole saw, not much use here. Maybe I could buy a cheap one from Harbor Freight or rent one from Ace.

I know there is wood inside the cactus, that might be good for a future craft / decoration project. Could I could fillet it like a fish and save the core? 

I loaded a 12" pruning blade into my beloved Cordless Reciprocating Saw and gave it a rip. It sliced like a warm knife through butter. Juice gushed out of the carcass, spattering me in the face.

Cutting up a fallen Suguaro Cactus

The fleshy pulp felt smooth and a little slimy. It smelled fresh vegetables, a bit like jicama. I started lopping off big chunks rapidly, starting with one of the detached arms. The blade occasionally made contact with the wood core of the trunk, so I'd ease back, trying not to damage it too much. 

Slice 'n dice
I'm not much of a videographer, but I thought you'd like to see what it was like sawing through the pulpy goodness with a reciprocating saw. If you watch closely, you'll see where your's truly manages to stick himself in the hand with a spine. Evidently, Mr. AZ Dumb-ass Guy, thought that wearing gloves while slicing up a freaking, cactus with razor sharp spines was just too much effort this first day.  


Jess commented on the last post that a sturdy pitch fork would make handling cactus chunks much safer on the hands and feet. Of course, since I'm not raising miniature donkeys, I don't own a pitchfork. I used the next best thing, a sturdy steel landscaping rake. It did the trick. (Thanks Jess!)


It was like dragging whale blubber across the landscape. I laid out the squishy chunks in rows to start drying. I'm going to have to parcel this over several weeks into the trash bin. I don't have an alternative, since there's not another bulk trash pick up until December, and I don't want to slime my truck by taking it to the dump myself.

I took a break to handle some kid obligations and charge the saw's batteries, but came out later in the evening. I tried another tactic, a mini-spade shovel. It sliced and diced really well. I scooped the fleshy pulp off the inner woody skeleton; it was like carving a pumpkin. 


It killed my back to hack and pry, stooped over with that little shovel, as I simultaneously tried not to slip in the goop or impale myself on the horrendous needles all around me. These things are tough, medieval-style caltrops that would puncture the sole of my boot with ease.

Don't tread on me.

I called it a night. It was an easy choice, since I had managed to spatter cactus juice in my eye and rub it in with the back of my hand. My eye was an burning, bloodshot mess.

A fresh day followed, with a fresh approach. I went full-on, flat-blade shovel on this sucker. This time,  I wore gloves.

Photo tip: It's considered much more manly to have a work truck parked in the 
background, especially when it looks like you're raising the flag over Mt. Suribachi.
It worked like a charm. I was tearing through cactus at a rapid, pulp-splattering pace, rending nice juicy slabs off, one after the other. Then, of course, seconds after the photo above was taken, a meaty slab flopped down on my right foot.

It got my attention. Of the 4 spines that punctured my boot and broke off in it, one in particular really pissed me off when it stabbed into my toe.

That's the little bastard that got me.
The toe wasn't bad, not much more than a scrape. I bled more from the gash my finger suffered in the ten minutes of fiddling around, trying to get the spine out of my boot without breaking it off inside. It just stinks that I have perforated my new, formerly-waterproof, Red Wing work boot.


Back in action, it was a matter of picking the bones the rest of the way clean...


...and sawing off the root mass.


What a dang mess. I've got a massive elephant graveyard of saguaro chunks drying in the sun. 


Now it's just a matter of metering out the chunks into the weekly trash as they dry out. Luckily, monsoon season is over and it's not humid anymore.  The carcass is cleaned down to the big woody pole. I think it's pulp filled and will eventually dry hollow. I'll post updates on Facebook as it dries. We'll see if it's worth making something out of. 


I have to fix the drip irrigation leak before it makes the other one topple. That big sucker will take something out if it falls.


What do you think? Have I prepared you to handle your next 16' fallen cactus monster crisis in Michigan, Pennsylvania, Georgia, or wherever you live? 

Re-securing the Border (Not that Border)

Recall this awesome, recycled-tire-rubber landscaping border I installed earlier in the summer? I still love the stuff. It was easy to work with and looks great.

"...earlier this summer"

Well,... then this happened:


The heads of the stakes faded to a nearly white color, in roughly a month and a half. They look like buttons on a coat. It really makes the border look weird. Crud.


After a couple weeks grumbling about it, and hoping it lawn elves would work their magic, I finally checked out EcoBorder's website for contact info to complain. I found their FAQ's addressed the issue. They know about it and are tackling it head on: 

NOTICE:  It has come to our attention that some of the stakes sold with our EcoBorder "L" product last year (estimated time frame between July and August 2012) have a raw material defect.  In our ongoing efforts to use recycled materials in our products, we have learned that some of the recycled raw material plastics used in those stakes (we expect about 3% of product sold over that time) have this issue.  Due to an adverse reaction from some impurities found in those materials, some stakes purchased in those months could turn white.  With product quality and customer satisfaction as our top priorities we apologize greatly to any customers that have experienced this.  In response, we vow to "make it right" with any customers that this may have affected.
If you were affected by this issue, please email us a photo (to: mail@ecoborder.com) of the stakes along with a count of how many replacement stakes are needed.  In response, we will send out top quality replacement stakes at no cost to you.  Once again, we apologize for this issue and will do whatever it takes to make sure that you our customers see our unending dedication to a quality product and customer service!
I contacted EcoBorder through the site and quickly received an email, followed by a phone call from their Florida HQ (not a call center on the other side of the planet). They offered a genuine apology and an explanation. They didn't dodge the issue or accuse me of living in a God-forsaken, uninhabitable desert wasteland where the sun savages any material known to man. They didn't question my installation methods or ask if I'd hosed the area with Vietnam war era, carcinogenic defoliants. They truly, humbly apologized and took accountability. I never even got a chance to fence a rude tech support operator with my well-honed, rapier wit. It was refreshing.

EcoBorder knows there was a very small lot of stakes that were discovered to have a defect in a UV protecting ingredient. They've adjusted suppliers and resolved the issue. It's been difficult for them to locate the affected batch, since it's scattered across the country, carried by the two big home center chains.

A supply of fresh replacement stakes was quickly shipped. I received an email with tracking information. They arrived a couple days later.


Do I want to re-install what I've already installed? Nope. 

Do problems occasionally happen in the world manufacturing stuff? Yep.  

Heck yes; it just happens. I like how EcoBorder dealt with an unfortunate issue straight on. No dodging. No questioning. No games. No delays. They just handled it. That's class. That's customer support. Seriously, that's good business sense.  In my opinion, this is a case study in how companies should handle problem products.

I'd like to get more of this stuff for the back yard landscape. I support good, companies, manufacturing in the USA, that stand behind their products and I like this product.

I'll head out there with a hammer and whack these new ones in.
__________________________

Disclaimer: I have no relationship with EcoBorder (Although, I do host affiliate ads from Home Depot, where it is sold). I selected and purchased the initial product with my own hard-earned cash. They were aware of and responded favorably to my unsolicited blog post on their product. As consumer and a blogger, I believe their response was genuine, and not influenced by the fact that this issue happened to affect a blogger, although, I imagine they're probably not celebrating that it happened. In no way did they try to influence my response as a blogger. That's class. - John

Oh, How the mighty has fallen!

I have many, many items to tackle around here. Now that we have the swimming pool somewhat on the mend, I'm exited to get to the next items on my list. But first, once again, Murphy's Law stepped in this week, just to keep life interesting.

You can only imagine how it felt to get home from work one afternoon and head out the back door, to check on the pool, only to find one of the most striking features of our back yard destroyed. It was a stop-cold-in-my-tracks moment...

Fallen Saguaro Cactus in our yard
Aaaaaaghhhhh!!!
This was a sixteen-foot tall Suguaro Cactus (Carmegiea gigantea), not the biggest, by far, but an awesome multi-armed monster, at least 100 years old. It was the best-looking of the four tall boys on our property. 

I found this pic in my misting system post. You can see most of him still standing, mid summer (and some gratuitous, hard-core Weber BBQ action).

Fallen Saguaro Cactus in our yard
Pay not attention to the horrible porch; it's on the list.
Now the beast has fallen. We had a heavy monsoon storm that must have saturated the soil  too much. I suspect yet another drip irrigation leak in the area as well. The surprisingly small root system just couldn't hold up.

The inspector.
On the bright side, it fell in one of the two narrow directions where it wouldn't damage anything else. It missed the porch, the block fence, the BBQ, most of the flowerbed, the pool fence, and the surviving (taller) Saguaro. It also land on anyone; which would have been fatal. We'll count our blessings.  

I don't even know where to start with clean-up on this one. It must weigh more than a ton. The tiny little arm bud, that augured into in the flower bed, weighs 60 lbs on the bathroom scale.

This 60 lb. ball punched a 3 inch deep dent into the flower bed.
I think I may need to get a chain saw and finally purchase a wheelbarrow. There's absolutely no way to get equipment like a Bobcat or forklift into the back yard. I'm surely not going to hire a crane to reach over the house and lift it out. 


It's been sitting, cracked open and leaking some sort foul juice like a Graboid from Tremors* for a few days now. 

Graboid juice
What a loss. We can't replace this beast. I'll figure out a way to dice it up and store it for the next quarterly bulk trash pick-up (since the most recent was last weekend, of course). Maybe I can plant some of the arms that weren't damaged in the impact. 


I grew up chopping-up and hauling ice-storm damaged trees out of our yard in Michigan. This is another challenge entirely. It goes without saying that this is going to be a very delicate operation. I rolled one of the arms with my foot and a spine punched right through the sole of my shoe. This monster bites. 

This isn't your little window-sill garden cactus my friends.
Stay tuned folks. I'll share the adventure, even though 99.9% of my readers probably won't get much use out of a "How to remove a fallen 16' cactus from your back yard" post in their lifetime.
*As my Facebook followers know, I've referenced Tremors twice, recently. I don't know why. I guess it's time to bust out the DVD and visit Val and Earl. I do miss those idiots.

The Great Debate: Hiring a Pro vs DIY (Replacing Swimming Pool Equipment Edition)

My whole concept is Do IT Yourself . I write this blog hoping to empower others to do the same by sharing my experiences, triumphs and challenges. Truly, I believe homeowners can do nearly anything themselves with the right tools, materials, and knowledge. I enjoy doing it myself, have saved tons of money, and  have a lot of experience being dissatisfied with the results from people I've hired in the past. I guess I expect absolute perfection for my hard earned money.

However, there are times were the time spent muddling through a project is just not worth possible savings, fun, bragging rights, or the experience gained. Sometimes there are expensive, specialized tools required, that I'd never use again. A mistake I make can cost me, where the mistake a contractor makes, should have to be corrected on their dime. There may be product warranties to consider as well. True craftsmen, can get results even the most gifted DIY'er can hardly hope to obtain. 

So, can I follow instructions, tear out and replace all this mess? Yes, I think so. It's mostly a PVC pipe and glue project. Can I get it done in a few hours and be confident? No. It would probably take me all weekend and infinite trips to the hardware store to do it. 


So, today it happens. I had already cleaned out the dirt around the horror-show above and repaired some of the electrical last weekend (check it out here). We have an experienced professional from one of our local pool stores coming with brand spanking new equipment. 

Here's the scope: 
  1. A new cartridge filter to replace the aging DE filter (the big R2-D2 looking thing) so back-washing and dealing with that messy white powder is a thing of the past. Old leaky here has been a maintenance nightmare. It would need hundreds of dollars in replacement parts if we wanted to save it. A cartridge filter will reduce my maintenance time greatly.
  2. Replace the pool pump. The existing motor is doing fine, since the it was replaced a year ago (home warranty!!!) but, we expect to save about $700 annually in power consumption by upgrading to a modern, variable speed pump. Plus, the unit is tired and has air and water leaks. 
  3. Adding a salt water cell. This is actually exciting. We are going to nearly eliminate our chemical dependency (and cost!!!!) by converting salt water to chlorine. Everyone I talk to who's made this conversion has loved it.
This is coming to us at a heart-stopping cost of nearly $4,000. No, we cannot afford it. But, we also cannot afford to let this beast nickle and dime us to death, while we spawn water creatures in it's foul depths. We are still in swim season here and cannot take advantage of it.  I've spent untold hours and about $1,000 this year alone in chemicals and parts trying to keep this priceless awesomeness... 

No swamp.
...fom reverting again to Dagobah, in the blink of an eye.

Swamp.
The total cost of this renovation includes about $380 in labor (and that's on special this month). Still steep, but I think it's worth it. I don't think I need to surrender my DIY Guy credentials on this one. 

Hire or DIY? The great debate. I nearly always choose DIY. I've hired out for roofing and plan to hire out for window replacement (if we can ever afford it after this pool debacle). I only do so much electrical myself because I have been trained, but suggest most people bring in a pro for anything major. How about you; what's on your hire vs. DIY list?


Homework: There's a neat article Marcie Geffner wrote last year for Bankrate.com, titled Remodeling Yeilds Rewards, Vexations where she compares my successful family room remodel experience to cautionary advice from the authors of Home Improvement For Dummies. I do their cautionary, contrasting point of view vs. my gung-ho, I-can-do-anything approach. Doing research, I found their website diyornot.com, which provides lots of info on DIY vs. hire. It's a very good site. I just get a vibe that it's pushing the hire direction a bit hard, especially with an apparent choice of advertisers directed towards for hiring contractors. Maybe I'm a bit sensitive because I love the do it yourself approach. Heck, I have ads for tools and materials on my site. - John


UPDATE: I after re-doing some electrical myself and digging up the pavers in advance of the new install, the work is done. The technician arrived early and lugged in a bunch of new parts and pieces.


He installed the equipment in the existing footprint, using a bunch of the existing plumbing. You can see the salt cell standing vertically in the center and its new computer on the wall.


I did the honors and dumped seven huge bags of special swimming pool salt in the pool. They say it was special salt, but I think its the same stuff they put on those big salt pretzels at the mall. Shhhhhh....


When it was wrapped up, we had a completely new mechanical system,.... and some exciting new financing payments. We're really happy we did it. This winter I hope to drain and re-coat the pool, maybe the decking. Who knows, I may even do some cool new landscaping and a screen to hide the equipment. Next summer should be a great swim season!


A Relaxing Labor Day Project: Underground Electrical

So the pool's a swamp again, despite battling with all the modern chemical weaponry at my disposal. It's time to throw in the towel. We give up. It's either a dump truck full of fill-dirt or we scratch together enough money to replace all of our pool's mechanical equipment. Since a dump truck won't fit into the back yard (and I'm out voted 3 to 1), we're replacing the pool equipment, next Saturday. It's a spendy proposition. Do you hear the sound of our kitchen remodel disappearing? Those new, energy-efficient windows slipping from our grasp?

Even though I'd proclaimed it a no-project weekend, I started excavating the slab the equipment is sitting on. I thought I'd be nice and hopefully avoid the cost creep of having a pool tech digging at $80 / hour before dropping down a new slab. I dug it out pretty quickly.

One of the many leaks dribbling away.
Done!

Of course, it wouldn't be a ripping good DIY Guy project experience if it ended as neatly as that, would it? Nope. Remember Murphy's Law, my friends. I noticed this little gem of awesomeness:


The electrical feed conduit is rusted completely through. This is the entry point for a 240 volt pump circuit and a 120 volt light and receptacle circuit, sitting next to 10,000 gallons of highly-conductive pool water where we run around barefoot and soaking wet. Professional electricians would call this condition, "not so good". I let a few choice expletives loose under my breath. I'd have to dig out the rigid conduit 90 degree elbow and replace it, maybe a couple fittings too. Skip the nap, but still, I'd be lighting the BBQ in no time.

"Don't you call me a mindless philosopher, you overweight glob of grease!"
More expletives. There's no 90 degree elbow to unscrew. It's a full 10 foot stick of rigid metal, threaded
conduit, wrapped in corrosion preventing rubber tape. Awesome. Guess what else?!!! There's cement covering it too. Oh, joyous day!! But that's not all; there's a thunderstorm bearing down on me. Sweeeeeeeeeeeet, now this is a holiday, my friends!!! So much for BBQ, it's going to be a carryout pizza night.

I managed to beat through the concrete with my sawed-off sledge hammer and scratch down to the conduit to a coupling using a mini-spade, on my hands and knees. My full size shovel is a flat-blade, not at suited for trenching. I was pretty miserable in the heat.


With the pipe out of the way, I pulled the nasty wire out; it would need to be replaced. The mess of junction boxes also needs to be replaced while I have it all torn apart. They're full of DE filter powder and rusted parts and the switch and plug are junk, all evidence of full water penetration. It's time for a shopping list and a trip to Home Depot.

The conduit on the left and the gounding box on top are brass, and in perfect condition.
The thunderstorm blew in while I was in the store. Luckily, it moved through fast and didn't flood my trench. It simply introduced more delightful humidity. I brought home more than $ 120.00 of assorted loot to straighten out this rat's nest. It sure doesn't look like much stuff when I dump the bags.
Can you tell the new from the old?
I re-jiggered the boxes a bit to neaten the installation and switched to PVC conduit to save cash, time, and corrosion. When it was time to pull wire through the conduit, I grabbed Jack to help by feed it, avoiding damage to the jacket, while I tugged the Fish Tape. Gracie lubed the wire with liquid dish soap to keep it sliding smoothly.

100 degrees and humid after the storm. It's not quite as fun as it sounds.
Gracie and her dinosaurs helped further, by recreating the excavation of the Tanis Map Room from Raiders of the Lost Ark. That mini spade is perfect for her diminutive stature.  


I put all the wiring back exactly the way it was before. I recommend you don't mess around with electrical near a pool if you're not really comfortable with it. Seriously, hire an electrician. There's a whole section of code devoted to it.


It's cleaned up, safe and fresh looking. The new junction box actually has a gasket and does not have the optional big drywall screws driven through it (as can be viewed with amazement in the second photo from the top). I installed a switched cover for the pool light rather than the flip-door style cover.


I filled in the trench with clean dirt, ensuring no rocks were anywhere near the PVC conduit. I soaked it down with the hose every few inches of dirt cover  and compacted it. I don't want this caving in beneath the big paving stones later.


I'll clean up the area and leave it nice and accessible for the pool tech on Saturday.  We are so ready to have this old, sucking money pit of a system replaced so I can spend my weekends doing productive projects (and actually swimming!), rather than repeatedly fighting the endless, loosing battle of the putrid swamp of Dagobah. Yep, I'm really ready for this crap to end.

Generally, you don't see pools this color outside St Patrick's Day
I'm off to the pool store to stock up on some more chemical weapons.