

With visitors on the way to the house, an ugly countertop gouge can be fixed well enough to easily sneak past the casual viewer.
I did this simple trick a while back, wanting to cover up a gash for a weekend or so. It surprisingly lasted several years, before getting picked out by small, curious hands.
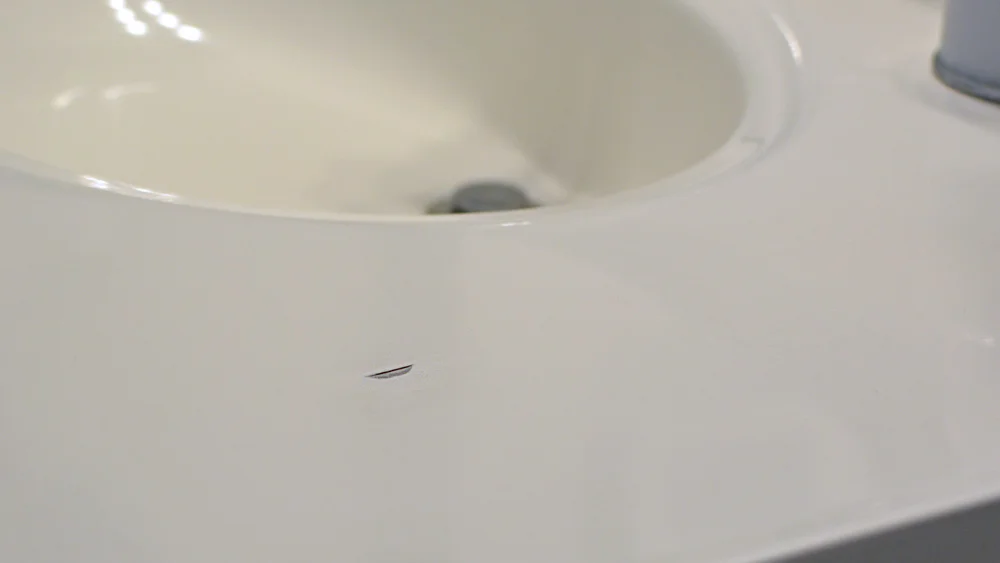
The smooth, white acrylic vanity top is gouged deeply, all the way through the surface, into the fiberglass below. The damage is up front and very noticable.
How did that happen?
How does one get such a gory wound in a bathroom countertop? It was super simple in my case. It was just a matter of me dragging a bunch of hand and power tools into the room and making some adjustments to my door installation project. Nature just took itscourse.

I do not recommend setting a power planer down on an acrylic countertop while the blade is still spinning. I missed the rear kickstand. A millisecond is all it took.
- The Great Goblin

Pay attention to the blades friends.
The Quick and Easy "Temporary" Countertop Patch
Thank you to Bernzomatic for sponsoring this post. The opinion and experience is 100% my own.
My last patch job started flaking out after a couple years. I think it was too shallow. This time, I drilled some tiny holes through the gouge to give my patch some extra grip.

The Secret Formula
My top-secret, "temporary" filling compound comes in a literal rainbow of colors. I have personal access to a huge collection of well-loved, creative sticks of counter-filling goodness.

Over 120 colors...
My tool of choice for this endeavour is is the Bernzomatic ST500, the Cordless Soldering Iron for Hobby and Household Use. It's trigger-start, adjustable a 3-in-1 torch about the size of a big, permanent marker.

3-in-1 modes:
- Soldering Iron: I've used the soldering iron when I made Stained Glass Christmas Ornaments and again to do some electronic's repairs to fix a Swimming Pool Salt Water Controller.
- Micro-Torch: The ST500 converts to a cool micro-torch by removing the front barrel and tip. It's a precise blade of flame. It's the mode is the mode I used to burn the some of the designs on my Distressed Wooden Flag and Pallet Wood Pirate Flag projects.
- Hot Air Blower: This is the first time I've used the blower tip on this torch. It transforms to a hot simply by unscrewing the soldering tip and leaving the barrel extension in place.

Fun tip: You may want to perform this step while the torch is cold.
Triggering the torch to life, ignites the refillable, internal butane fuel to a bright red glow. With the removable barrel left in place, the flame is diffused by an internal screen. No fire shoots out the end, like it does in micro-torch mode, even with the selector set for full blast.

Feel the heat
I peeled the paper on the crayon back and held it above the canyon in our countertop. The super-heated air quickly melted the wax until it dropped a few nice dollops into the hole.

To clear out any air pockets, I slowly waived the torch over the wax droplets without heating one place for very long.
I'm not sure if it would have scorched the acrylic or not, but I wasn't going to take any chances of creating a lovely, retro cigarette-burn design.

The melted-crayon smoothed out nicely and kept its throughout the heating.
I'd intentionally overfilled the hole it so that I could level it precisely even with the countertop with a fresh, clean utility knife blade.

I held the blade at a slight angle and slowly shaved the top layer off. Niiiiiiiiiiiiice and smooth.

The patch virtually disappeared into the countertop. It's even better looking in person than it shows on camera, probably something to do with reflectivity and photography.
I imagine that any countertop color can be matched by blending from a big box of crayons. Speckles and flecks could be replicated by shaving bits of colors into the hole before dripping the molten wax on top and melting it in. We're just lucky our top is plain white.

Even though my first patch lasted several years, I thought I'd toughen this one up by adding a shield of super glue. We'll see how it affects things in the long term.

This is a quick, 5 minute fix that quickly camouflages an ugly eyesore. It lasts longer than it should, considering it's just melted crayon. Kinda silly right?

Since we'd already substantially remodeled this room, I'm not in a big hurry to get back into it and replace the vanity top when we have so many more renovation projects to spend our money on.

The Torch Bearers are a group of tradespeople, DIY'ers, culinarians, adventurers and artists brought together to create projects using Bernzomatic torches and share their knowledge and ideas with you. Check them out here and get inspired to create with fire. Thank you for supporting my sponsors!
Visit the Bernzomatic Torch Bearer Site and see what the other awesome Torchbearers are up to.