

Working with A Pro Designer on an IKEA KITCHEN
With demolition of our crusty, old kitchen well underway, it's high time I reveal the grand plan for the final design.
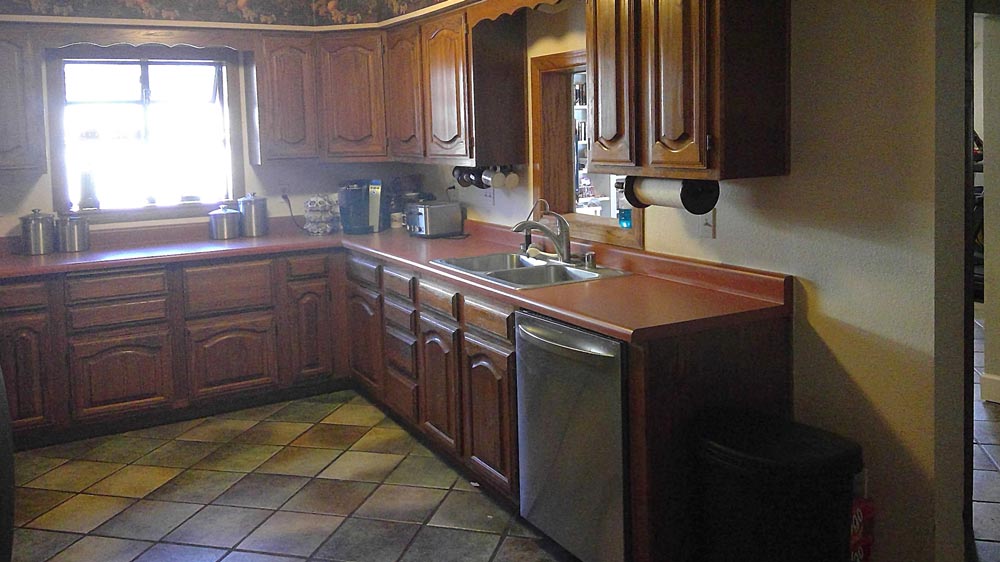
This project is easily the largest, most complex DIY endeavour I've ever attempted. It's taken a lot of planning. We're starting with this 70's / 80's mess that looks a heck of lot better in photos than it does in person, trust me.


Choosing to use IKEA Cabinets
After a bunch of research and consideration of our budget and time, we've decided to use IKEA cabinetry. Could I build my own? Probably. In fact, my blogging buddy John Gerard from Our Home From Scratch has a top-notch cabinet building course that empowers you to do just that. I know I can do it. In fact, I'm drooling to try it someday. But, the reality is right now that I don't have the storage space, time, painting setup, etc. to undertake on the challenge.

From the local IKEA showroom. We like this style,.. the cabinets, not the fake pie.
I've done a fair bit of research and come to the conclusion that this project is perfect for the IKEA system. I get it; it's an mid-range alternative to higher materials, but it's what we need, and it's a huge, HUGE money saving option. It has a solid warranty, and can be DIY'd with its simple install system It's perfect for our situation. It doesn't hurt that the closest IKEA is about 9 minutes from my front door, and has that cafe serving meatballs and cheap breakfast.
Sure, there's plenty of nay-saying, highbrow snobbery out there against using IKEA, but there's also as much, or more support for using it. Google it yourself. People really like it. I'm following the advice of people that actually installed IKEA in their homes, not those that hold their noses up and take pot shots at it based on their beliefs that custom cabinetry is the only way to go, unless you are a simplistic troll living under a moss covered bridge.
NOTE: I have absolutely no relationship with IKEA, other than I'm hopelessly addicted those meatballs in the cafe. Opinions are my own from my experience and research.
Choosing to use an IKEA Design Specialist
Again, I did my research. I played with the IKEA kitchen design software and noodled around with designs. The reality is, I don't know how to design a kitchen. Sure, I could snap various cabinets together and bumble through their software, but what do I know about real functionality and the best way to design a kitchen?
"IKD is an online team of professional kitchen designers who turn IKEA into affordable luxury for your kitchen."
- Inspired Kitchen Design
The Kitchen Design Process
We chose IKD's Express Design Service for this project, because we had a general idea what we wanted to accomplish. I just needed some help with cabinet selection, placement advice, and the development of the final design as well as uploading the file to the official IKEA software for purchase. For $245 they describe the service for people, just like me who...
- pretty much already know what they want for their IKEA kitchen
- just need a “second set of eyes” to check their design for potential problems
- are very busy, and prefer to do everything through email
If we'd needed a fuller featured experience, they also offer a IKD Premium service for complete design services.
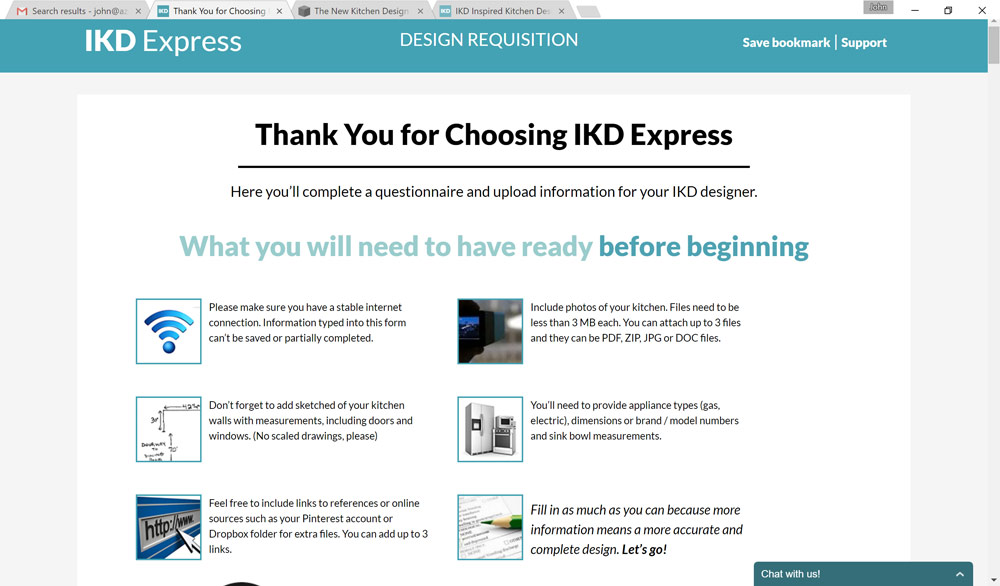
The Express Design Service was perfect for us. It all started with a simple online form for their designer to get to know our preferences.
We did the initial workup, sitting in a coffee shop (IMPORTANT: I had an iced Americano). I brought my measurements, sketches and photographs of the existing kitchen as well as pictures we'd found online to show our style preferences.
The form lead us through all the necessary items needed to get started. You don't have to send them anything fancy. Cell phone shots and hand sketches are fine, just be sure of your measurements.
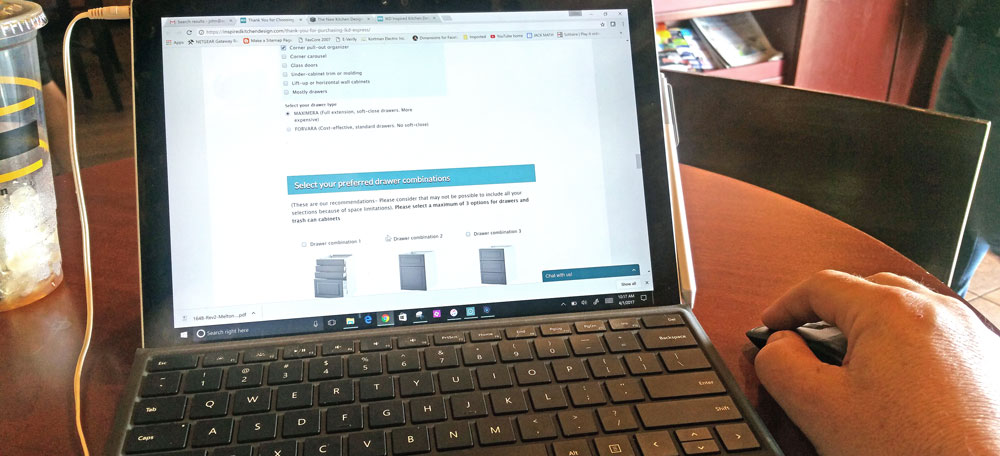
The online questionnaire let us chose our prefered cabinet styles and door fronts. We discussed and uploaded our photos, thoughts, ideas. Just filling out the form was a great exercise, helping us narrow our vision, much easier than fumbling through the massive inventory of IKEA's design software. I redid my hand sketch of the kitchen in Microsoft Word and added it to the form as a pdf. I'm sure a cocktail coffee house napkin sketch would have done just as good, but I like doing stuff neat.


A few days after I'd completed the initial design form, I received a first draft from our designer, Ana. She also sent some specific design comments and pointed out some of the unique challenges of our space that needed some decision making input on our end. The first draft was really close to what we wanted, a great starting point.


There was some concern about the height of our ceiling, so Ana included a soffit type filler above the new design. We discussed it and I decided to give up a little space between the countertop and uppers as well as snug up the toe kicks.
Design Revision #1
The cool thing about the IKD Express Design Service is that there are two included revisions. Ana sent me another online form to fill out with changes, thoughts, and questions. I could even print out the initial draft pictures, mark them up, scan it, and send it back. I did my markup in Photoshop Elements, because,.. dork, and sent them back to Ana.
The biggest change is the swap up to 40" upper cabinets and moving the glass-front uppers to the south wall. We'll also move the trash to the end, allowing for some wider lowers to the left of the sink.
There were some items I just didn't know what to do with, so I asked IKD to suggest a solution.
Edited to send back, with my adjustments in blue. (click to enlarge):
North Wall
South Wall
Ana did not disappoint. She quickly came back with the adjusted file. It was shaping up. Check out the dimensioned images (click to enlarge).
North Wall - Rev. 2
South Wall - Rev. 2
Design Revision #2
We were happy with the south wall design at that point and called it final. The north, however, took some thinking. Although I had originally told IKD I didn't want to move the sink, it looked silly offset in the widened "window" opening to the family room. We decided to center it and split the cabinet that had been to its left. into two smaller ones, straddling the sink base. Plumbing is in my future it seems. I also gave them the ok to move the window around a bit to allow the best situation with lining cabinets up from upper to lower.

The Final Design!
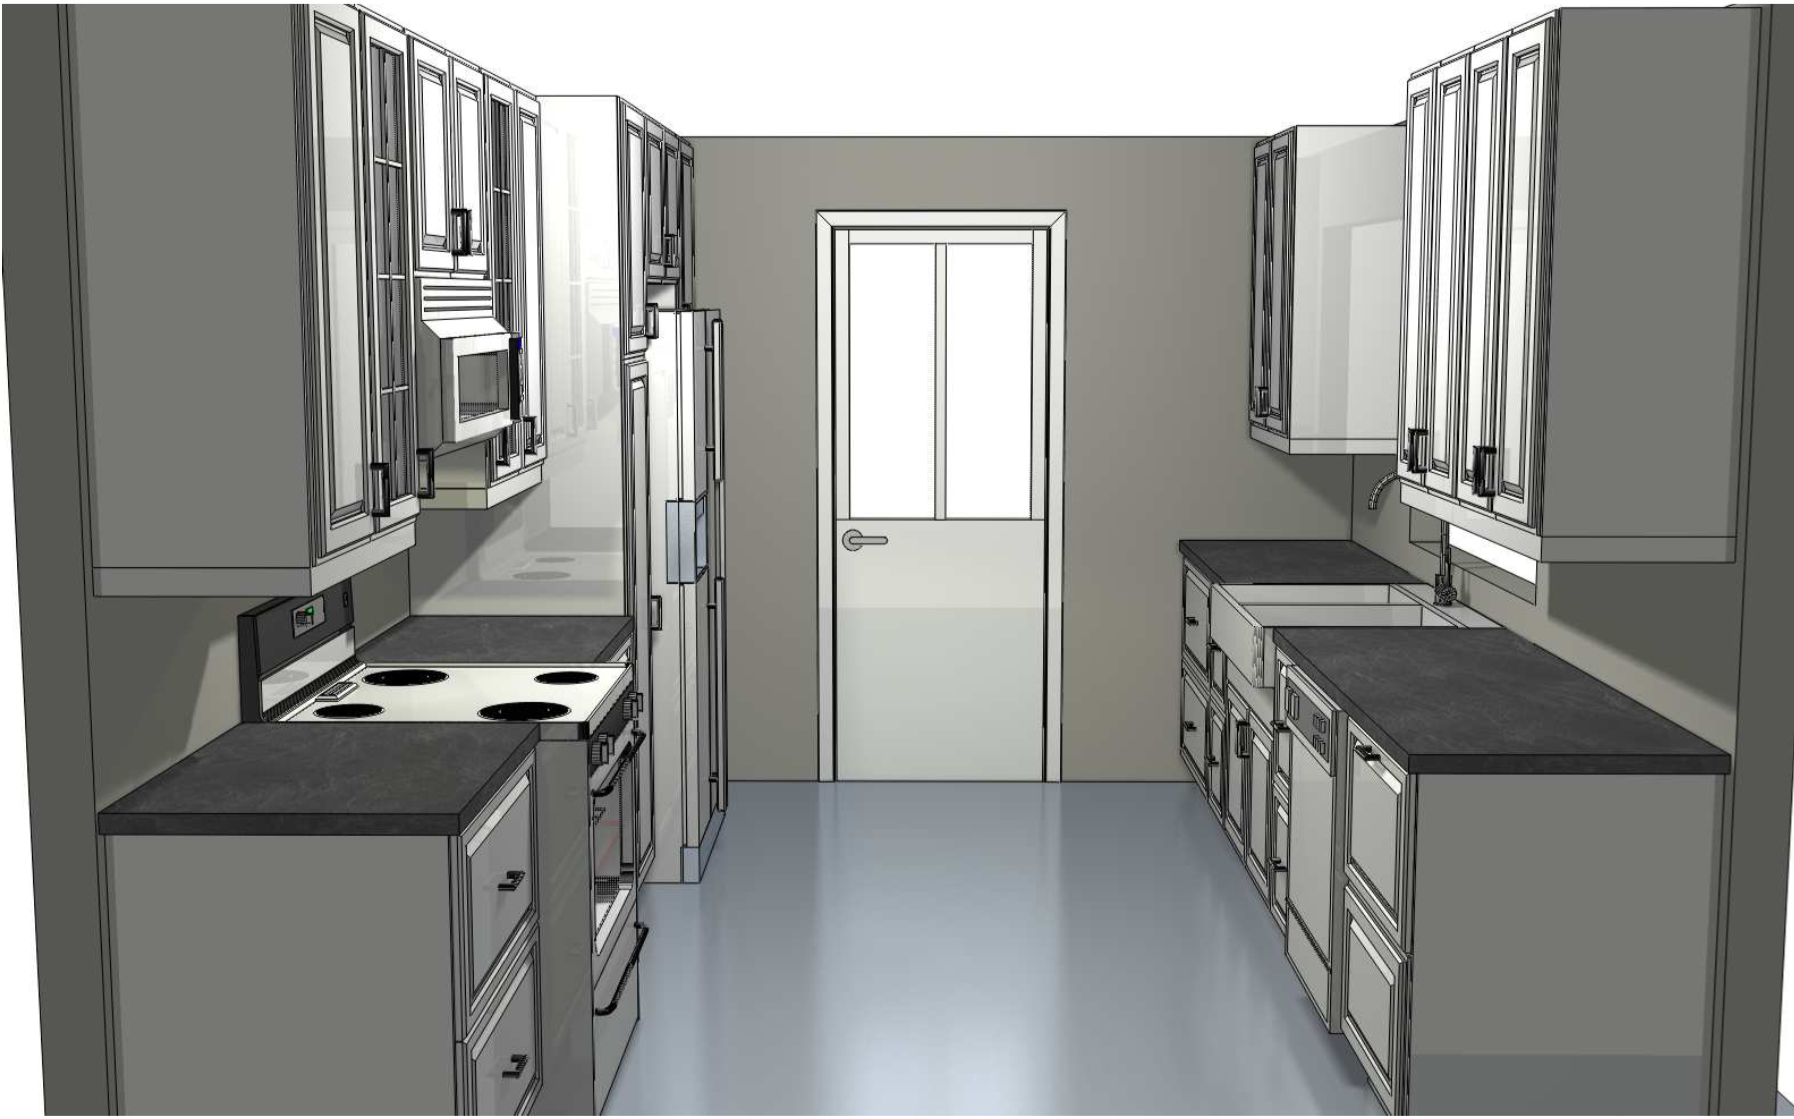
A few days after I sent my changes, we got a final design. It's going to work out really well.
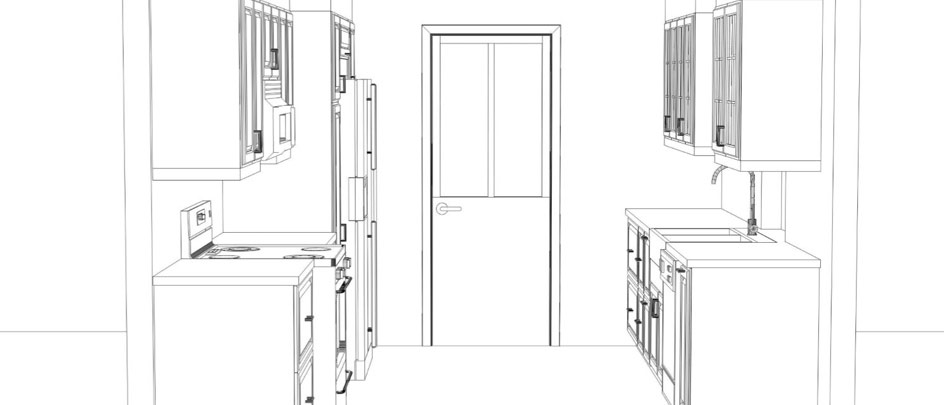
The drawings are not showing tinal finishes of course, but it has the cabinets and appliances in place. The U-Shape kitchen shall become a galley, with a door leading out to a future, private patio for that all important, morning coffee.
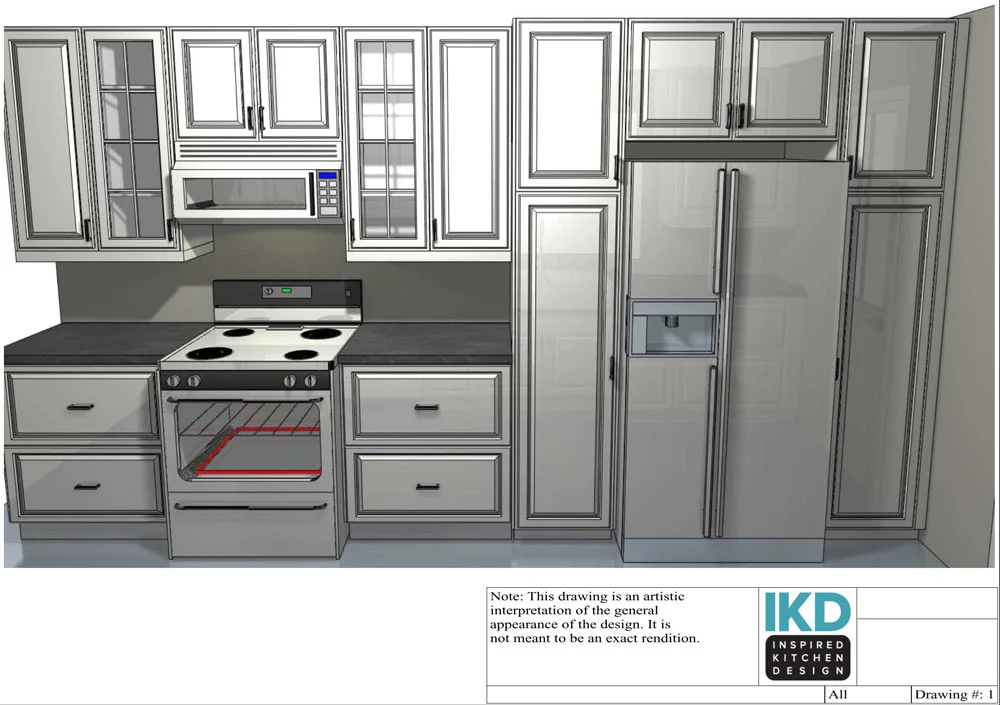
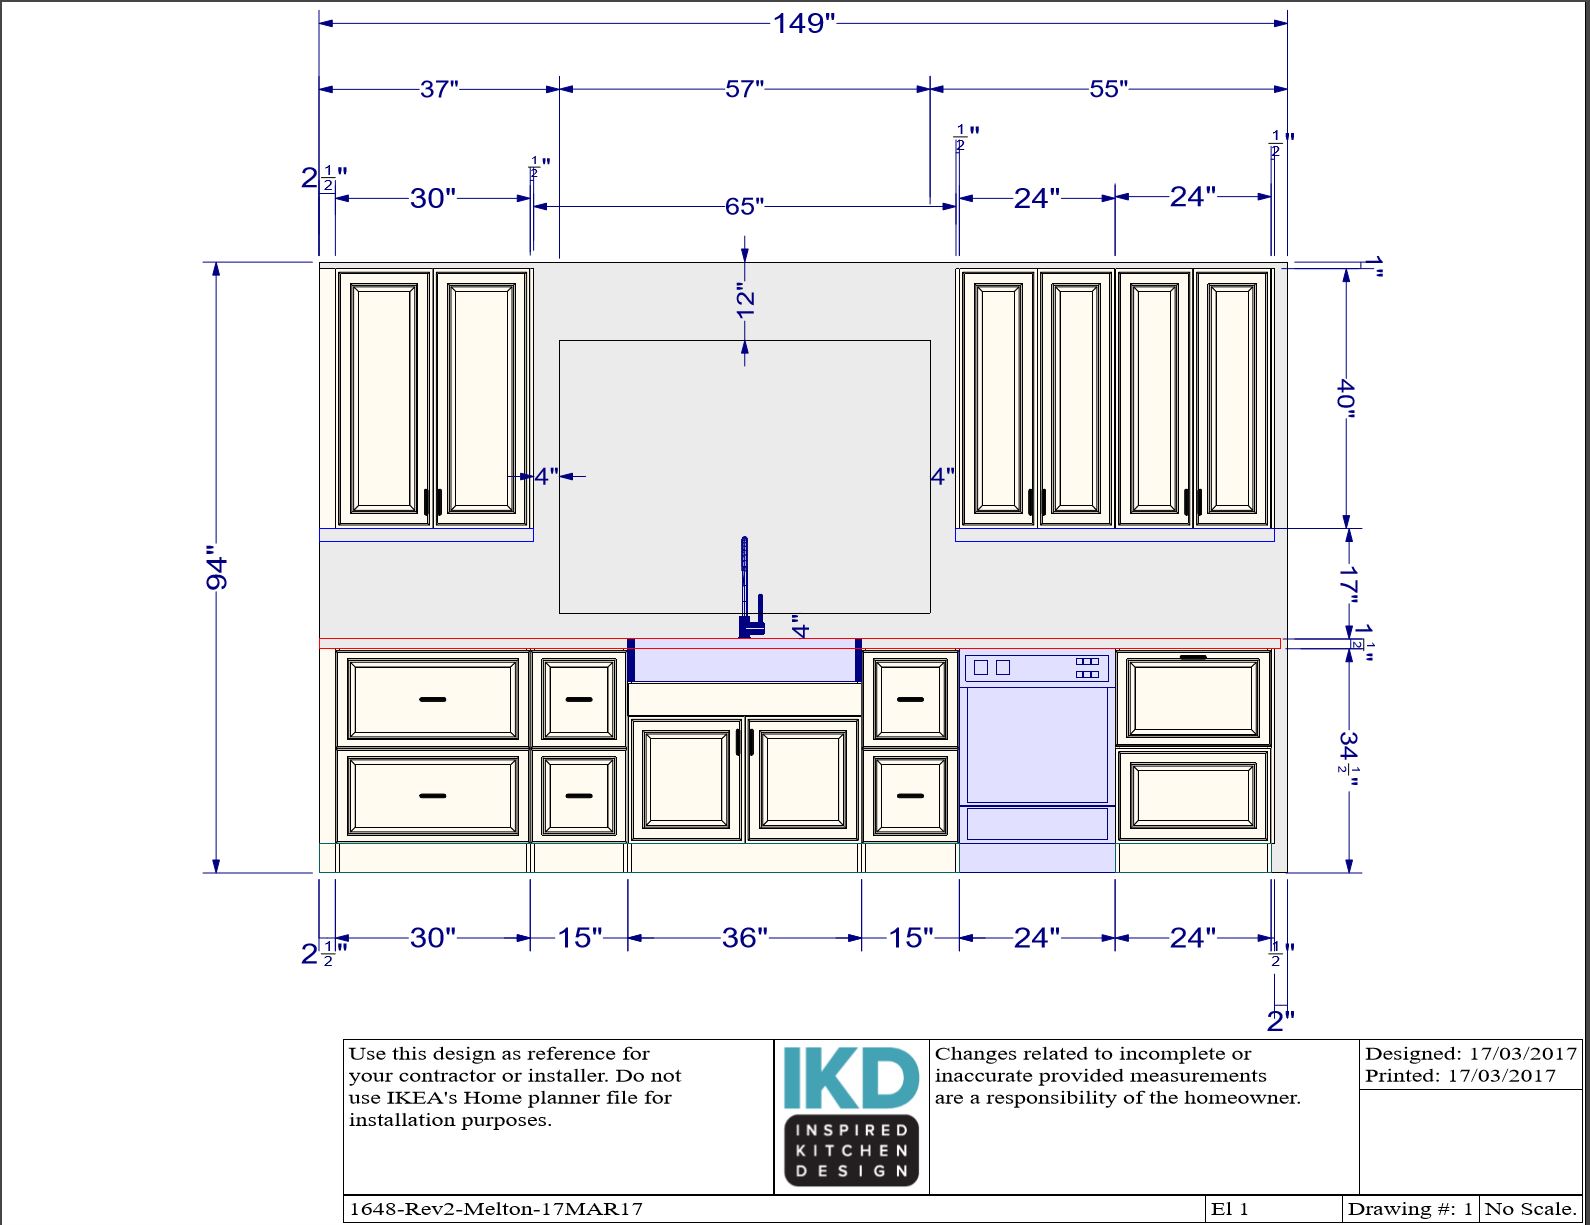
The South Wall Design
We have a goofy bit of countertop spanning what was originally a too small refrigerator space with a toaster oven and microwave plopped on top. The fridge sitting at the entry end of the kitchen, coupled with the soffits above makes the made the space feel cave-like. The range tucked into the corner, blocked the drawer beside it from opening unless we opened the oven.

Here's the IKD design for that wall. We have working space around the range, a couple glass front upper cabinets and a split pantry layout. We've opted for a hood mounted microwave with a baking element, so we can drop the old toaster oven. These cabinets go all the way up. No soffits!
I'm going to do some electrical work to move the fridge, oven and microwave. It will need counterop receptacles and light switches too.
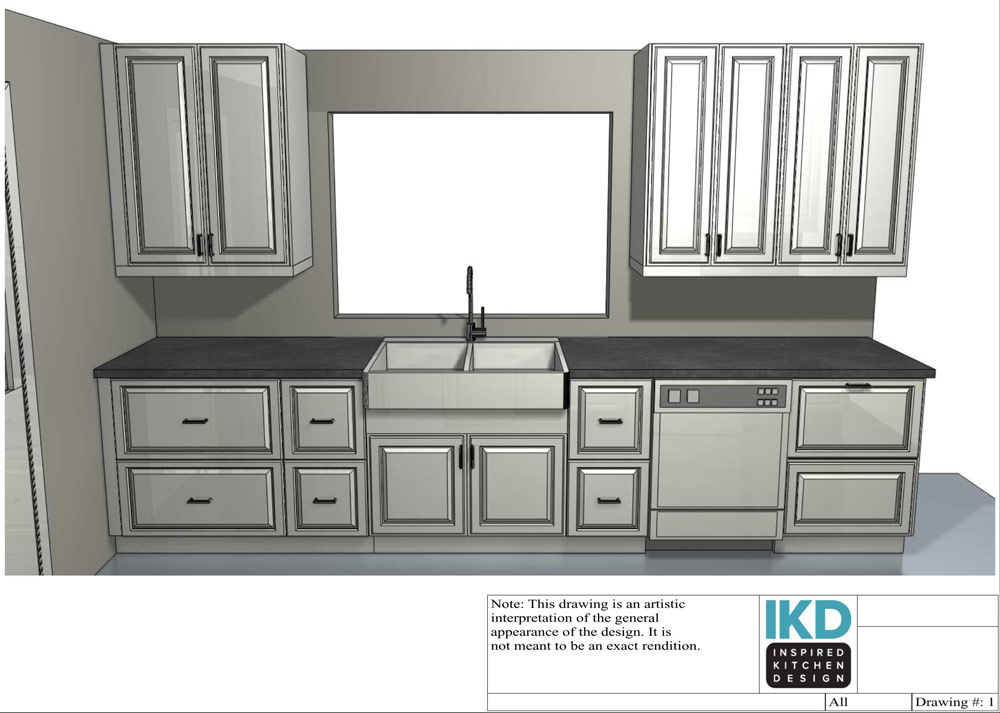
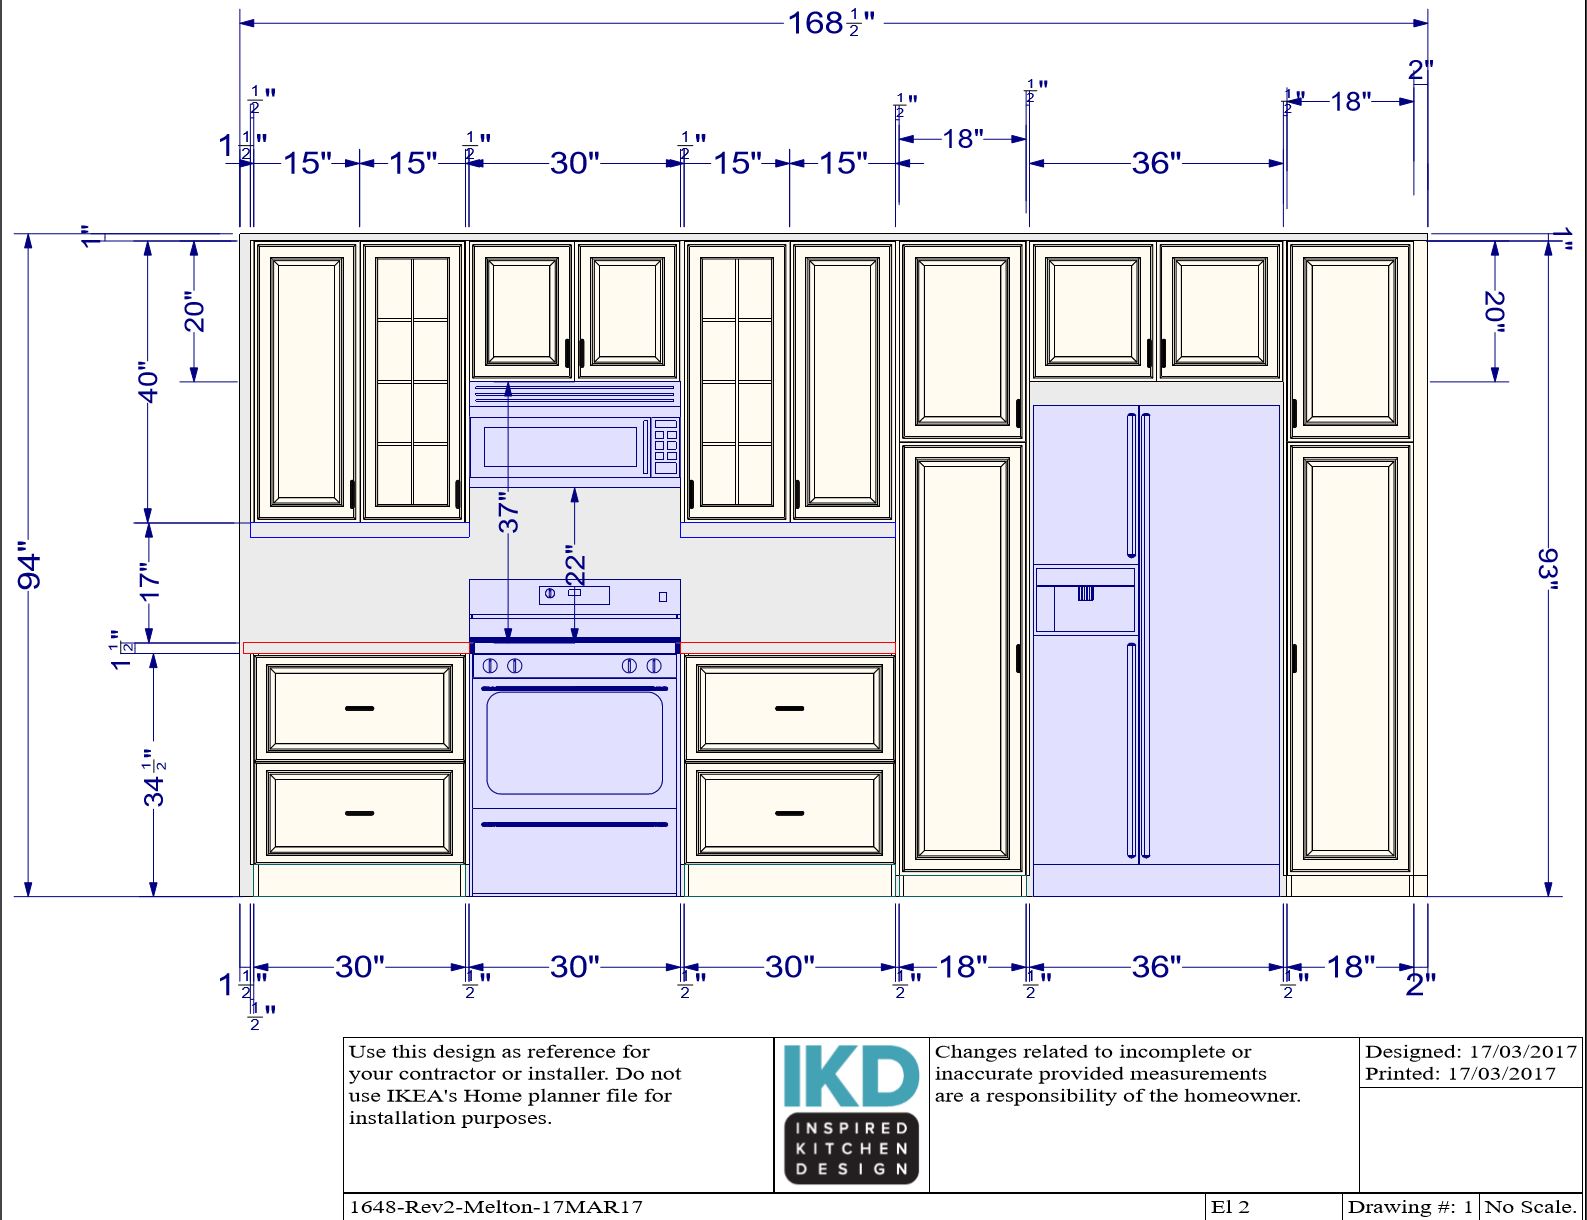
The North Wall
This is the big one, requiring serious construction, taxing my abilities to their fullest. I think I'm up to it.
Since we're losing the cabinetry on the west wall and some of the uppers, we'll pick up some at the far right end of this wall and, again, extend cabinets all the way to the ceiling.
We'll pick up some space at the right end.
Here's where it gets serious. I'm going to open up the pass through window to the family room. It's going to take some structural framing work to get it done. It's the original back wall of the house and is certainly load-bearing. The current opening must be the back window.
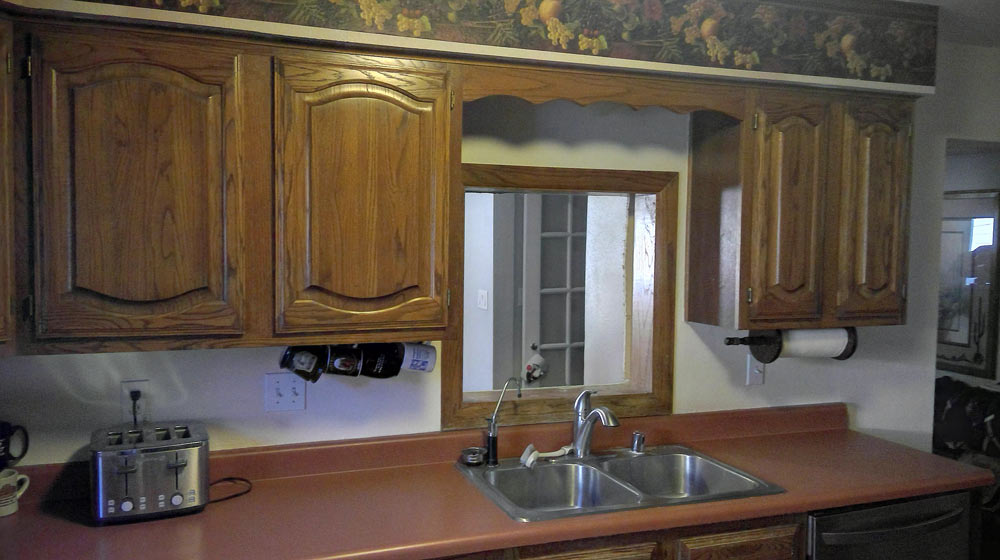
How about that burnt orange countertop eh?
Look how clean the new design looks.
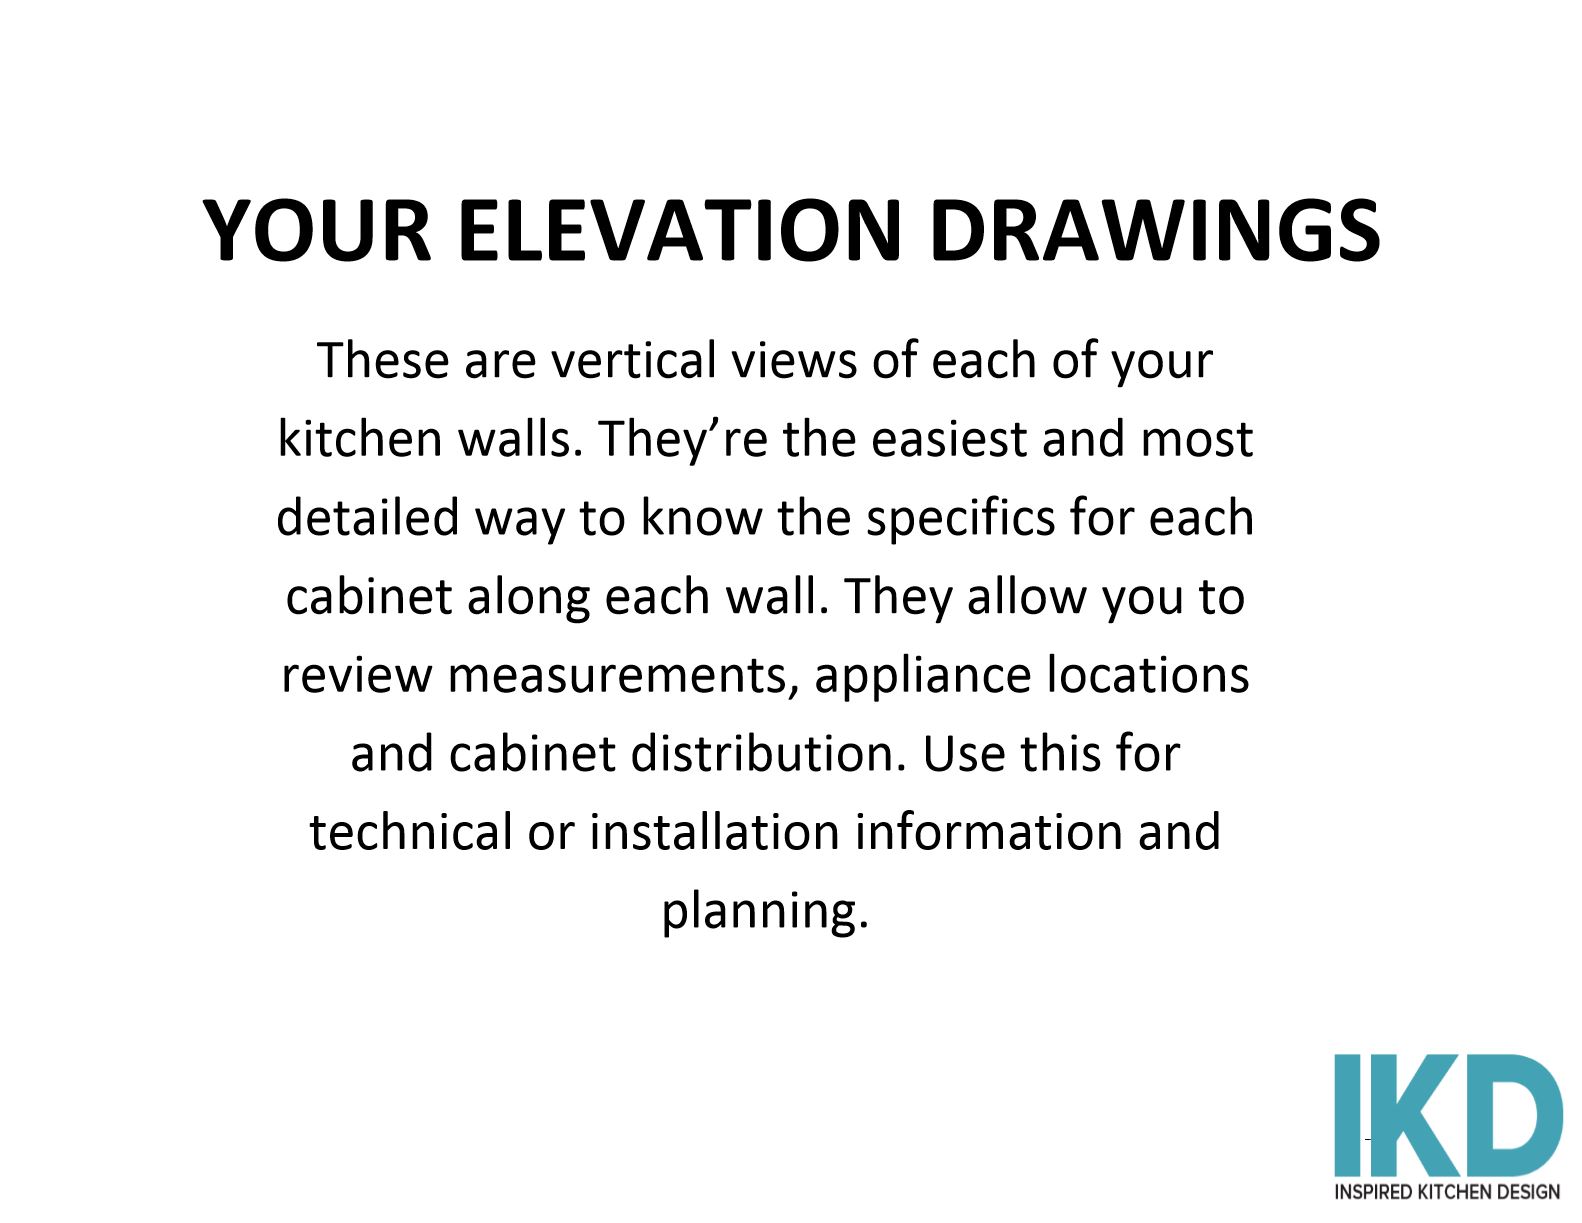
IKD provided plenty of measured drawings from their own software so I don't have to fumble through the IKEA stuff.
Check out the final elevation diagrams for doing the layout.
The best part of the service was that they uploaded their design into my IKEA Kitchen Designer account. IKEA won't sell to you unless you have a design in their system and they go through it. IKD includes a printout with the full parts list from IKEA's designer in their final package.
Even then, there were a few bits and pieces, the customizing touches, that the IKEA system didn't pick up. IKD did such a tight design that they gave me list of extra stuff to take with me when I go shopping.
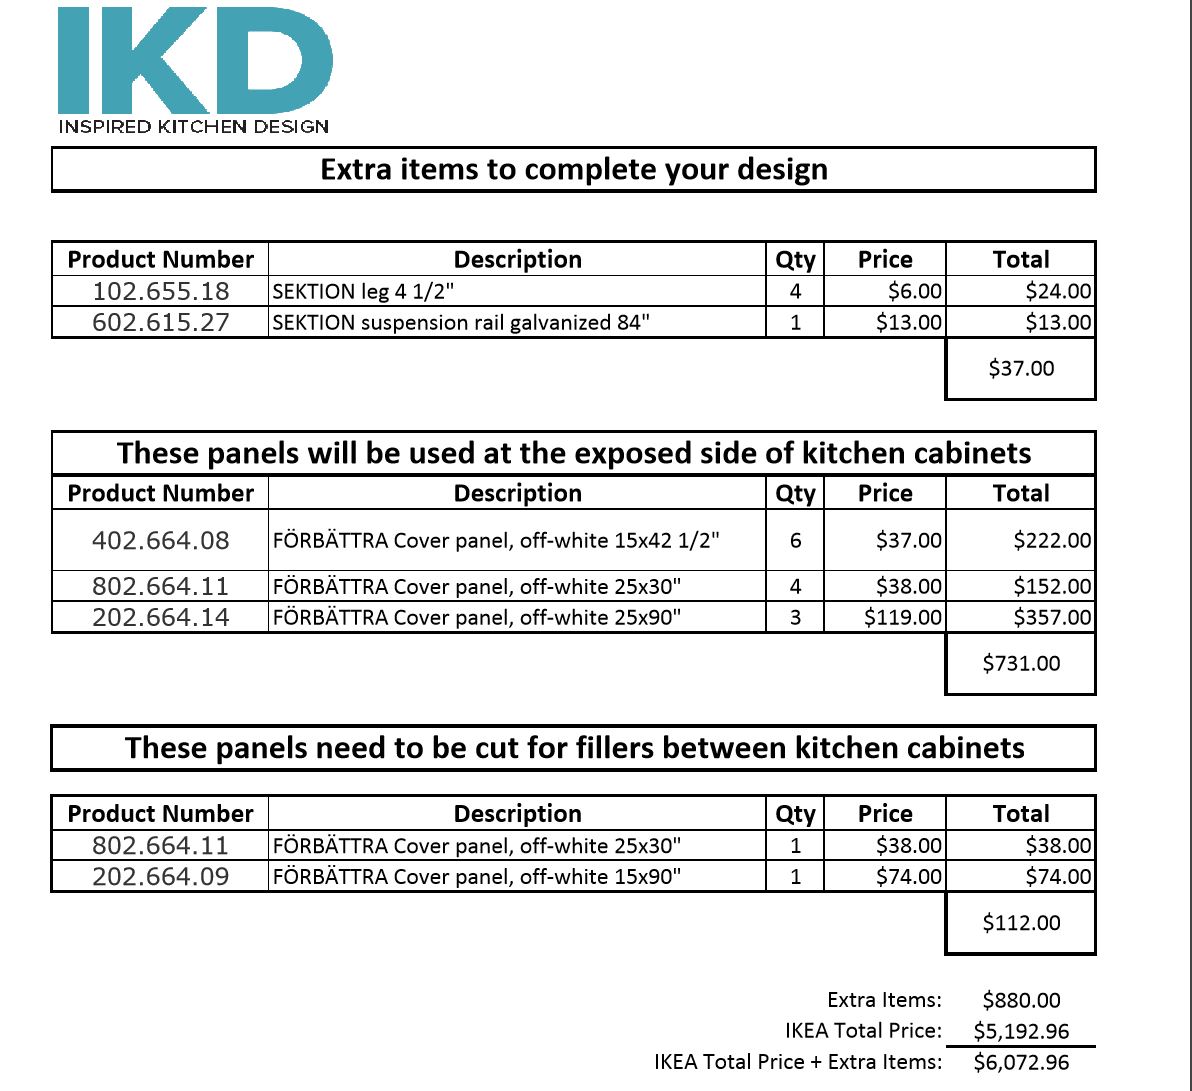
Notice how the total price brings in the total from the IKEA printout as well as these extras? No surprises at the checkout.
That's our new design. Keep on coming by the blog to see how it unfolds. Our plan is to purchase and install the south wall first, before doing the heavy work on the north wall. It will help financially to phase it in as well. We just have to spend $3,000 or more, in one purchase, to get the current 20% discount. Shouldn't be a problem. All the big stuff is on the south wall. We'll target the summer sale for another batch.
What do you think?
