

There's a whole lot going on in our kitchen, but unfortunately it's nothing to do with food. Well not much to do with food anyway. There's always food.

Ham. Cheese. Period. Like a barbarian before battle.
Since I finished installing the power for the new stove at its new location, I'd laid out the cabinet locations on the wall with pencil and masking tape. I took the liberty of expeditiously losing the memory card, so I can't share those pictures with you, but you'll spot some of it moving forward.
I'm focusing on the south west corner, the far left of the kitchen. Here's a refresher on the plan:

by Inspired Kitchen Design
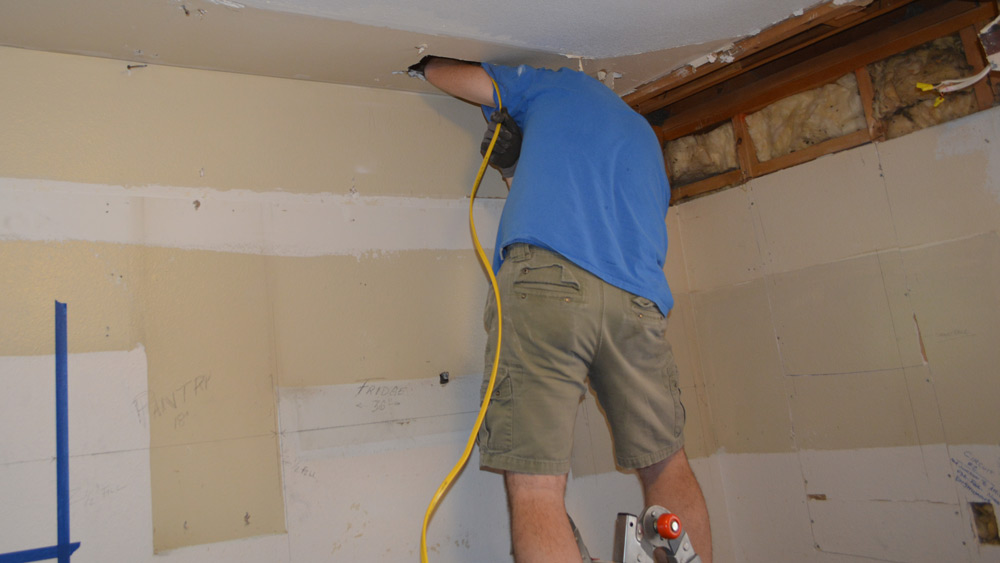
It's a going to be a lot of work since the soffit didn't have any existing drywall over it, but I'd use the situation to my advantage. I have a bunch of electrical work to do, and absolutely zero desire to climb up into the attic in the summer. I'd do as much as possible from below, reaching up through the hole.
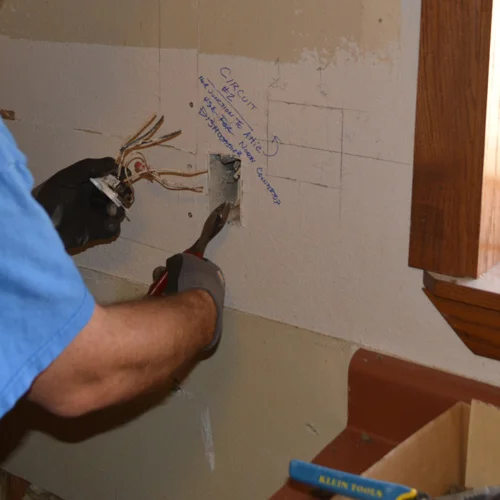
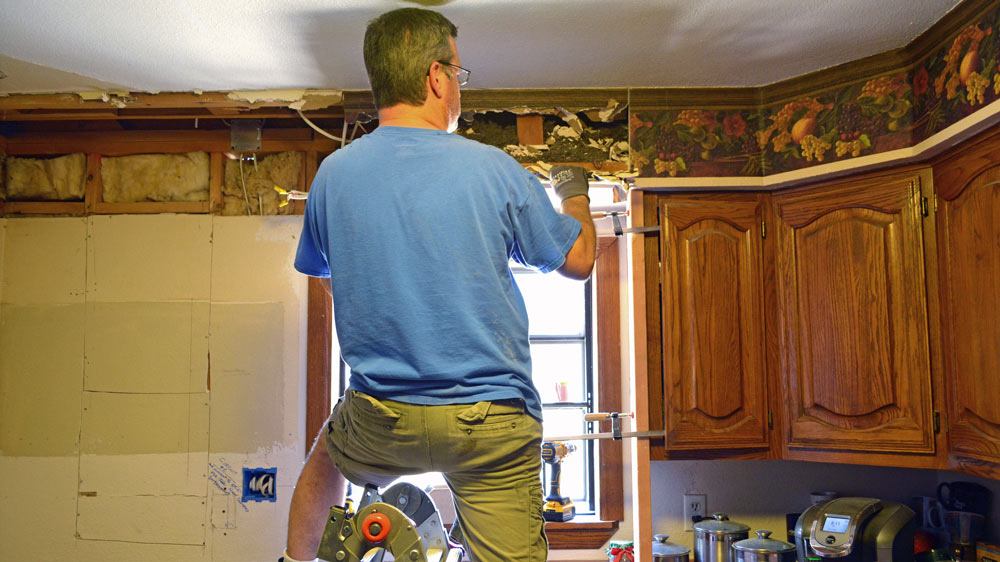
I needed to install a light switch location, both for the interior light and for an outdoor light since we are going to add that exterior door. I started by tracing out the location for the new box.

Yes. It's an official Detroit Lions electical box. It came with the shirt.
There was also a countertop receptacle from circuit #2 that would be floating out in the middle of nowhere in the new design. It was on the same circuit as the receptacles on the north wall so I needed to keep the line intact.
I turned off the circuit and chopped the cables. (See AZ DIY Guy's Scary Electrical Warning). I reconnected them with wire nuts temporarily. I'd splice them in a junction box in the attic later.


With the power completely disconnected, I could chop the wires behind the receptacle out and heave that paint crusted, nasty old outlet in the trash bucket.
The existing outlet box was a "new work" version, meaning it was nailed to the studs before the original drywall got installed. I slipped a hack saw blade between the box and the stud and sliced through the two holding nails so I could pop the thing out of the wall.


I shifted over to the south wall and dropped a new 12/2 with ground electrical cable down the wall. Avoiding the sweltering attic at all costs, I could reach through the old vent-hood hole and stuff the wiring down through an existing hole in the 2x4 top plate.
The two #12 wires with a bare ground will feed a dedicated 20 amp circuit for the refrigerator. We'd lurked the 4th of July appliance sales for a new counter depth 'fridge to plug into it until we found a new one. It gets delivered next week.
The Headless Electrician?
I left enough cable to feed all the way back to the house panel and moved my focus to the base of the wall.

Spaghetti wires.
A brand new piece of drywall got screwed into place. I'd cut out for the existing stove outlet and the new water valve before I attached it. I'll abandon the stove plug soon, but for now we need it for cooking.
We're not doing much cooking with the kitchen in steady state of disaster. Carry-out and barbarian ham and cheese dominate.
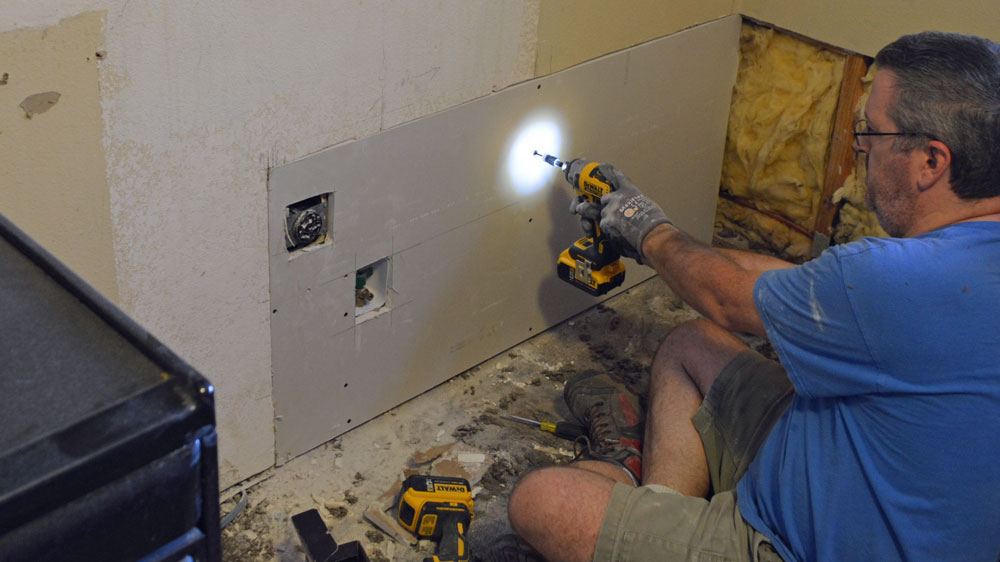
Impact Drivers make awesome drywall guns
I cut another hole for power with my Oscillating Multi tool, reached through, and pulled the cable out. A new cut-in "old work" box will get the fridge receptacle later. For the time being, I rolled the wiring up and tucked it in for hibernation.

Tucking a little something away for later.
I also cut in a double-gang box for the light switches and fed the wires down the east wall.

Installing a switchbox
I marked both ends of the cables to keep everything straight. Maybe one of these days, I'll talk about three-way switches. Keeping your wires identified is crucial to avoid heartache later.
I'll be latching on to those up in the attic sometime when I can go up, before it gets too hot. For now, I stuffed it up out of the way.
I screwed an extra junction box cover over the wires going up through the top plate. Those cables needed protection in case I forgot where they were and decided to shoot drywall screws through and damage them. (Spoiler: Of course, I would certainly have hit one of them against the odds, because,.. I tend to do stuff like that.)
A function at the junction
I decided to extend my soffit destruction another few feet to the north. I chewed it up with the reciprocating saw and yanked the thing down in an avalanche of that black-ish mystery insulation. As a bonus, I managed to land a boatload of the nasty insulation into the better part of our collection of coffee mugs sitting open-mouthed on the counter, almost directly under my demolition zone.
Idiot.
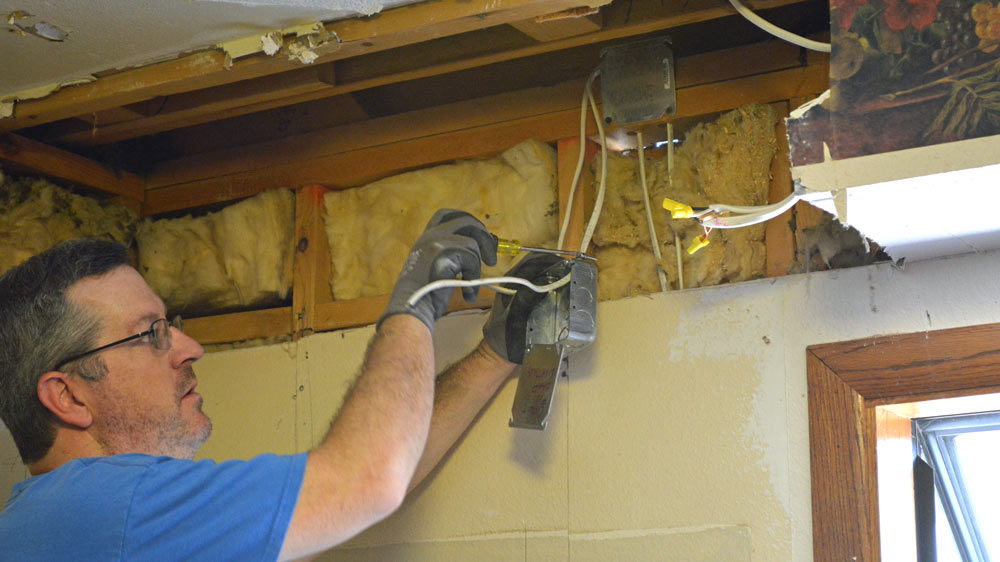
Now that there was a gaping maw into the attic, I tucked two electrical junction boxes up and out of the way permanently, screwing them to the inner framing of the gable-end of the house.
One will be for lighting; the other is just to splice the circuit back together from the receptacle I'd remove.

Sticking my head in the oven.
If you follow me on Instagram, you may have caught a sneak peak of my next oversight as I tried to seal up the ceiling..
At least I was able to close up the rest of the wall with the sheet of 5/8" drywall I had on hand. I had to dice it up into weird lengths to be able to end each piece on framing.

After weeks and weeks of temporary insulation falling from the ceiling, I'd tucked the new bats up there nice and neat, to permanently fill the void and stop the Mr. Heat Miser from setting a flame thrower to the west end of our home, baking us alive and sending our air conditioner into overload.
"Oh, some like it hot, but I like it REALLY hot."

Tucked and tucked.
Next up, I'm going to seal that ceiling up and start with the drywall mud and texture. I can hardly wait!!! ...to have that step completely behind me.
Progress Check!
It's been slow going up until now. Picking away on weekends does not make for a speedy remodel completion. But now with demolition of the existing cabinets, some electrical upgrades, and the water line behind me. this south wall is starting to take shape. Things should start falling into place quickly.
Even in it's current, rough shape, I can feel a better space coming. I can almost see the lines of taller wall cabinets instead of the weird wallpaper covered soffits.
I can barely remember how it looked just a few months ago.
How it Looked Then:

Ugly. With the too small fridge hole, old stove and tiny microwave. Yeesh.
How it Looks Now:

The Kitchen half gone.
Until next time friends. What do you think? Anything I should keep my eye out for?