

I had to pause my rabid demolition our kitchen, halfway through. I'm weekend warrior-ing this massive DIY project when I can find the time to chip away. I have to have it back cooking, cleaning, and fast-food deploying order at the end of each of my work sessions.
Trouble
The not-so-secret trick of pulling a sink cabinet out of place is to shut off the water before doing it. Otherwise, it's a whole big thing with flooding. Given the choice, I generally avoid house floods.
I was super pleased to find out that the knobs on both valves that fed the faucets spun endlessly without doing anything. I couldn't turn off the water.

Seriously, valves,...you had one job.
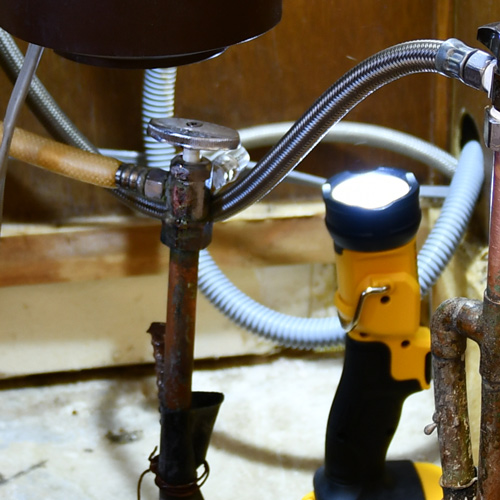
These ugly, patina-corroded water lines come up through the concrete slab (which can be seen now that I've cut the bottom out of the cabinet.) I'm going to have to move them somehow during this renovation, but for now, I have more pressing matters. I just want to get the sink out in such a way that I can put it back after I work on the wall (especially during the holidays).
How To Replace Sink Valves
I picked up a couple valves that only took a quarter-turn to open and close. The first was a dual-feed for the hot water, one tap for the dishwasher and another tap for the faucet. The valve I'd use for cold water had a single tap, just to feed the faucet. I would no longer need a second attachment for the refrigerator, since I'd already installed a water line on the other side of the kitchen.
I turned the water off to the entire house (refer back to that whole flood avoidance concept above). Luckily, I don't have to mess with a water company valve out by the street. We have a simple, lever valve near the front hose bib. It takes a simple pull and we're instantly without water. I suspect you won't find these quite as handily placed outside the house in areas with hard-freeze winters. They're probably indoors in a basement or utility area of the house.

Water off!
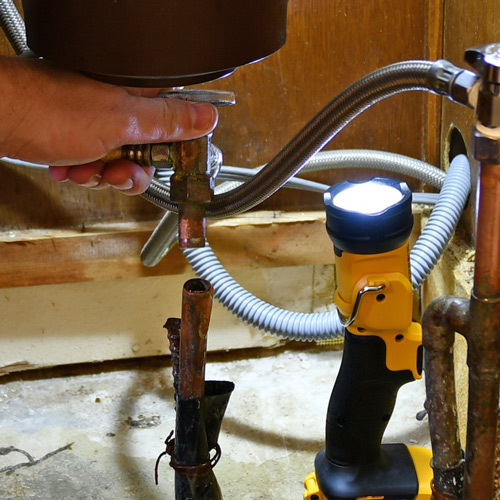
I turned on the kitchen faucet to let the residual water out of the lines and relieve the pressure. With the water off, I could remove the old valves without a torrential geiser. I slipped my trusty Channel Lock Pliers on the bottom nut, braced the assembly to keep from twisting the copper pipe, and started gently unscrewing.

Nice and easy.
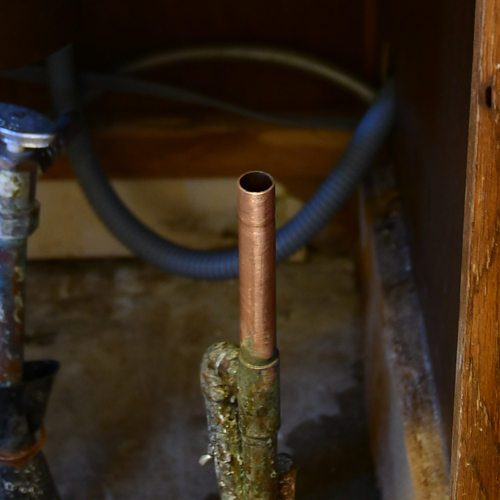
The bottom nut popped free and slid down the copper tubing letting the valve lift off. I don't know when these valves were installed last (1979?), but good lord, they left ugly corroded messes of the copper plumbing (as opposed to beautiful corroded art pieces).

A mess to fix later.
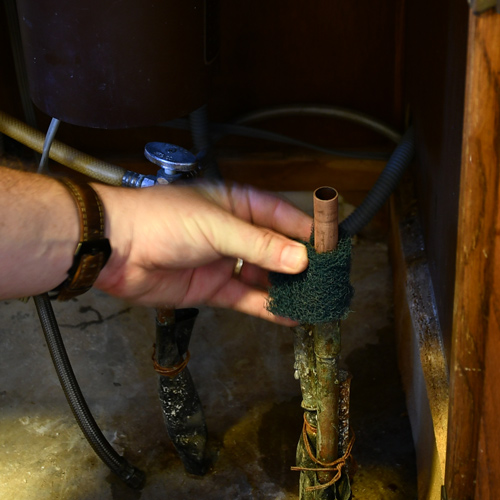
I cleaned up the copper protruding vertically through the floor by scrubbing it with a synthetic steel wool sanding pad. It was simple to fit it back in there and it's what I had easily on hand. Emery cloth or a wire brush would do the trick as well.
I removed the nut and compression sleeve from the new valve. They slip over the pipe first.

One ring to rule them all, one ring to find them, One ring to bring them all and in the darkness bind them. One ring to bring them all and in the darkness bind them.
- as translated by Gandalf
I neatly wrapped the threads at the base of the valve with some teflon tape to make sure it would seal and not let water ebb out and cause more of that nasty patina and corrosion. It just takes a simple overlapping wrap or so, enough to stick in place.
I hand spun the nut onto the fresh wrapped threads to get them started.

Gleaming, new lovliness.
To keep the new valve facing the right direction and to avoid bending the copper feed line, I braced the hex-shaped body with a crescent wrench and tightened the nut with the channel lock pliers.

Both hands on the wheel.
I reattached the water line the same way. Done.

More Trouble
With the first valve happily in place, the second decided to be a jerk and give me a fight. I couldn't loosen the nut. I tried WD-40 and brute strength to break it free, but was really concerned that too much macho Hulk torquing on it would kink or break the tubing. That would change this easy repair into a full-fledged emergency.
I cut it off with a mini tubing cutter instead of taking the chance of catastrophe.

Once the old valve was removed and the tubing was cleaned up, I followed the same steps to replace it and attach the water lines. Grace helped hook up the dishwasher

Get rid of cheap supply lines
I thought I had replaced all the plastic water lines in the house years ago. I'd done it (pre-bog) after a small slit in a toilet feed line spewed for 8 hours, soaking the place. It was thousands of dollars of an insurance claim. I had to run out and get a braided steel waterline to replace this last holdout that had been hidden up under the sink.

Much better.
There's just no comfortable way to work under a sink.

It's all done. Now I can simply give the knobs a quarter turn and the water turns completely off. I'll be able to disconnect the braided lines and the drain pipe to pull the cabinet out of the way for daily project work and recconect them for real life.

Catch up on the kitchen remodel project so far:
