

Our new kitchen design includes enlarging the small pass-through-opening (former exterior window?) to the family room. We can't go "open concept" with our floorplan, but enlarging the opening will make kitchen feel much more connected to the family room and brighten the space.
It's a big project. So, game on.

The obligatory "before" picture, from simpler times
I'd already torn out soffits, peeled drywall, removed electrical, moved the sink drain, shifted the water feed lines and marked the new cabinet locations on a fancy strip of brown paper.
At the end of each weekend, I've been setting up a makeshift kitchen with hunks of countertop a few cabinet bases, the sink, and the dishwasher. This time, when I disassembled my temporary solution, I also demo'd the very last, chunk of original cabinetry still standing, the far end panel where the dishwasher once resided.

The last time I punched through a wall, I installed an actual window. It was an exterior wall and super easy. This time, I was ripping a BIG hole through what had originally been an exterior wall in the 1970's, but this time it was load bearing. It was holding up the roof of the original kitchen AND the adjoining family room addition from the 1980's or 90's.
Building a Temporary Load Bearing Wall
Something needed to hold all that weight while the wall was undergoing reframing. I picked up a bunch of decent-looking 2x4 studs to build another temporary wall a couple feet over. This new wall would run parallel to the existing and perpendicular to the rafters up in the ceiling.
I started by drawing lines across the studs that would become the top and bottom of my support wall. The lines marked where I'd be screwing each piece of vertical framing.

I screwed the top board to the ceiling, just enough to hold it in place so I could slip studs in. Since there's not a straight line or surface anywhere in the house, I had to measure and cut each piece as I went. I added 1/8 of an inch to my measurement to make a super tight fit and make sure that it was really picking up the load.
I tapped each stud into place with a hammer and level and attached it all together with 2" screws instead of nails. It would be easy to take back apart.


It was a pain in the butt to work in such narrow space, while avoiding stepping on my new copper plumbing contraption on the floor. At least I wouldn't have the roof caving in on me while I worked.

Come Mr. Frodo! I can't carry it for you, but I can carry you.
Demolition
With a piece of heavy, brown paper covering the small, drive-through window sized opening to the family room, I started the smashing and bashing. Once again, I called in the Vice President of Destruction, Mr. Stanley FUBAR to do his duty.All the framing that wasn't structural came out easily.

Weilding the Stanley 55-099 FatMax Xtreme Fubar Functional Utility Bar
I didn't have to worry about tearing drywall nails backwards through the face of the family room on the other side of wall that I wanted to remain intact. That wall had already been furred out a couple inches, so I wasn't going that deep.
I loaded a heavy, carbide-tipped demolition blade in my reciprocating saw to rip through nails and wood.


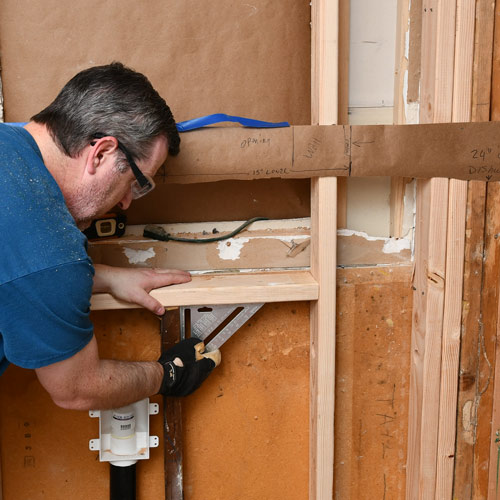
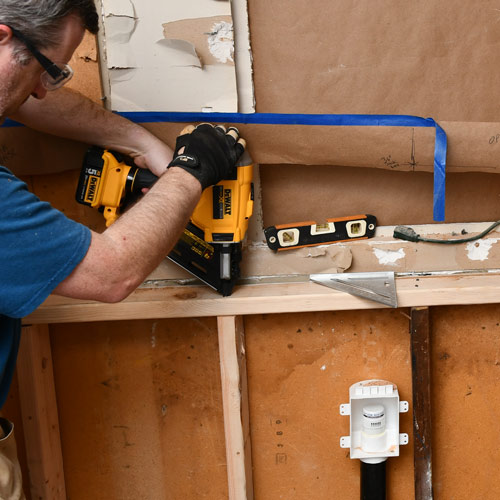
There was a little framing I wanted to keep and some initial pieces to add, just at the right height to hold a new, load bearing beam. I slipped my laser level on an obliging temporary stud to project a line at the height of the bottom of the beam-to-be.

You know, I have one simple request. And that is to have sharks with frickin' laser beams attached to their heads!
- Dr. Evil
I'd be matching the height of another, existing beam, one that holds the weight of an archway to the right. I wanted to keep the same, visual line across the whole space. I installed a stud at just the right height and started cutting away the old, "window" beam.

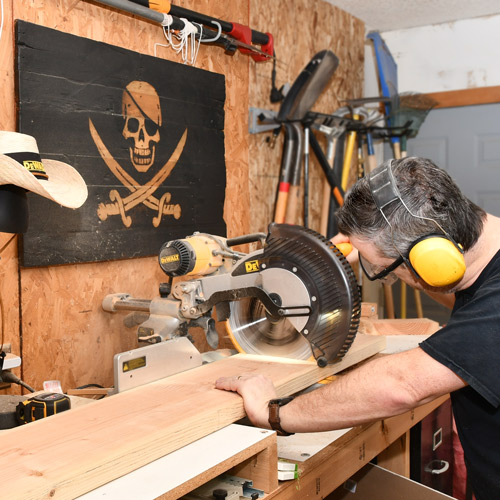
A quick note on the earmuffs - I know my big, yellow Princess Leia looking earmuffs are sexy as hell in the photos. Here's the thing; they work awesome. I don't like to screw around with dainty little earbud things when I'm doing heavy work and wearing gloves. I just sling the big beasts on and off as I go. I don't care what I look like, it's not like anyone will see me...
Hearing is serious stuff and it's close to home. My beautiful wife has now completely lost her natural hearing. We've spent thousands on cybernetic, cochlear implant technology and surgeries; she's struggled with therapy and retraining her brain to interpret the electronic signals. It works, but it's not great at all. It's serious stuff friends. It's not worth taking chances with your hearing. (More)
Be safe. - John
PS - Safety Glasses.
Building the Load Bearing Beam
I'd picked up a couple of 2x10's that were the straightest ones in the stack. They were longer than I needed, which allowed me to trim the ends off and loose a couple splitting ends.
A 2x4 is actually 1½" x 3½". Therefore, two pieces of 2x material together only adds up to be 3" thick. To get the right size and offer another layer of strength to my beam, I cut a piece of ½" thick OSB board and slipped it between the 2x10's like a big, long sandwich. Sideways, it was now the thickness of the width of the 2x4's in the wall.
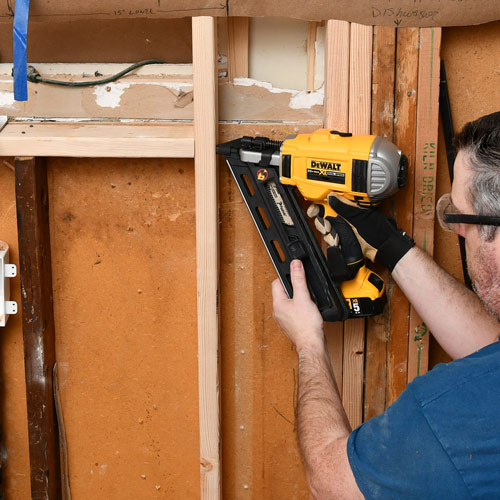
Covered in sawdust, I brought out the big gun. I fired a good amount of ring-shank nails from the Dewalt 20V Max XR Brushless Dual Speed Nailer. Those three pieces of wood became the monster beam that would bear the load of the ceiling and roof.

Shooting a monster beam
I lugged the big, heavy log from the garage, back to the kitchen, and squoze through the awkward temporary wall. With teeth grit, a quick grunt, and a heave, I lobbed it up into place.


I sistered an additional supporting 2x4 on each side of the end of the beam and clamped everything together tightly to prepare it for nailing. This thing was not going anywhere.

The three sisters
The last time I used a framing nailer, it was when I installed a window in a closet. That time I was firing my beloved Porter Cable pneumatic gun with a little pancake air compressor. It was open and outdoors, so I didn't mind the cord, hose, and noise. A cordless nailer sure made it more convenient this time.

The shootist
After I installed all the supporting framing, I toenailed the ends into the new beam. The weight was carried again. Relief.

Defining the very meaning of temporary, I disassembled my short-lived support wall and carted it back out to the garage. I'd use some of the lumber for additional framing, the rest will certainly come in handy for one future project or another.


It's hard to see with all the old siding and drywall still in place, but this opening will more than double in size.
I still had to reframe the lower wall. It was so torn up from the prior drain vent stack line that there's hardly much good wood left. At least the vent stack issue was solved by my recently installed air admittance valve solution.

Back to DEMOLITION
With the load carried and the temporary wall down, I tore out most of what remained below the opening. The coming IKEA cabinets will hang from a wall-mounted rail system. I didn't want all that weight supported by hacked up framing. I unrolled my "storyline" paper with all the cabinet locations marked and stapled it back to the wall.


A last bit of Framing
Fresh, clean framing slid into to place easily. At this point, I still didn't realize I'd pre drilled for electrical, exactly where the cabinet rail would be screwed in. If you didn't already know, it's a commonly held belief, in electrical circles, that driving deep-drilling cabinet screws into electrical cables, is considered "unwise". I'm an idiot.

I squared everything up and added a horizontal 2x4 to the opening to cap it off.
Wire it up
After @#$%& re-drilling the holes, I sipped the electrical circuitry back in place. It's pretty much everything that was there to begin with, just freshened up and corrected. I provided for switches for the over-sink light, under cabinet lighting, and the disposal as well as outlets for the dishwasher, disposal, and countertop convenience.

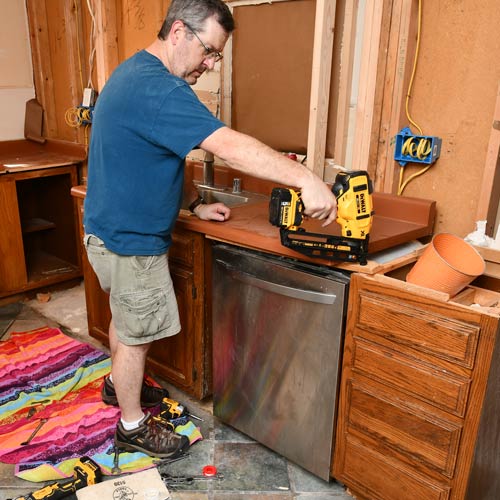
Closing out my adventurous 3-day weekend, I cobbled together the battered cabinetry, and for the millionth time, reattached the water and drain lines to the sink and dishwasher. God, I'm getting sick of this manuver.

I screwed the cabinets to the studs again and tacked a board in to secure the dishwasher from tipping forward. I plugged it into an extension cord.
Then I did my chores.

That was a ton of stuff in one, long weekend, but it was a huge milestone to pass in the project.
As fun as it was to get all sawdusty and do some beefy framing work, I had been dreading it. I was a little unsure if I could pull it off. This step was probably one of the top 5 most ambitious DIY's I've tackled to date. I'm glad it's done.
Thanks for reading friends!
