

Our daughter's closet remodel is finally, finally done. It took way longer than it should have, but eh,..life, right? Plus, this wasn't just a dab-of-paint type project; I ripped into and through walls. Sawdust flew, drywall crumbled, and the light of day burst into this little room.
Before - Wasted Space
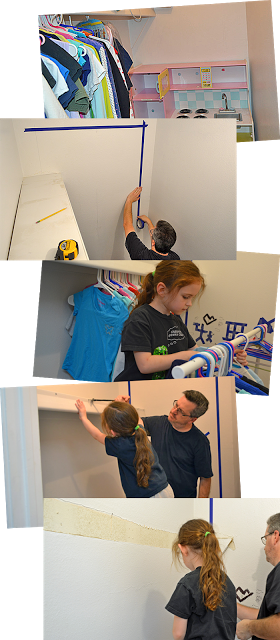
The closet was a huge mess. Although, it was a walk-in, it was small, and simply didn't offer a good use of of space. The doorway is offset, preventing storage on both walls.
There was just one shelf on the left, with a clothes-hanger lip, essentially a six-foot closet rod with heaps of kid junk piled on top. A battered play kitchen sat against the back wall, too heaped with books and toys to offer a play space, much less decent storage of any kind.
To cap off the challenge, her room was technically not a legal bedroom. Our DIY Predecessors had put an addition on the house, essentially burying the bedroom in the interior of the house, without an egress window, or second means of escape, in the event of a fire.
The Battle Plan
I boiled the project down into a three point scope:
- Add a window to the exterior wall, for natural light and an emergency exit
- Trim the window, remove the shelf, repair and repaint the walls
- Create and expand storage to make it usable beyond the elementary school years
Following is a quick chronological tour of the action as it went down. I'll share links to the original posts, in all their detailed glory, at the end of this post.
Please forgive the odd-angled photography; it's damn near impossible to frame good shots inside a 4x6 closet.
Demolition Party
We emptied the closet of Legos, army men, fast food happy meal toys, books, stuffed animals, loose change, and even a secret stash of fruit roll ups. There were some happy discoveries along the way, long lost toys and treasures.
I ordered the minimum size window to meet the egress requirements and laid out a rough opening with painter's tape. It was going to be a real trick to install shelving and a closet rod with the window effectively taking up the entire back wall. Eh,.. I'd figure that out later.
Gracie decorated what would be the opening with sharpies and more tape.
She was going to be a part of this project as much as possible. She was on hand to build a temporary clothing rack and load all her clothes so they could hang out in the dining room for a couple weeks several months.
We tore the self / hanger combo out together. The wall was pretty torn up, with nearly 40 years of paint and caulk build up and damage from who knows how many families moving in and out.

Luckily, for this project, we have a wood sided home. I hope to stucco it at some point, but for now, it just took a bit of saw-work to slice the exterior siding open. I later took a whole sheet off, in order to get at the framing from the outside.
Studs had to be cut out and reinforcing framing had to be put into place to form the rough opening. Man, I just
love using a framing nailer. There was even a little plumbing that had to be redone for the exterior spigot and the swimming pool's auto-fill device.
The wall cavity got fresh insulation before being sealed up again behind a new sheet of siding.
I punched through the drywall, trimming it flush with the new, rough opening.
I waterproofed the opening and slipped the brand new window into place. Exterior trim would come later.
Interior Trim and Walls
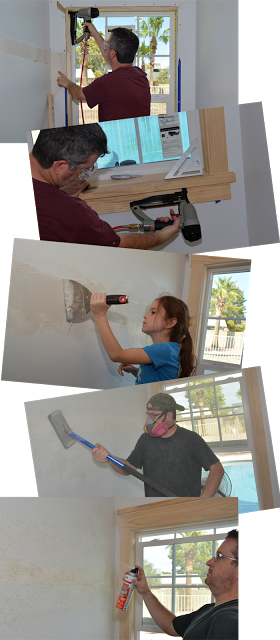
Back indoors, I wrapped the interior of the window opening with select pine, to hide the framing, insulating foam, and waterproofing membrane.
I trimmed the window with various sizes of select pine, creating an easy, nice-looking Craftsman style look. There were no miter cuts, just 90 degree butt joints. It's an experiment to see if we like it, before we replicate it elsewhere in the house.
My helper returned to repair the walls. She absolutely loved it; she absolutely made a mess. It was great.
I deployed my high tech, dust-extraction system in an attempt to keep drywall dust from getting everywhere in the house during sanding.
(Note: High-tech, dust-extraction = blowing a cheap fan out an open window)
Since this was a small wall area, I didn't deploy the big texture blaster I'd used on the family room remodel . I just used the canned stuff and sprayed the wall.
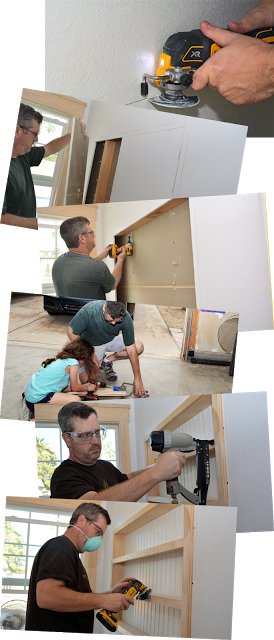
As sort of a project within a project, I decided to slice into the large, blank wall and create a recessed shelving unit. Why cover the wall with posters when some extra storage space could be stolen from the inner recesses of an interior partition wall?
I peeled a large section of drywall off, revealing the sweet, secret space hidden within.
It was not load bearing, but it was a big cavity. After I removed a couple studs, the opening got re-framed with 2x4's to keep the wall nice and stable.
Gracie and I built the shelf carcass in the garage with 1x4's pocket holes and bead board.
I pocket screwed a couple horizontal shelves in place and attached a face frame to give the piece a built-in look and give it just a little more depth.
This was a fun, little bonus addition to the closet that will grow over time, starting with Minecraft, Pokemon, and Shopkins toys. In the future, she will likely end up filling it with nail polish, perfume, or whatever our future teenage Gracie wants to load them up them with.
The finishing touches
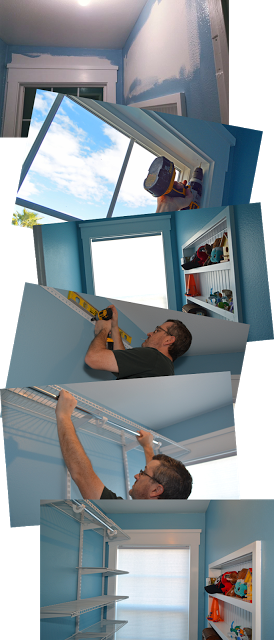
Gracie chose blue walls. Don't even try to tell her blue is not a girl color. She'll probably bounce you off the sidewalk and tell you that, "YOU are a girl's color." Blue it would be then, with crisp, white trim.
Years ago, we had to have someone come to the house to measure and custom order cellular window shades. Now, thanks to the miracles of modern science and engineering, an average Joe can simply walk in from the street and snag them off the shelf at their local home center. No more Winnie the Pooh bed sheet for a window shade.
With the new window, slightly in the way, I couldn't use any form of end-to-end shelving. I went with a clean, white, wire shelving / organizing system, suspended from a horizontal support, screwed into the wall framing.
The system is adjustable, able to resize and adapt, with Gracie's growing need. We loaded it with plenty of shelves to hold her stuff. Some are far above her reach, for seldom used items.
Clothing hanger rods, were also included, with clips to hold them beneath a shelf.
The Final Reveal
The finished closet is chock-full of grade-school age, mighty, girl-of-action stuff. It's got natural light, with an egress window for safety, and a bit of fun style.
It's gone from from a boring, faded cave, heaped with debris dating back to toddlerhood to a colorful space with contrasting trim and shelving. The room looks and acts completely different.
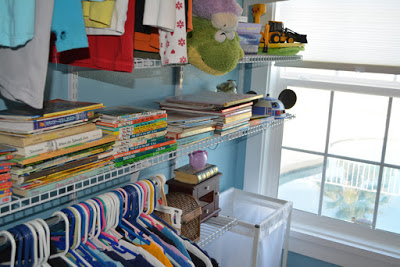
Books don't do well vertically on wire shelving.
It's got plenty of storage and organization room now. We've pulled items into the closet, like the dirty clothes hamper, freeing up even more play space in her room.
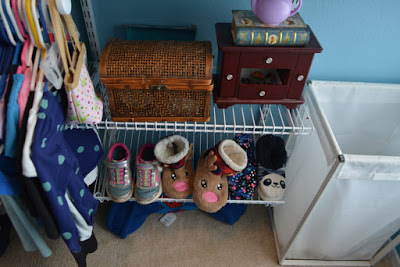
Is it still technically a "shoe rack" with 75% slippers?
I even had enough leftover shelving pieces to build this little rack over the doorway, for stuff we rarely use.
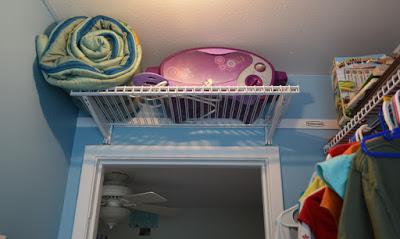
Honestly, I hope she forgets about that God-awful "Easy bake" oven.
With free space opened up in her bedroom, naturally we find Gracie spending more time playing and reading in her closet.
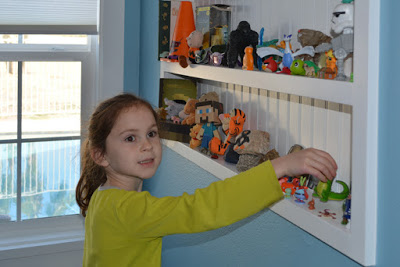
The curator in her element.
A glutton for punishment?
If you want to read the how I did it detail, step-by-step, as well as some of the decision making points in this project, check out the sub posts that tell the entire tale. Pour yourself a beverage, sit back with some munchies, and treat yourself to the whole story:
- Closet Remodel and Emergency Escape
- Adding a Window: Framing Fun and Foolishness
- Adding a Window: Sliding on Some Siding
- Adding a Window: The Install
- Super Easy DIY Craftsman Style Window Trim
- DIY Built-in-the-Wall Shelving - Reclaim hidden storage space in your home
- Installing a Closet Organizer - Easy DIY Project
I'd love to hear what you think of this one in the comments below. Thanks for reading!
