

So I'm installing a brand-new window where there wasn't one before. I'd already punched into the side of the house, framed the opening, and installed the siding. I'll include all the links at the end of this post if you want to start from the beginning and need an explanation why the hell I'd be putting a window in a little girl's closet.
The rough opening was ready but it didn't go all the way into the house. The back side of the drywall, temporary insulation, and some plastic sheeting have been desperately trying to keep the raging summer heat from infiltrating into our home. The insulation and sheeting were easy enough to rip out, but the drywall would require a little more of a precision touch.
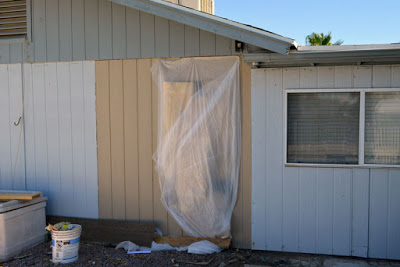
Good lord. This side of the house is ugly, eh? More to do, more to do.
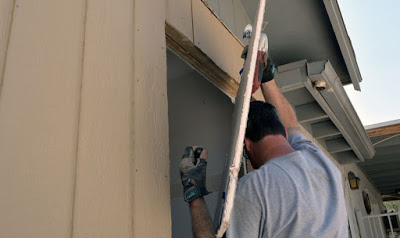
I used the oscillating multi-tool to make a drywall plunge-cut, then traced it along the framing, cutting as close to the edge of the 2x4 as possible. I find this method a lot cleaner than the high-powered, devouring rage of a reciprocating saw.

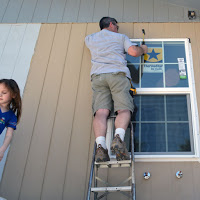
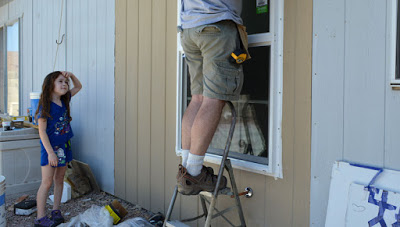
I'd like to thank one of my coolest fans for being by my side...
I love this type of tool. Mine's an inexpensive, Harbor Freight model that I think I picked up for about twenty bucks a few years ago. Somehow, inexplicably it keeps on chugging. I really thought I'd have killed it by now and picked up a higher grade, more professional quality tool, but as long as it's still slicing and dicing, I'm taking it into battle.

The drywall popped out easily. With Phoenix temperatures around 110 degrees, I can't express how pleased I was to be greeted with by a sweet blast of arctic-chilled, air conditioned goodness.
As I paused and enjoyed the enticing breeze from the inside of the house, I was jarred back to reality by the wailing sounds of despair howling from my wallet in my back pocket. It knew that cool air was a stream of cash, blasting unchecked into the desert heat and prodded me back to work.
"Break on through to the other side"
- Jim Morrison
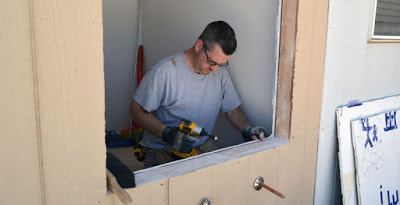
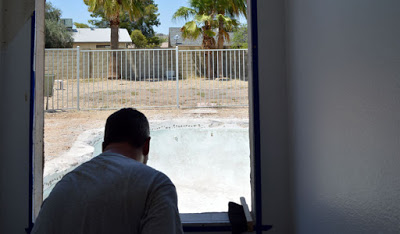
The hole needed to be sealed fast. With the size of our next electric bill on the line, I vaulted like an action hero, into the closet (minus the combat roll). I started rapidly screwing the drywall edge into my newly framed window opening, the very essence of speed.
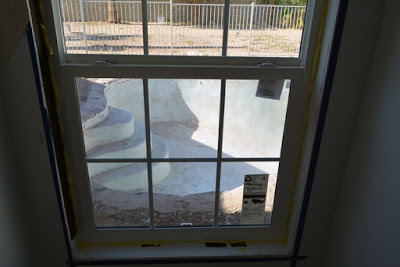
With the room door closed to retain precious AC, I got my first glimpse of what the world would look like through the new window. Of course, it was the apocalyptic scene of a partially demolished swimming pool. Lovely.
Moving back outside, I shifted to waterproofing the opening. Even though Phoenix has an annual rainfall of only about 8.03 inches a year. We've had some gully-washers dump a significant amount of that down in a matter of hours. In fact, last year there was an absolutely brutal dumping that closed the city. I needed to take sealing the window up seriously, or I'd regret it later. Summer monsoon season is on the way after all.
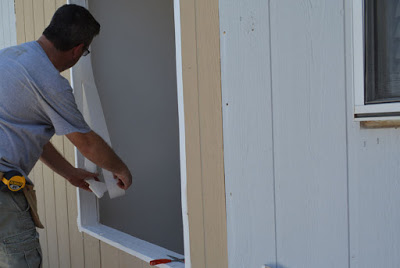
I reached, once again, into the magical box of samples that my friends at Echo Tape had sent me to play with a while back and extracted one of the thickest, toughest beasts of the bunch, their All Leak Repair Tape. I'd contacted them for a recommendation and this is the one they advised for the job.

Since water flows down, I started at the lowest portion of the opening and applied the tape. Each successive layer would overlap from above, like shingles. The front of the bottom edge got it first. I overlapped the front, cut the corners and folded them over, sealing the gap between the siding and framing.


This EchoTape, peel and stick stuff is tenaciously sticky; I could feel how tightly it grabbed hold as I burnished it into the wood with my hands. I really hope I don't have to peel it back up at some point.
Maybe I should have dry fitted the window before I got this far...crud.
Confidence friends. Moving on, I reinforced the corners next with a short piece.

The sides got it next, wrapped around the corners tightly and overlapping onto the bottom pieces

I may have overdone it a bit, adding a second layer, deeper into the framed area. Each time, I overlapped it. a little. With the bottom sill slightly angled outward, water would have to find its way outside, right?
I placed some cedar wedges on the sill, leveled them, and taped them in place. These would keep the window slightly elevated, allowing any potential invading water to drip outwards.
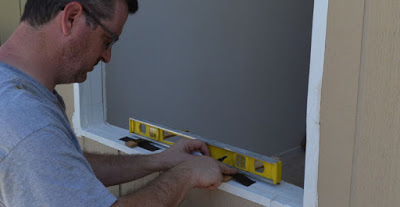
Go time. I slipped the new window into place and it actually fit! I CAN read a tape measure correctly once in a while!
Nice and easy, I laid it gently into a bead of silicone caulk behind the nailing flange, leaving a couple gaps at the bottom for water to escape.

Jack eyeballed it from the inside, so I could shimmy it slightly back and forth until there was an even gap.
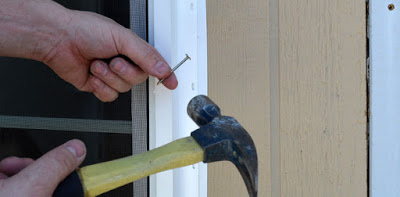
Sweetness came into the fray to drive some 2 inch, galvanized roofing nails into the nailing flange. I started first in the corners then followed the manufacturer's recommended nailing pattern.
Sweetness
The site Superintendent soon showed up to survey the jobsite. She told the crew to quit lollygagging around and get her window the heck finished. I straightened up and scurried up the ladder to nail off the top.
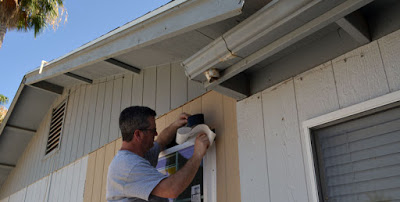
After running out of white Echo Tape, I switched to black to wrap the top. This time, I applied it from the siding onto the nailing flange of the window, covering all the nail heads and open nailing holes.
With that, the window is in.This particular unit is a ThermaStar by Pella 10 Series Vinyl Double Pane Annealed New Construction Egress Single Hung Window (Rough Opening: 36-in x 60-in; Actual: 35.5-in x 59.5-in).
I think they had the size we wanted in stock, but we special ordered this one with the internal mullions for about $210, delivered to our local Lowes. We're planning on all the windows being replaced eventually with this style. This one and the crummy one beside it are the only ones on the house that are double-pane, if you can believe it?..in Phoenix, Arizona, home of God-awful summer heat? That's the problem with a 1979 tract home.
.")
Nearly done, I still wanted to get it insulated before I could quit for the day. I used expanding spray foam, designed with low pressure expansion to keep from bowing and bending window frames.
This particular product is GREAT STUFF Window and Door Insulating Foam Sealant. .
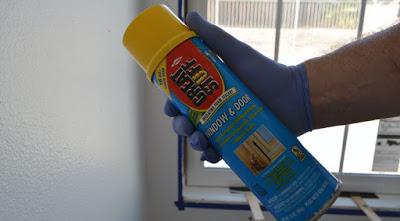
I would have called it "Damn Good Stuff", but that's just me.
I chose easy cleanup by wearing disposable Nitrile Gloves (I always keep a box around for painting and messy stuff). I slowly shot a stream of the foam into the gap, all around the window. I'll trim it back later when it's dry and I'm ready to install trim.
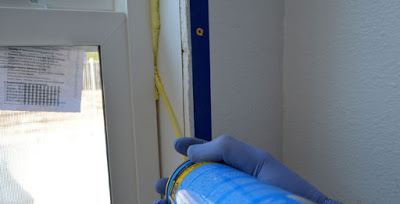
First Person Shooter View! It's just like you are there right?
Done deal. The window looks great, what a glorious view!!! Ohhhh yeah, a sparkling backyard oasis of summertime bliss, the glorious swimming pool. Simply gorgeous. Well, soon anyway. Hopefully.
There's more to do of course. A little more more waterproofing, interior and exterior trim, caulk and paint. Then the closet itself.

Background links:
As promised, here's the preceding required reading in my non-stop, action and adventure closet remodel / adding a window series:
- Closet Remodel and Emergency Escape
- Adding a Window: Framing Fun and Foolishness
- Adding a Window: Sliding on Some Siding
Update! Here's the next chapter:
And one more thing..
Thumb and Hammer - Home Improvement Podcast

I was recently honored to be interviewed by Doug who runs the Thumb and Hammer blog. Give it a listen to hear about how I got started in DIY home improvement the launch of the AZ DIY Guy's Projects blog. It was a lot of fun!
Check out the mp3 here, or iTunes here. Give him a good review over on iTunes too!
Thanks Doug!