


Our new bamboo living room floor floor joins an existing tile floor. Although I installed the living room floor in January, it took until Mid-March for the flooring store to finally get the t-molding in stock for me to finish. It's a frustrating tale I may share in a future post, but needless to say, We probably won't be returning to the same store in the future.
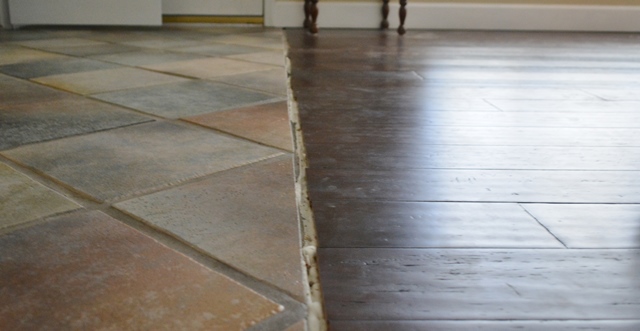
T-molding is a transition strip molding that bridges the gap between two flooring materials of similar height. It should be a simple install, but whoever installed this floor (me) didn't do such a good job keeping the edge uniform. Slopping that godawful adhesive at a rapid pace, made me sloppy on that last detail. It was left with this ragged edge.
It also doesn't help that there's a big goosh of cured urethane adhesive in there too. Both of these issues mean I couldn't get the t-molding to fit.

Not vanilla custard.
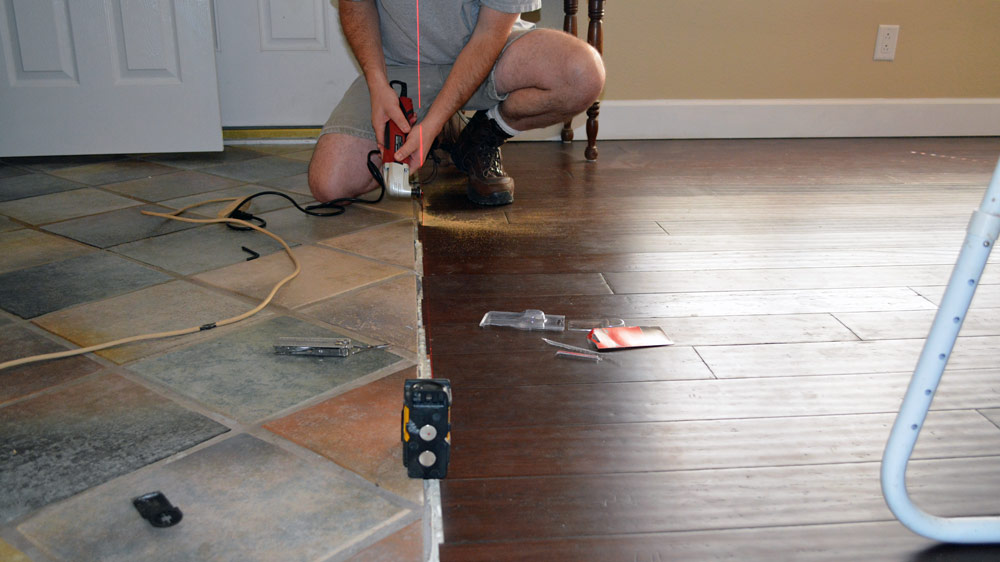
An easy 15 minute project became,... more interesting. Dang-it. My Harbor Freight Oscillating Multi-Tool still breathing, so I thought I'd give it a rip. I had picked up a couple new blades, since I trashed my first two, slicing through roofing material last summer. There wasn't much tooth left, and they were goo'd up with shingle tar.

I shot a line with the laser level and started roaring through the wood. The new blade went through the bamboo like butter,... for about 30 seconds.
It did about one board width, at about half the depth I needed, before it really bogged down. Bamboo is some really hard stuff. It was going to be a long day and I suspected I'd smoke the saw before it was over (Thus, giving me an excuse to buy a really nice replacement one perhaps? a DeWalt maybe? - UPDATE. Yep. I picked up the DeWalt - check out my review here)
I burned the blade into a toothless piece of scrap metal. I swapped it for new one. When I wore the second blade into a blunt waste, I took a quick break to run to the neighborhood hardware store to pick up some Craftsman, "Fits All Major Brands" replacement blades and a bag of licorice (to make the job go a little smoother).
I should have picked up something a little stronger than licorice; the damn "Fits All Major Brands" blades didn't fit my tool. Saw that coming, did you? Friends,...sit down for this earth shattering revelation....
Chicago Electric (Harbor Freight) may not be a "major brand"

Maybe they can gum their way through the wood?
Yeah. I said it. Ridiculous, right? Why would a power tool I bought with a newspaper coupon and $19 not be a "major brand"?
My local Harbor Freight is a bit further away than I wanted to go for more blades. I was stuck with these ruined ones and had to figure out a way to finish the cut. I toyed with using a circular saw, but didn't want to chance hitting the cement floor with a more expensive blade as it bumped along the irregular tile floor.
I needed to use the multi-tool, or carve it out with a pocket knife. You know what that means?
Reforge the blades!
It takes not the skill of the Elves of Rivendell to breathe life once again into these fine pieces of weaponry, it just takes a rotary tool , a cutting disk, and some imagination.

The were re-forged!!!
So these blades don't exactly look like Andúril , forged from the shards of Narsil. They they look more like the crude, black blades hammered by Saruman's goblins in the forges of Isengard .

What horror, these cursed blades! They will never work.
Yeah. More like that.
Ohhhh yeahhhh!!!!!!!

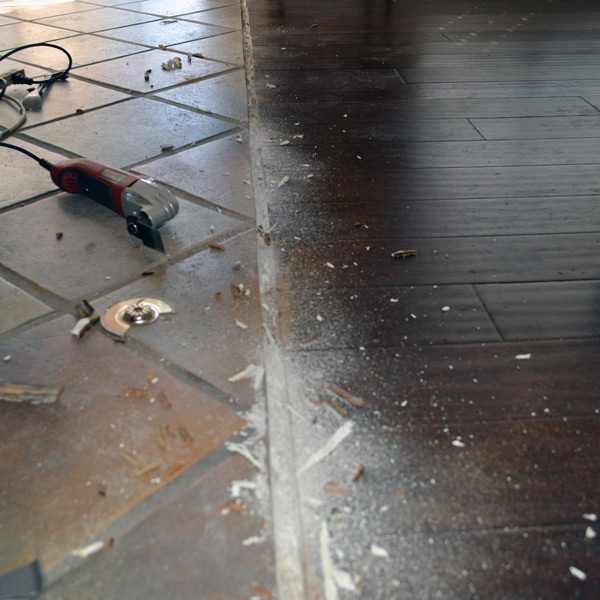
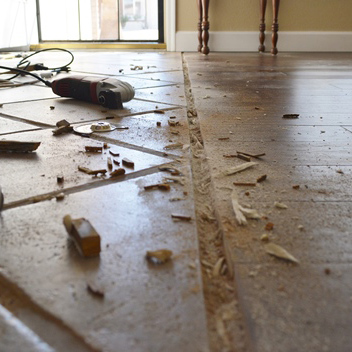
They worked. Not as good as new, but as good as free, which is pretty damn good. I did the Middle-Earth, evil blade re-forming thing a couple more times and finally finished the cutting. My cheap multi-tool didn't even burn out.
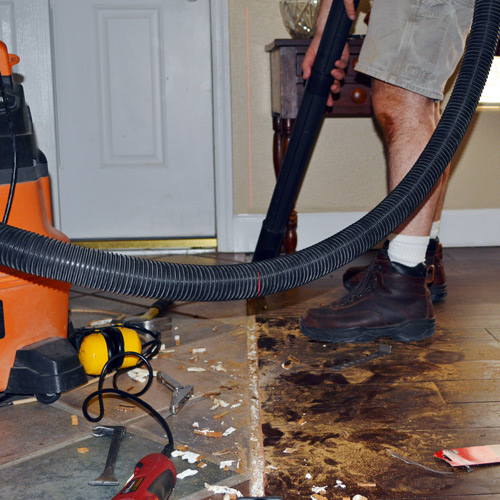
The wood needed to be chipped out of the channel, pried from the grips of the adhesive. That was fun hammer and chisel type work. Scraping the gooshed out adhesive was next. That was tedious.

...scrape, scrape, pry, peel , scrape, pry, scrape, scrape, peel, pry, scrape...
What a mess.
The molding fits perfectly. Since the room is twelve feet wide, I had to use two 8' sections. A utility knife makes a great marking tool.

I put the miter saw shadow line, just close enough so save my cutting mark.
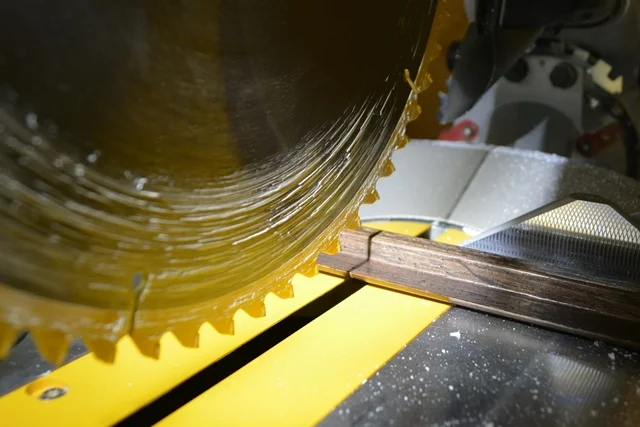
That's melted-plastic crown molding from running my saw too slow
Idiot.
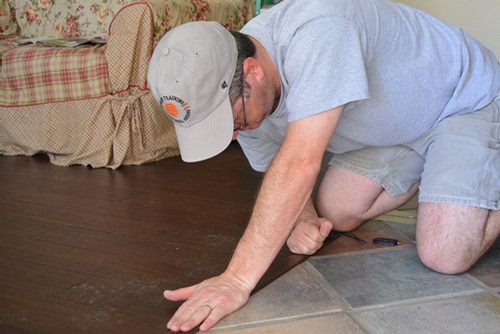
On the advice of the guy at the flooring store, I shot slot with a generous bead of pure silicone caulk for adhesive. His reasoning was that it would be much easier to remove the molding later for repair / replacement with rubbery silicone, than if I'd used construction adhesive.

It fit perfectly and concealed the rough edges in the tile and where I had trimmed the floor. Even though the molding isn't bamboo, it matched perfectly, color matched to the stain.
Installing the strip was unbelievably easy. I only had dab of silicone slight goosh out along the entire length, an easy clean up. Seriously, I had taken more care with the plank length, this whole project would have taken about 15 minutes, rather than hours of hands and knees, back strain inducing work.
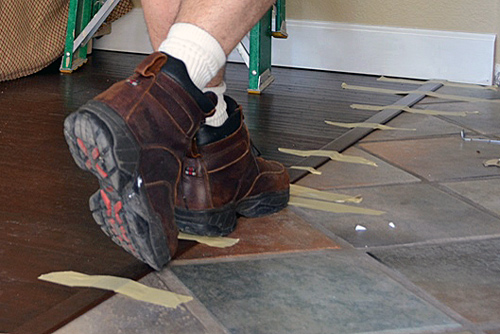
The molding spent the night being held down by some thick masking tape to keep it from moving.
A bit of clean-up and it's all done. We like the look; its a nice crisp edge. The floor is 100% complete!

Just a few more details to finish the room.
