

It's a little dim by my miter saw work bench. With my less than perfect eyes, its a little tricky to hit my marks. Yesterday, I received a work light system designed specifically for my saw. It's also supposed to project a shadow-line that gives assistance, similar to a laser. I'll review it later, but I wanted to share what the install was like.
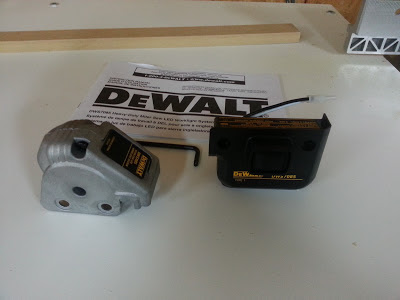 This is the contents of the DeWalt DWS7085 Heavy Duty Miter Saw LED Worklight System. It includes a switch assembly, a LED assembly, a T-20 Torx tipped Allen wrench, and an instruction manual.
The manual is short and sweet; it's illustrated and easy to follow. I gave it a quick preview and could tell this was going to be a simple operation. I briefly considered following the French instructions, but decided to use English, since I am admittedly, completely clueless about French.
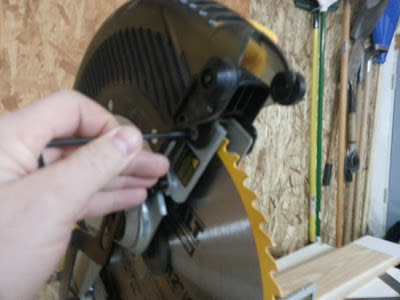
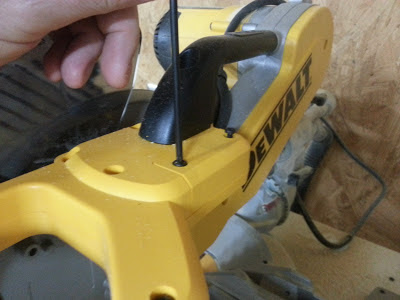 Working with the unit unplugged, you start with removing a couple of the Torx head screws to open an access point located on the top of the saw, just back from the main trigger / handle. The access cover gets discarded (or squirreled away forever, if your a pack-rat like me). Save the screws.
I locked the saw in the down position to make it easy to reach.
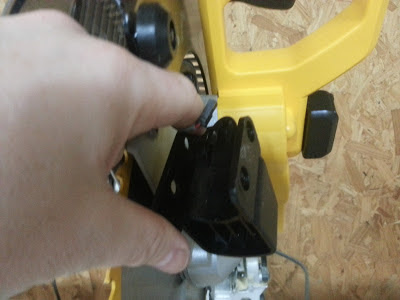
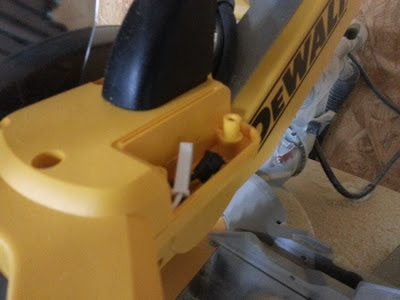 With the access cover off, there are two wiring connectors tucked in the cavity. It's an interesting testament to DeWalt quality that the cavity is totally enclosed; I had expected to see the electronic and mechanical guts of the saw visible when I removed part of the outer shell. The cavity was clean and sawdust free. This is obviously designed for easy consumer access for upgrades.
 The switch assembly, termed the "Worklight Power Supply (WPS)" was straight forward. The two wiring connectors snap into their respective mates. The connectors only fit in their proper locations and configuration, so even a knucklehead like me couldn't screw it up.
It takes a little fiddling to make sure they are tucked properly in the cavity and the wires don't get pinched. The WPS fits perfectly where the access cover once was.
 Next it's time to remove a black plastic thingie (a scientific term)that sits just above the leading edge of the blade, inside the blade guard. I raised the saw to the open position.
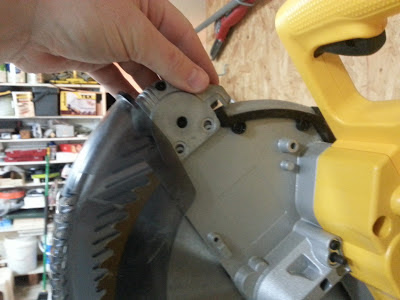
Again, using the supplied T-20 Torx wrench, I removed the screws holding it, two on each side. The two on the right and the one top left are easy to access from the basic, open position.
 The forth screw is accessible by raising the blade guard. All four screws are easy to get out.
Two of mine were also very easy to drop, ricocheting off the floor to hide under and behind nearby stuff. I wonder how DeWalt engineered them to do that. They must have known would be time for me to take a stretch break and crawl around on the floor with my butt in the air, cheek pressed against the concrete looking for hiding screws.
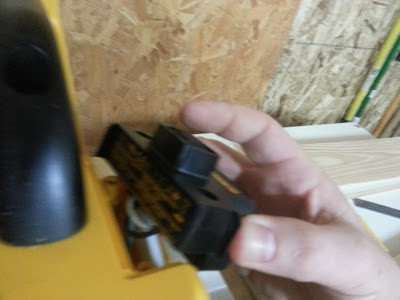
 The black plastic cover ("thingie") is fairly easy to wiggle out from behind the blade guard. There is another wiring connector tucked into it. Again, I squirreled the part away for the future. The directions state that it is unsafe to run the saw without either this cover or the work light installed, or risk "...serious personal injury". Good tip. They also warn you not touch the sharp point of the blade with fingers or hands, again at the risk of "...serious personal injury". That seems a bit more obvious. No warning about jamming my thumb in my left eye though.
 The cast metal work light assembly slips on easy enough. First, there is another simple wiring clip connection to make, followed by tucking the wires neatly inside, again without pinching them.
The four T-20 Torx screws taken out earlier (and found hiding under a tricycle) are replaced in the same way they were taken out. A quick test to make sure the blade guard moves easily, and surgery is complete Doctor!
The whole operation took about ten leisurely minutes, including the dropped screws and an interruption from a pint-sized visitor wanting Daddy to whip up some chocolate milk. It was not a serious challenge (the worklight or the chocolate milk); it was a pleasure to install. I suspect anyone that knows "righty-tighty / lefty-loosey" can handle it without sweat. If you see this as a difficult procedure, I submit that you stay away from a tool that includes a 12" carbide-tipped blade, that spins at high RPM.
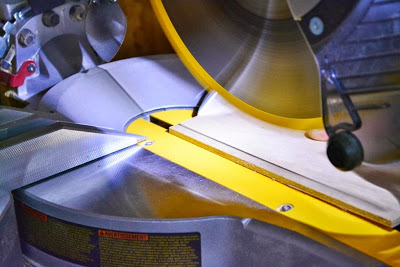
I'll review this unit soon, when I get a chance to make some sawdust, but I couldn't resist setting the mood in the ole workshop before shutting down for the night:

UPDATE: Check out that sweet shadow line! I'm loving this thing!
The manual is short and sweet; it's illustrated and easy to follow. I gave it a quick preview and could tell this was going to be a simple operation. I briefly considered following the French instructions, but decided to use English, since I am admittedly, completely clueless about French.
I locked the saw in the down position to make it easy to reach.
It takes a little fiddling to make sure they are tucked properly in the cavity and the wires don't get pinched. The WPS fits perfectly where the access cover once was.
Again, using the supplied T-20 Torx wrench, I removed the screws holding it, two on each side. The two on the right and the one top left are easy to access from the basic, open position.
Two of mine were also very easy to drop, ricocheting off the floor to hide under and behind nearby stuff. I wonder how DeWalt engineered them to do that. They must have known would be time for me to take a stretch break and crawl around on the floor with my butt in the air, cheek pressed against the concrete looking for hiding screws.
The four T-20 Torx screws taken out earlier (and found hiding under a tricycle) are replaced in the same way they were taken out. A quick test to make sure the blade guard moves easily, and surgery is complete Doctor!
The whole operation took about ten leisurely minutes, including the dropped screws and an interruption from a pint-sized visitor wanting Daddy to whip up some chocolate milk. It was not a serious challenge (the worklight or the chocolate milk); it was a pleasure to install. I suspect anyone that knows "righty-tighty / lefty-loosey" can handle it without sweat. If you see this as a difficult procedure, I submit that you stay away from a tool that includes a 12" carbide-tipped blade, that spins at high RPM.
I'll review this unit soon, when I get a chance to make some sawdust, but I couldn't resist setting the mood in the ole workshop before shutting down for the night:
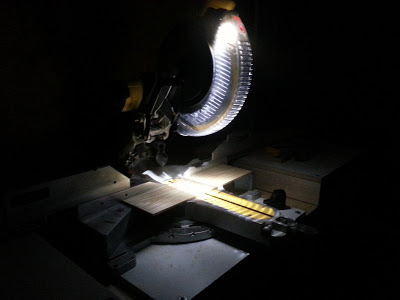 |
| Good night sweet prince. May you dream of large boards. |
UPDATE: Check out that sweet shadow line! I'm loving this thing!
 |
| Finally: A good comparison of photography with a DSLR camera instead of a camera phone. |
