

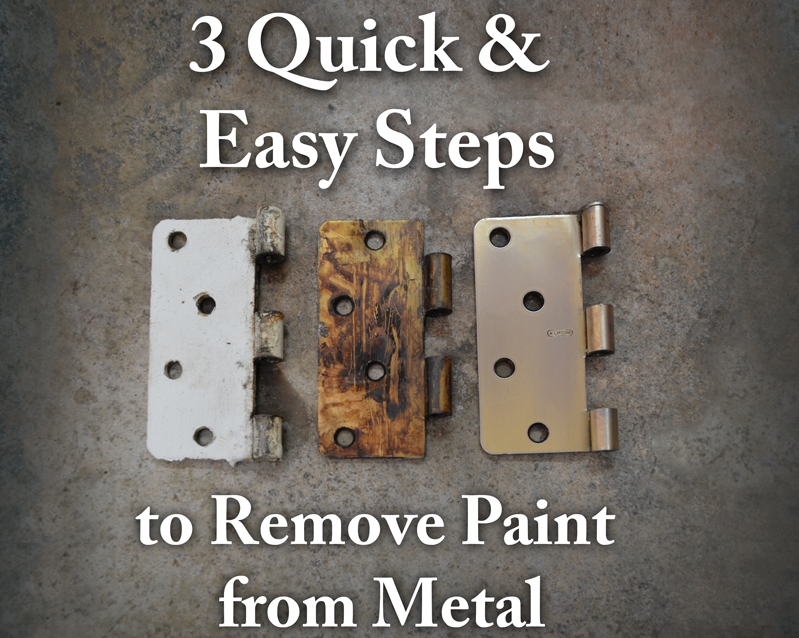
Here's how I stripped the paint off these hideous, painted-over hinges with some Bernzomatic firepower.
Read MoreSteampunk Table Lamp
I love the techno-industrial, sci-fi look of Steampunk design. Check out this DIY construction I created with copper tubing and a Bernzomatic TS-4000 trigger start torch.
Read MoreDIY Water Heater Maintenance and Custom Drain Upgrade
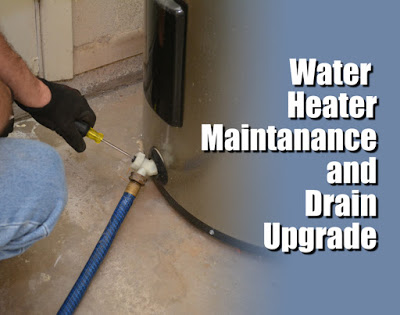
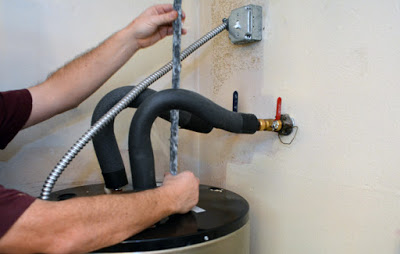
It's been a year and a half since we replaced our aging water heater. The old one had become filled with sediment, rusted, and its elements burned up, destroying the unit. A water heater is an expensive appliance to replace. I don't want to do it again anytime soon, so I decided I'd do annual maintenance on it.
I also wanted to upgrade the cheap, plastic drain valve from the factory. With all the experience with soldering I've gotten this year as a Bernzomatic Torchbearer, I figured I'd craft a custom valve assembly that would allow me to direct a drain hose in a gentle sweep towards the out-of-doors. More on that in a minute.
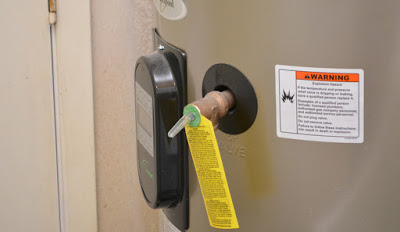
The project is easy in concept, disconnect the unit (power and water), drain it, check the sacrificial anode rod, and replace the valve. Piece of cake , in concept. Disconnecting electricity was the easiest. I'd installed a simple shut off switch a couple years ago. It was an easy project that keeps me from running outside to shut off the power at the circuit breaker. Flip the switch and the unit is dead.
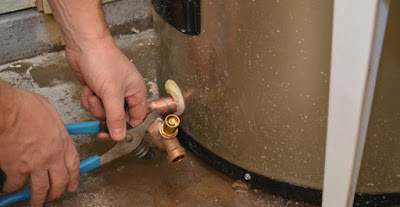
The water was also easy to disengage. When I'd installed this unit, I'd added valves on both the hot and cold water lines. (Of course, I'd reversed the red and blue colors for some pea-witted reason). I also turned on the hot water to the laundry tub, to empty the line a little.
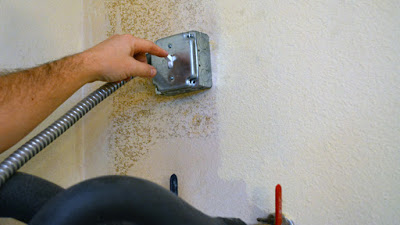
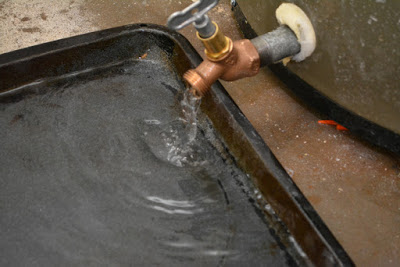
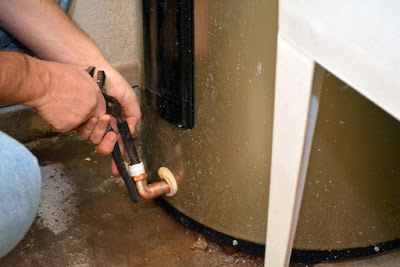
Moving merrily on to the next step to drain the water out, I attached a garden hose and opened the valve with a screwdriver to let the water flow freely.
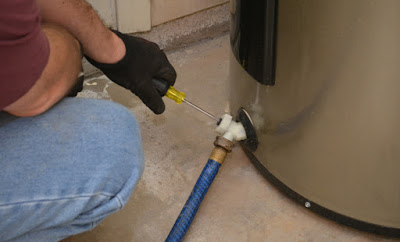
Yep -"flow freely". Dang it. It was completely jammed up with sediment. I couldn't get a drop through the hose. Even with the valve removed, only a dribble of water seeped out. This would not be the easy, piece-of-cake I'd imagined.
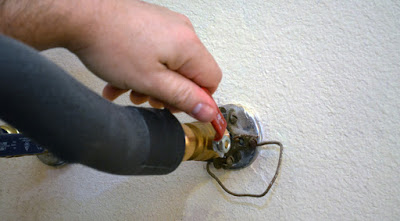
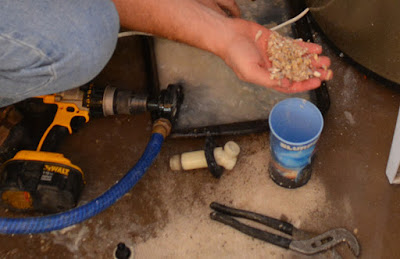
I started poking a piece of electrical cable in through the drain hole and twisting it around. I got a little water and oatmeal-looking sediment to come out.

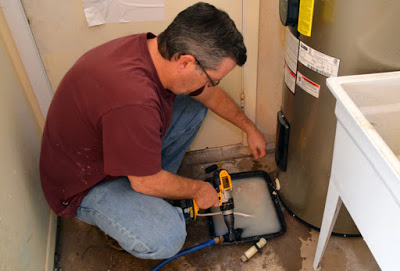
After a healthy bit of poking, I got water and crud flowing a little faster. There wasn't enough pressure to push all the way through the hose, so I used a handy drill-powered pump to suck the water out of the broiler pan I was using to catch the gunk (shhhh...don't tell my wife). I started making a pretty nice mess, too.
Uuuughhhh...
When I figured I had enough water out of the tank, I opened the pressure release valve to reduce the vacuum in the tank. It helped speed up the flow.
After a while, I was able to hook the hose up with a 6" threaded nipple and empty the tank. I turned the cold water back on and off a few times to flush the rest of the sediment out of the tank.
Temporary loose valve.
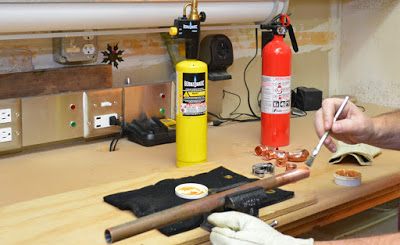
Finally, I got to start building my new drain valve assembly. I wanted a threaded 90-degree bend that was close enough to the tank to prevent tripping over. It also needed to be removable, in case I had another sediment clog.
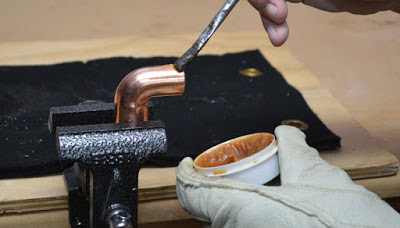
I clamped and cleaned a piece of 3/4" copper pipe and a threaded fitting, preparing them for soldering.

A little flux on both sides of the joint and the first piece was ready for the heat.
I laid down the heat on the fitting side of the union causing the flux to sizzle and bubble. The TS8000 High Intensity Torch is the sweetest, smoothest torch in the Bernzomatic line. I love its one-handed operation and the ability to upgrade from propane to hotter MAP-Pro gas.

The Bernzomatic TS8000 High Intensity Torch

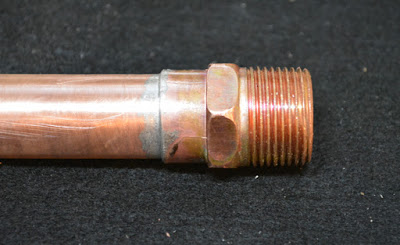
This particular torch is good for larger pipe. On this 3/4" stuff, it was an absolute breeze. With the flux quickly bubbling under the ultra swirl, high intensity flame , I clicked the torch off and touched the seam with the solder which melted and was sucked into the gap.

A quick quench from damp rag and the piece could be safely handled.
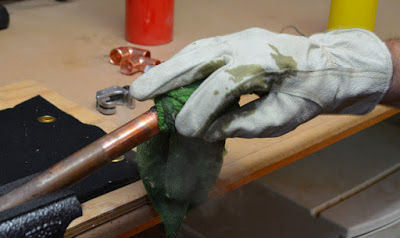
Since this is going to be an exposed piece, I touched it up with a quick dash of sandpaper. Beautiful.
I've really come to enjoy the satisfaction of making a nicely soldered piece. It's actually fun, when you get the hang of it.
I'm really sold on the MAP-Pro with the TS-8000. It gets the piece hotter faster, really speeding up how quickly the solder will liquify. I think I'm sticking with MAP-Pro for my future soldering projects.
I repeated the same steps as I pieced together the new drain assembly.
Clean and Flux

Heat the fitting side until the flux bubbles and sizzles

Melt that solder!
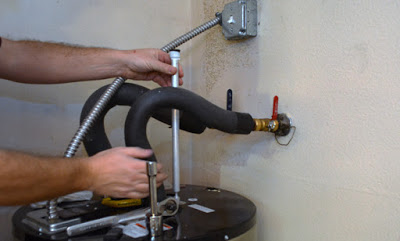
The custom drain elbow was competed with a cleanup and a few wraps of teflon tape to the threaded fittings. This custom piece is quite a bit longer on one end due to the extra thick insulation of our water heater.
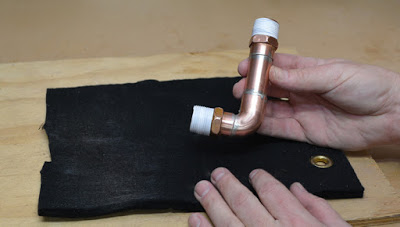
Back at my now soaked and spattered worksite, I threaded the new piece carefully into the drain hole of the heater. When I measured for the elbow, I'd marked the pieces to ensure that it would be parallel to floor when the piece was full threaded in place.
I'd chosen to install a threaded faucet rather than a soldered-on model so that I could remove it and spin the whole assembly off later. If I'd permanently attached it, the assembly would be too large to spin off in the event of another clog.
Done deal! The faucet I installed had a removable handle, so I could avoid having little hands messing around and spewing scalding hot water on themselves, flooding the garage. I hid the handle on top of the unit.

The last maintenance step was to check the anode rod. These are sacrificial shafts that stick into the tank from above and corrode over time. It's made from a material that is more susceptable to corrosion due to electrolytic action, so it gets eaten up before the lining of the tank. It greatly extends the life of the unit.
I'd picked up a rod when I was at the home center, so I was going to replace it regardless. It was a matter of popping a cap off the top of the unit, scratching some insulation out of the way and unscrewing it with a big 1 1/16 " socket, on a 1/2" drive ratchet.

It was a little chewed up, but would probably last another year or so. Still, I wanted to replace it anyway while I had the tank empty and the water off. Water heaters are expensive.
It was tough to get out because there was a low ceiling in that area due to a heating and air conditioning duct. I had to bend it.
The replacement anode rod was actually jointed, allowing it to flex in order to drop it into the tank. Handy, eh? Just a little teflon tape on the threads and screw it into place.
Note that this unit is an electrical model. I shut it down with the flick of a switch. If you have a gas model, you're going to want to turn off the heat before draining it. Check the manufacturer's instructions for a safe shutdown. Make extra sure there's no gas escaping while you work, especially if you are doing some flaming torch work in the area.
I filled the tank back up, fired up the power, and cleaned up the tools. Maintenance done. Next time it will be easier if I don't wait for the thing to fill up with gross sediment. Plus, I have a nice metal valve to speed the process. I think I'll adjust up to a 6 month draining schedule, just to keep it ship shape. I'd
autopsied our old one after I tore it out. I never want to see that absolute horror again.
Maintain your heater and save serious money down the road.

This is a sponsored post. I am a proud to be a Bernzomatic Torch Bearer, though all opinions expressed are 100% my own. I won't recommend products I don't believe in.
The Torch Bearers are a group of tradespeople, DIYers, culinarians, adventurers and artists brought together to create projects using Bernzomatic torches and share their knowledge and ideas with you. Check them out here and get inspired to create with fire.
Visit the other awesome Torchbearers and see what they are up to on the Bernzomatic Torch Bearer Site.
Cutting with Fire: DIY Metal-Cutting with an Oxygen Torch

This year, I've been trying out all kinds of handheld torches, using several types of fuel. The tool geek in me really wanted to challenge myself and move up to something even more serious. Luckily, I got my hands on a
Cutting, Welding, and Brazing Torch Kit , the big, hot Mamma of the Bernzomatic line.
I've done recent torch projects with butane (up to 3,150° F), projects with propane (up to 3,600° F), and projects with hotter burning MAP-Pro (up to 3,730°).
The Bernzomatic OX2550KC, is the next step up. It uses a dual-gas fuel setup; burning both MAP-Pro and pure Oxygen. This compact, fire-breathing beast can produce a flame up to an incredible 5,300° F! It's not even a commercial tool; it's something you can pick up for yourself at a hardware store or home center.
I wanted to try cutting metal with fire. I'd never done anything like it. I think this torch in cutting mode is probably best suited for metal stock, perhaps around 1/8" thick or so. So, naturally, I decided to push well past that on my very first task. I'd been wanting to remove an old, bent fence hinge from our block wall. It was there when we bought our home and has always been an eyesore. The trick would be to cut it off behind the face of the block, so I could patch over it. A reciprocating saw would be difficult to use in that spot. I'd bend the heck out of some blades, chip the wall up, and rattle the heck out of my arms.

It's time to go, Mr. Bent Hinge Pin
This torch doesn't work like a standard handheld torch, it takes a bit of fiddling to get the hang of it, but it's incredible when you do. After a little practice, I was able to perform the fine dance of easing more and more gas into the flame, making it hotter and hotter, a blue/white blade of flame.

The Bernzomatic OX2550KC Cutting, Welding, and Brazing Torch Kit This is a hose style tool, with fuel cylinders placed remotely, away from the torch head. Starting the torch requires opening the MAP-Pro valve, ever so slightly and using a handheld sparker to ignite it.

“Come on Baby, Light my fire.”
It takes a different approach, too much gas flow and the flame will go out with a quick blast and a "pop!"
Since I'm used to using a standard, handheld torch which can be instantly lit with a hearty blast of flame, it took me a several tries to figure out that I needed to use a very light touch. The MAP-Pro fueled flame needed to be quiet and soft, waving gently like a stick pulled from a camp fire. I learned to ease the MAP-Pro flow down even more, until the base of the flame barely touched the torch nozzle.

Isn't it soft and cuddly?
Next came the oxygen. Its valve appears to be finely threaded, because you can turn it quite a bit before the oxygen gets flowing. It's great for controlling the release of a very small amount of gas and easing it up slowly. Too much oxygen, too quick, and "pop" out goes the light. In that case, everything has to be shut off to safely start again.
Speaking of safety, you'll note I stepped up my gear a couple notches for this project. First,since there would potentially be sparks and molten metal, I wore long pants and shirt sleeves (in Arizona even!). Beefy, long-wristed welding gloves would protect my hands if anything spattered. I capped my natty ensemble off with some Mad Max eye-protection, exchanging my normal safety glasses for a shaded, welding mono-goggle. I wouldn't take any chances with my already crappy eyes and a blinding, white-hot flame.

Fire, when you can't see the whites of my eyes.
As I slowly eased more oxygen into the flame, it snapped from the slowly waving, orange flame, to a crisp jet of blue-white fury. To cut with this rascal, I had to get it as hot as possible. It took a few tries, but I got the hang of dancing my hand between the MAP-Pro and Oxygen valves, until I got a real tight blast going.

The perfect flame of awesomeness
With my finely-tuned fire-knife ready, I eased the absolute hottest point up to the metal hinge. The tip of the innermost cone of blue flame was the sweet spot. It was a 1/4" of legendary dragon-fire.

I slowly eased the cutting tip of flame back and forth, ever so slightly, watching the metal turn red-hot. Soon, the surface was liquified and starting to flow. I could move a gelatinous blob of molten metal around with the tip of the flame.

I was really getting going when the flame died out. Getting the initial feel for working the tool sucked down quite a bit of oxygen. I'd run out, just when I was having fun. I ran out to the hardware store and grabbed another, which was perfect, because they had just finished making the first batch of popcorn for the day.
The second time, with the learning curve behind me. I got my flame ripping in no time. I was once again in the molten metal business.

"Hot"
As I cut, it seemed like the liquid metal helped accelerate the process, it kept the hinge piece stay glowing hot.
The camera, just doesn't do it justice. Even through the shaded goggles, it looked incredible, like a movie scene from a steel mill. It was too fun to be work.

Hotter
I tapped on the piece few times with a pair of pliers and could easily bend it. A couple flaming minutes later, I grabbed ahold and snapped it off without effort.
Hottest
Although the red glow faded very quickly, the piece was still dangerously hot. I could feel the heat radiating from it on my weekend-stubble chin. Even after cooling on the ground for several minutes, it still scorched the board I set it on like a wood burning iron.

It was a shame I was done. It was just too much fun.
Naturally, the kid in me decided I really needed to push the remaining bit of metal back, just a little deeper into the block face, because,... molten metal!
I sparked up some fire again. I really had the hang of lighting the torch by this point, quickly getting the flame into good cutting shape. With the flame concentrated in a recessed hole in the block, it created an oven of incredible heat, liquefying the metal in seconds.

The Bernzomatic Cutting, Welding, and Brazing Torch Kit really is a cool tool. I pushed it hard on my first foray, not only cutting, but cutting a really thick piece of metal. I think I may do a more crafty-dude project with thinner metal at some point. I'm also looking forward to using it to try brazing, basically a big-kid version of soldering, to weld metal together.
What do you think? Ready to try this powerhouse of flame?


This is a sponsored post. I am a proud to be a Bernzomatic Torch Bearer, though all opinions expressed are 100% my own. I won't recommend products I don't believe in.
The Torch Bearers are a group of tradespeople, DIYers, culinarians, adventurers and artists brought together to create projects using Bernzomatic torches and share their knowledge and ideas with you. Check them out here and get inspired to create with fire.
Visit the other awesome Torchbearers and see what they are up to on the Bernzomatic Torch Bearer Site.
Tips for Using a Handheld Torch Safely

I've been doing a bunch of posts about projects using handheld torches this year and I have a lot more to share in the coming months. Torches are sweet, fire-spitting tools that really aren't scary to work with. Like any tool, they just have to be treated with respect and they are perfectly safe. I've going to share some safety tips and one ferociously close call that could have burned our house down.
My first rule for using a torch, is to stay mindful of my surroundings. Combustible materials inadvertently set ablaze could lead to disaster. I avoid or protect flammable stuff. I always do this. In fact, in the past, you've seen me use window cleaner to wet a wooden area, then add a flame proof mat, like when I plumbed to replace a hose bib on the back of our wooden-sided, very - flammable house.

Flame-proof mat in action.
Pictured Torch: TS4000-Trigger-Start Torch Head (with propane)
Like I said, I always do this. Unless, of course, I'm being a moron...
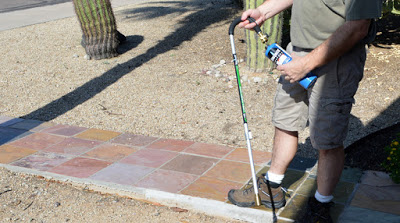
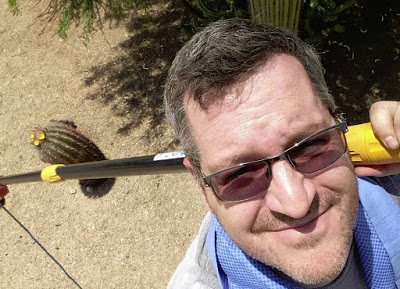
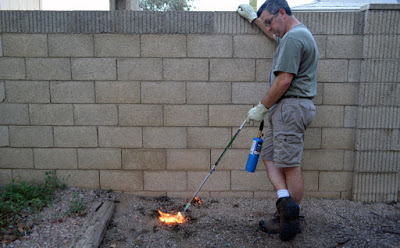
Recently, you may recall me weeding the yard with a Bernzomatic Lawn and Garden torch. Trust me, it's pure joy to incinerate and kill weeds this way, plus there's no nasty chemicals to deal with. In order to share this pure joy with you on this blog, I puttered merrily about the yard, flaming weeds. I moved my camera tripod around with me to capture the hard-core, flame-throwing action.
Good bye.
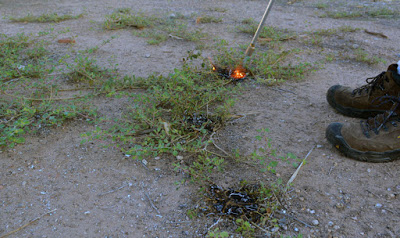
All was going well with this marvelous, photo-journalistic endeavour. I walked from the front yard to the side, sending weeds to their smoking doom and snapping pictures. I set the camera down over a particularly leafy little weed to get a close-up, before-and-after shot (all for you, dear reader), I leaned over to squint through the viewfinder and set the focal point, which of course was...
Mistake #1.

A particularly leafy weed.
With my face pressed against the camera, I heard a single, sharp cracking sound that made me think perhaps someone coming up behind me stepped on a dry stick. When I turned around, the sound instantly transformed into a fast, frying-bacon crackle and a sickening "whoosh!" I took a leisurely full second to stand, slack-jawed, with a burning torch in my hand, wondering how in the world I had managed to set a huge pile of dried palm fronds on fire. Flames exploded upwards, rapidly climbing the pile. The heap was stacked and waiting politely for bulk trash pickup a couple weeks later. Now it was rapidly and rudely turning into a flaming hell, just a few feet away from the house.
I clearly remember saying, "Uughhhtt!!!"
Sometimes in life, situations occur where curse words just don't do it. In the moment, I couldn't recall any actual words, curse or otherwise.
I shut off the torch, set it down, and ran at the pile. I knocked the biggest of the burning pieces off the stack with the sort of Kung-fu, whiptail kick maneuver that comes naturally to a person in fight-or-flight situations like this. Trust me, you would do it too, instant Kung-fu master style. I began to stomp my work boots on those flames, crushing them into submission.
Thank the heavens I hadn't been a complete idiot wearing sandals; boots were perfect. Oh, how I wished the camera had been facing the pile to see that bad-ass, action hero kick and stomp action. I even had the remote trigger in my hand the whole time, but the camera was pointed at that dang, particularly leafy weed. I was sure my Kung-fu firefighting moves looked cool.
No, they weren't cool at all, nor were they effective. The action hero bit evaporated away instantly. I had scattered glowing embers in my initial kicking and stomping assault that each latched hungrily onto fresh, bone-dry fronds. I continued to kick and stomp as fires continued to flare.
It was a loooong time that I leapt around in an insane hybrid dance. I was getting exhausted. The initial shock had worn off. I realized I wasn't losing the battle, but I clearly wasn't winning either. I was going to burn out before the fire would. I didn't think it would get to the house about 6 feet away, but I couldn't be sure. Even if it didn't, I really didn't want to have a neighbor call the fire department when they noticed the smoke. They'd probably present me with a nice, big fine.
As I furiously danced and singed my leg hair off, my first thought was the garden hose. Could I unwind it from its hook in the front yard, turn it on, and run it all the way back around before the entire pile was engulfed? As I got ready to run for it, I noticed the pool remodeling contractor had left it in a tangle, about 5 feet away from the place I was furiously doing the crazy stomp dance. There was absolutely no way I'd get that mess working in time.
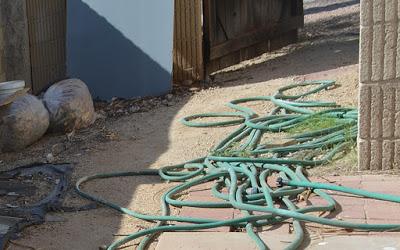
Nope. Nope. Nope.
How about the fire extinguisher?!!! Of course goofball! I had brought it out of the garage when I started torching.
Unfortunately, I had also left it in the furthest side of the front yard when I walked around the house, which of course was...
Mistake #2
I got a second burst adrenaline-fueled energy and ran faster than I had run 20 years, sliding in the gravel and spinning narrowly past the treacherous, spiked Saguaro cactus to grab that little red cylinder. I was back to the inferno in seconds, ripping the pull ring, and blasting the conflagration. The world disappeared in a massive cloud of yellow powder. Ever your devoted blogger, I spun the camera around for you to see the second, smaller blast.

Good times, eh? In the end, I know I was super lucky. What if I had rounded the corner and not heard that first crackle? The truth is, five solitary minutes of this pile blazing without any defensive fight could have cost us the house.

Scary, but easily avoidable. In this one, rare occasion, I didn't give my tool proper respect and it bit me. Moron.
Basic Torch Safety
Bernzomatic provides excellent documentation with their torches, plus they have some great resources on their general safety information page. Work safe. Don't be a moron
Here are their basics a nutshell:
- Read the safety warnings and instructions
- Use gloves and safety glasses

Blog Post:
Removing Rusted Bolts with a Torch - Fire it up!
- Check the seals. Don't use cylinders with damaged or missing seals. Get rid of cylinders with dirt or rust in the valve areas.
Blog Post:
Yard Cleanup - buckets, a pole saw, and a torch!
- Turn off a torch before attaching fuel. Hold the cylinder vertically when attaching it.
- Do not use tools to tighten, hand pressure only to avoid over-tightening.
- Check for leaks. Use soapy water on the connections and look for bubbles. Listen for hissing of gas. Feel for coldness. Smell for a rotten egg odor. Do not use if a leak is detected.
- Keep torches upright to prevent flare-ups or flashes. If it sputters or flares up, turn cylinder upright and turn it off. Vent unburned gas from the area.

Facebook Gallery:
Torch Lighting the Grill and Spiral Dogs!
- Allow torches to cool off. Remove fuel and replace caps.

Blog Post:
Re-Plumbing an Exterior Hose Bib - Fun with Fire!
- Don't drop, throw, or puncture the cylinders. Store them away from living spaces, children's access, ignition sources, and direct sunlight. Do not store fuel at temperatures above 120 degrees F (49 degrees C)
Just be smart. Think about what could happen and takes steps to prevent it. Keep an extinguisher nearby.
The easiest thing to remember is to look for ways for you or your stuff to get burned before you start. It's not just the flame, it's also the stuff you are applying the heat to and the stuff close to it. Think about where that drip of molten solder might go when you choose your footwear and where to put your arms and legs. Could an item you are heating or something nearby melt, drip, catch fire, spatter, spark, or explode?

Blog Post:
Burned Pallet Wood Pirate Flag
Work smart. You'll be fine. You'll have fun!
Cylinder Disposal
A great question that I heard asked by another Bernzomatic Torchbearer, in the early stages of the program was about what to do with the spent fuel cylinders. They last a good long time, even at the rate I've been torching, but they do eventually give their last hiss of gas as the flame slowly dwindles and winks out.

So what do you do with these non-refillable cylinders?

Since localities have different rules and regulations on how to properly handle these materials, Bernzomatic launched a great informational program called Cylinder Safe . This is a launching pad to get the details needed to safely use, transport, store, and dispose of the used gas cylinders.
I visited Cylinder Safe, at www.bernzomatic.com/cylindersafe and typed in my zip code. It gave me a website and phone number to my county's solid waste authority.

I got a call back from a really nice lady from Maricopa County (actually from the Solid Waste Program, part of the Water and Waste Management Division of the Environmental Services Department of Maricopa County). She gave some great information. Unfortunately, their static collection sites are on the fringes of the county, with the closest being a 40 minute drive. She gave me info for the City of Phoenix. Since we pay a residential waste collection fee with my utility bill, I could drop them off for free. It turns out they had a collection event at a local park, really close to us. Lots of cities have these events where you can hand off your hazardous household waste. My local event even took car tires, auto fluids, paint, batteries, appliances, electronics, pool chemicals, and yes,...
fire extinguishers.
Coincidentally, I just so happened to have one of those to drop off too.
Have fun torching my friends, and remember, don't be a moron.
Stay safe.

This is a sponsored post. I am a proud to be a Bernzomatic Torch Bearer, though all opinions expressed are 100% my own. I won't recommend products I don't believe in.
The Torch Bearers are a group of tradespeople, DIYers, culinarians, adventurers and artists brought together to create projects using Bernzomatic torches and share their knowledge and ideas with you. Check them out here and get inspired to create with fire.
Visit the other awesome Torchbearers and see what they are up to on the Bernzomatic Torch Bearer Site.
Burned Pallet Wood Pirate Flag

This wooden pirate flag is a cool project I came up with using free pallet wood and paint FIRE! The piece is something that just may be the start a decorative theme for our backyard / swimming pool area. The kids are going to love it.
I crafted this rustic, shipwrecked piece of maritime debris by taking the art of wood burning to a ridiculous extreme, torching the absolute heck out the wood with the fiery fury of Bernzomatic torches. Trust me, it's easier than it looks; I've got some tricks.The large board can be built many ways, but I'll walk through how I did it, because...

Salvaged Pallet Wood
I'd already torn the pallets apart, picked the choicest of boards, and removed all the nails and staples I could find (here). In order for the boards to nestle somewhat tightly together, I had to straighten the edges out a bit. Surprisingly, free pallet wood is not the straightest, purest of wood stock to start with. I probably won't be building an heirloom china cabinet out of it, but there are plenty of of cool projects to be done.
A board edge can be straightened a number of ways: with a power planer, a table saw, a router, a hand plane, etc. I'm lucky enough to have a joiner in my garage, designed to do the deed perfectly. Still, I didn't get too precise with it so I'd still get the rustic look of aged ship boards.
please no hidden nails... please no hidden nails...
Each board had its own character. It was weathered, warped, stained, and battered from the abuse of its former career, likely bouncing cross country in the back of a long-haul cargo truck raiding Spanish galleons, plundering their holds of priceless cargo from the New World. I cleaned up the best side of the planks with a good sanding.
Orbiting and sanding, randomly.
Assembling the Board
When they were smoothed up, I laid them out, arranging the varying thicknesses and colors in the most pleasing pattern and best fit. The knots and nail holes left no doubt this was used wood.
It was good that it was recycled, because it would be a real shame to build this thing out of select, beautiful grade-A planks from the store, only to heap on the abuse that I had planned for it.
I really didn't like how it still looked like obvious, salvaged pallet wood with the nail holes lined up in three rows. It didn't look anything like shattered timber scavenged from the hull of a battle-worn craft, washed up on a beachhead after a fierce naval engagement. It just looked like a pallet.
I chopped a few of the planks in two, whacking them randomly on the big miter saw.
Much better. The Jolly Roger would be burned onto a scrap hewn directly from the side of a fatally damaged vessel floundering in the pounding surf on the shores of an uncharted isle.
To build such a large piece, I used a Kreg jig to drill a series of pocket holes from the backside, along the mating edge of each plank. I placed a hole roughly every 6 inches or so along the entire length.
I applied glue to the edges, clamped, and ran the pocket hole screws tightly into place. There were a couple different thicknesses to the boards, since I'd salvaged them from a variety of obliging pallets.
There was no way I was going to take a chance with my thickness planer blades versus whatever bits of crud could still be embedded in the boards, so I simply pressed hard, downward as I screwed them from the backside. The face would be relatively flat.
Applying the Design
I'd blown up a Jolly Roger image on the computer and removed the black background (to save expensive toner). Unfortunately, I didn't have easy access to a large format printer to output the design in once piece. It was nothing some good ol' frosted tape couldn't fix. I simply overlapped several prints and taped them into place on my plank.
I used an X-Acto knife to cut out the pattern from above, scoring slightly into the wood surface.
I traced the scored lines with a pencil and did a little free hand drawing. For the teeth, I shaded the back of my pattern with the pencil, put it back on the board, and traced hard from above. Poor man's transfer paper.
Wood Burning the Design
The trick, of course, would be to control the flame along the edges of my pencil drawing. Luckily, I picked up this cool tip from Kayleen McKabe's Facebook post. Soaking Sodium Polyacrylate in water quickly expands into weird jelly-like, bead-ish stuff. I pushed it around on the work piece, effectively masking off the areas I didn't want burned.
This odd stuff is the magical absorbent product they put in diapers. It's also sold for science experiments (and pranks I would imagine). I hunted around locally before finding it on Amazon.com (HERE)

Even masked off, this was precision work. I used a sweet, little handheld torch to blaze the edges black. The Bernzomatic ST500-3-in-1 Micro Torch and Soldering Iron is a refillable, butane-powered mini-torch that comes with a variety of tool options. I set the fine-soldering and hot-air-blower tips aside and dialed in the pinpoint torch flame.
The micro torch was lightweight and comfortable to use, like a marker (a marker with a flaming hot jet of blue flame). It was plenty hot to blacken the wood in a few seconds. I worked it slowly away from the edge of the design by a few inches.
The sodium polyacrylate could be pushed around a little and re-used a couple times, but it was difficult to use for tight, precise work. It completely blocked the flame and left a crisp, somewhat lumpy edge. I wanted the finish to be a little more shaded and rustic.
I started using a drywall joint-taping knife as a flame shield. I found I could vary the flame intensity by letting it bounce off the blade and just lightly lick the wood or I could blast right against the knife edge, leaving a line crisp on one side and feathered on the other. I got pretty good at pivoting the knife around curved areas and varying how long I'd let the flame touch the wood. I did the swords and teeth entirely with this method.
With the basic edges laid out, I did a touch of free hand shading and expanded the black field further away from the design.
I did the outline of the entire design with the micro torch, only refilling it with butane four times.
There was no sense using the micro torch to char the entire field. I broke out the big, bad Bernzomatic TS8000 High Intensity Torch, with propane, to lay down some serious flame.
I used this particular torch because I could adjust the flame level from a light "toast a marshmallow" all the way up to the hell-fire of "I love the smell of napalm in the morning." It made quick work of the job, blackening the whole plank.
The next day I decided I wanted to really burn the heck out of the right side and give it a more ragged edge. Even though I had a cup of water and a fire extinguisher in the garage where I'd started torching, I wasn't going to take any chances when I upped the ante to hotter burning MAP-Pro gas in the Bernzomatic TS8000 and literally set my project on fire. I took it outside, clear of anything combustible.
I burned the right edge and random parts of the flag until it started to check and turn to ash. It was glorious. I lowered the flame and went over the lighter shaded parts I could see better in the bright sunlight, darkening them even more.
Seeing it out in the light, I decided I wanted to shade and distress the design a even more. I brought the micro torch back out and did a little free hand work.
I had to quench some smoldering areas with a damp rag and aggressively brush the whole thing with my shop brush to remove the loose ash, before bringing it back into the garage.
Finishing
Since this would be displayed outside, I needed a serious protective shield. I cracked a can of spar urethane, the stuff they use on wooden boats. I chose a satin finish with a heavy dose of UV protection to shield it from the weather and our ever ferocious desert sun.
I started by applying the spar urethane over the "white" areas first, so I wouldn't contaminate them if any more of the black ash came loose.
Note: This serious, exterior grade urethane is NOT soap and water cleanup stuff. You have to be very careful not to spatter it on your beloved "The beatings will continue until morale improves" pirate t-shirt. If you need a pirate t-shirt like this one, I found it at a quaint little merchant you probably haven't heard of, called "DisneyLand".
Even though it was to be a rustic and not fine furniture, I kept the brush strokes with the grain of the wood. I didn't bother with a fine quality brush, just used cheap-o disposables. They got the job done just fine.
I applied three coats to the front, with serious drying time between. I applied a couple thick coats to the back, letting the urethane seep into the the pocket holes, sealing the screw heads from the elements.
Of course, I was less than pleased when I discovered urethane had seeped through the original pallet nail holes and adhered to the newspaper laid down to the finished design. It was embedded in the completed front side. I had to scrape and sand it down and recoat those areas. Ahhhh well, it's more distressing, for that battle-damaged authenticity today's aspiring pirate loves.
Installing the Flag
Eventually, after a few more coats of urethane and serious dry time, the deed was done. The Jolly Roger was ready to be run up. I used some zinc plated eyehole screws and stainless steel wire to hang it on the fence like a painting. Of course, most paintings don't require a masonry bit and the squeal of a hammer-drill to set the anchors.
On you honor, as a ruthless Pirate of the Seven Seas, do not reveal the location of the hidden grotto.
Remember...
This post is sponsored by the scurvy bilge rats of Bernzomatic.
I am a proud to be a Bernzomatic Torch Bearer, though all opinions expressed are 100% my own. I won't recommend products I don't believe in.
The Torch Bearers are a group of tradespeople, DIYers, culinarians, adventurers and artists brought together to create projects using Bernzomatic torches and share their knowledge and ideas with you. Check them out here and get inspired to create with fire.
Visit the other awesome Torchbearers and see what they are up to on the Bernzomatic Torch Bearer Site.
Yard Cleanup - buckets, a pole saw, and a torch!
Living in an HOA community, even one started around 1971, requires us to keep our front yard looking sharp. Even with a desert landscaped yard, it means I have to occasionally face the Phoenix summertime inferno and engage in some dreaded yard work to avoid a friendly reminder in the mailbox and the judging, raised eyebrows of neighbors.
This time of year, with the horror of triple digit temperatures, yard work must be done like a commando strike, get in, get out,... and get on the couch with a frosty beverage.
I use whatever method I can to cheat and get done faster. If that means I forgo pulling weeds by hand and decimate them with a sweet, flame-throwing tool from my friends at Bernzomatic , then heck yeah! But more on that in a minute.
I'm going to share a few yardwork speed tips with you as I go. I realize not all my readers have desert landscapes, but these methods can be easily adapted elsewhere.
GET TO WORK!
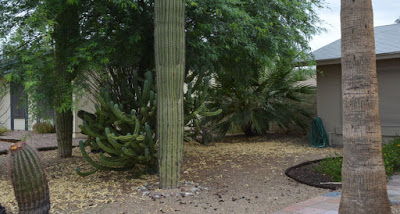
It didn't help that I had really let it go for a while. To the delight of our expansive population of neighborhood rabbits, the mesquite tree had spent a great deal of its summer leisure time raining pale green seed pods on our landscape. They do an outstanding job of contrasting against the rocky yard to make it look extra scrubby and unkept. This is close combat work, to be picked up piece by individual piece.
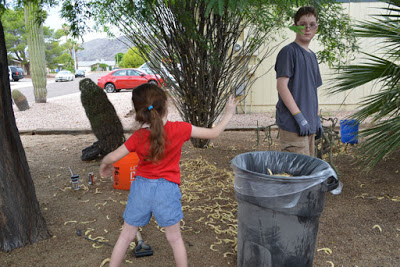
SPEED TIP#1: Recruit Free Labor
I'm a big proponent of conscripted labor. Sweetie and I knew this particular clean up project was coming, so a little over 15 years ago, we took certain steps (that shall not be described here) resulting in a teenaged laborer. I love it when a plan comes together.
For this task, I supplemented our normal teenage conscripted workforce with a longer range labor plan that we'd started developing over 7 years ago. She was a little squirrely, but through wholesale bribery I was able to get her out to help.
LEAVES and SEED PODS
SPEED TIP#2: The Ol' Bucket Trick
Buckets aren't just for holding paint kids. For hand and knees precision cleanup, it's incredibly quick to use a 5 gallon bucket as a low- level transitionary vessel to a larger garbage can lined with a lawn waste bag.

AZ DIY Guy: Representing the two local big box stores equally.
Step one is done. Get out of the heat and prepare for battle another day.
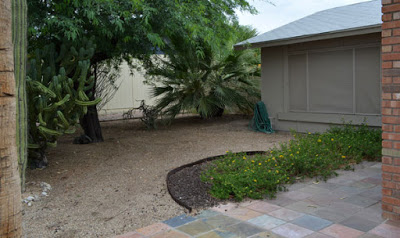
TREES
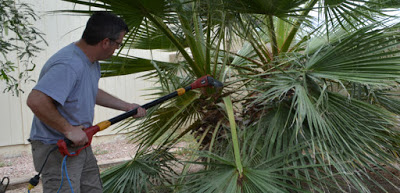
The palms were overgrown and had to be trimmed. That was on tap for the next morning. It's actually quite fun, blazing through them with an electric pole saw. Close to the ground, it's unbelievably quick work.
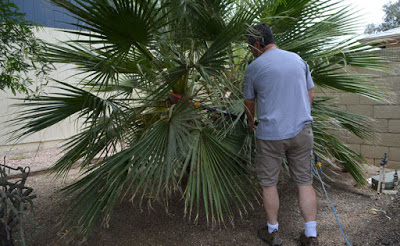
As I shift to the taller trees, it's slightly less fun. Staring sunwards with sawdust and sharp, serrated palm fronds raining down on me while attempting to maintain solid ladder balance is a ripping good time.
Ehhh... still fun.
SPEED TIP#3: No delays with chainsaws, keep 'em running smooth
When using any sort of chainsaw for yard work tasks, add bar and chain oil, every chance you get , or even more often. I loose so much time when a chain heats up, expands, and slips off. Sometimes it damages it and I have to grind the drive teeth with a rotary tool to get it back in the saw sprocket. It's at least a half hour each time. A full oil reservoir just keeps me working instead of fixing the chain.
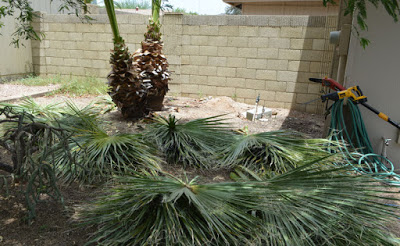
With bulk waste pickup a few weeks out, I lugged the fronds to a giant heap beside the house where they would wait, safely behind the fence.
WEEDS
Of course, next up was WEEDS.
I freaking hate weeding! In the land of very little rain, we still constantly have to fight weeds. The ones we get seem to be locked hard in the soil and are an incredible pain to pull out.
SPEED TIP#3: Fight weeds with a lawn and garden torch
Weeding does not have to be done on you hands and knees, or with nasty poisons, I propose we fight weeds with fire, my friends.
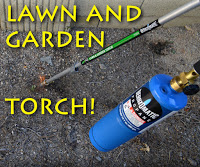
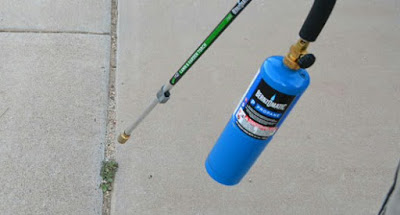
I used the Bernzomatic JT850 Lawn and Garden Torch, a lightweight, long-handled tool that looks like a steampunk walking cane. It's perfect for frying those devilish weeds.
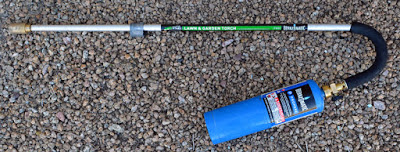
The Lawn and Garden Torch
The nice thing about this beauty is that it uses the same propane bottle from a standard handheld torch, or the type used in a camping stove.
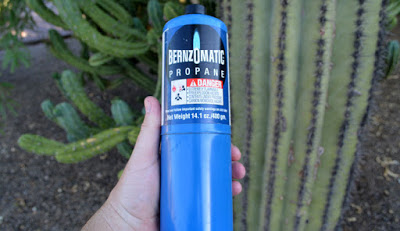
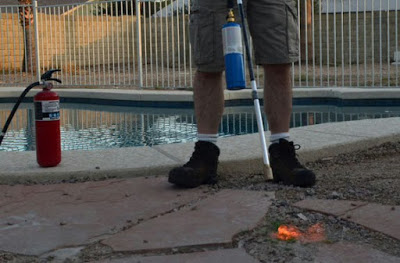
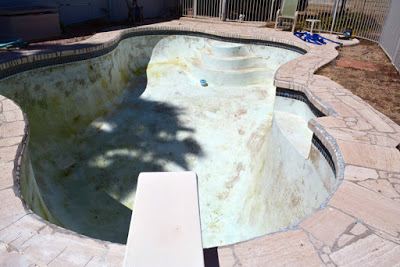
A long handled torch is absolutely wonderful for spot-killing weeds in non-combustible areas like desert landscaped yards, driveways or walkways, or stone-filled planting beds. I took it to the back yard first, to do some cleanup around the pool. After threading a bottle of propane onto the handle, I opened the valve, just a little bit to get the gas flowing. I found if I let too much out, it just won't light. There's a neat little sparking trigger built in, just to get the party started.

Auto start, no outside sparker needed!
I laid down some flames on the weeds that were taking root in the splash zone of the pool. This particular weed was more of a fine grass. The flame simply wiped it out in seconds. There was a slight crackle, a puff of smoke, and it was erased from the face of the earth.
The fine grass was super quick to wipe out, I strolled around the pool with the sun still low in the sky slaying weeds. It really didn't feel like work; it was relaxing and even a bit fun.
I think I can speak for all dudes when I say there is a vestige of man-child that lives in all of us. We never outgrow the desire to: A.) blow stuff up or B.) burn stuff down. Sure it's an irresponsible urge, that's why you don't see grown men melting plastic army men with a magnifying glass. But dang, when we're allowed to burn stuff?!!! Sign me up! (Ladies,...there's a vestige of man-child in you too. Try one of these out and you'll be hooked .)
How about those hearty, tenacious weeds that won't release their steely grip in the driveway or sidewalk cracks? They are those ugly suckers that break off when you try to pluck 'em, only to re-spout from the roots craftily left behind. I've got the solution...
Targeting,... targeting...
Ohhh heck yeah,..
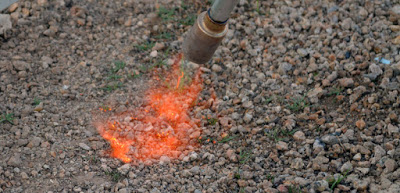
FLAME ON!
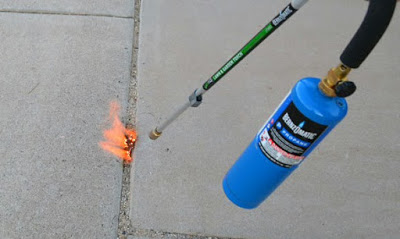
Fire!
The moisture in the stem boils instantly to vapor and destroys the cells that let water travel through the plant. You can hear a satisfying, audible crackle as it happens. Nothing is coming back from those roots, Nothing,
Who's next?
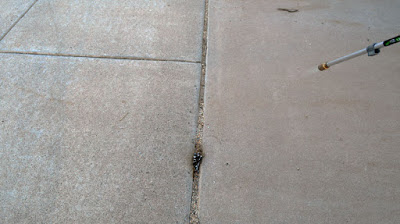
Target destroyed.
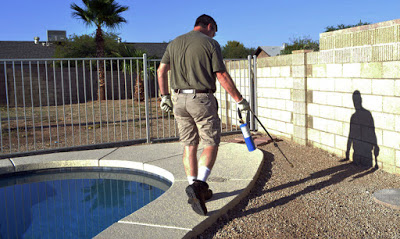
I took a stroll along the front sidewalk, engaging in a light search and destroy. Luckily, there wasn't anything too serious to engage up there, just some tall, spindly-stalked stuff which met its end as I ambled along.
I think the ants I saw in the area must have something to do with keeping lush, leafy type stuff down, but I'm not sure. They're not fire ants, but still the little buggers are not averse to biting you on the toe knuckle if you tarry too long in their territory wearing sandals.
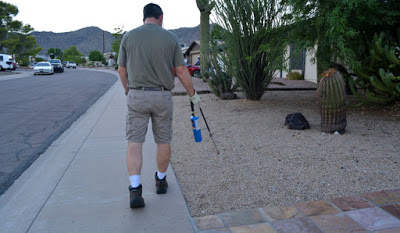
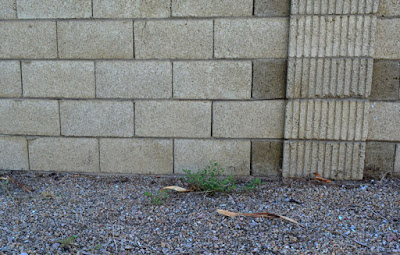
Towards the fence line, there was the big, lush stuff, the leafy, salad greens looking weeds. If anyone asks, I really threw my back into it and laboriously weeded the area. Yard work is brutal.
You can approach the lush, thick stalked stuff a couple ways. You can just kill it and let it dry out for a day or two before raking it up, or you can burn it to a crisp. Which will it be?
Option # 1 - Just kill the weed and let it dry: Generally, with the big stuff, especially in the back yard, I just hit it and come back later. Once the main stalk gets zapped, water cannot get to the rest of the weed. It won't survive and will just dry up. It's easy enough to rake up later.
Tick,.. tack,.. toe
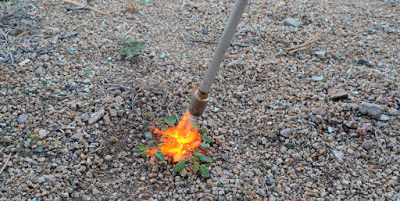
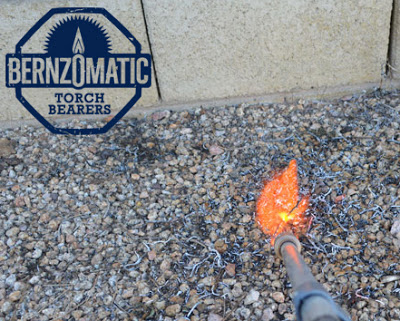
Option #2 - Burn it to a cinder: If it's not too big, or if it's in an area you really want cleaned up right away, you can expend a little more propane and virtually vaporize it.
This rascal was a medium-sized growth, I could easily wipe out in a few seconds.
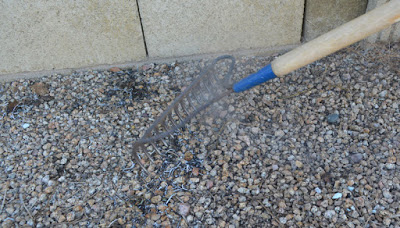
I kicked the dried, flammable sticks and leaves from the area and laid down some flame upon the interloping weed.

After about 30 seconds of heat, the weed was pretty much reduced to crispy ash. Seriously, you can't tell me this doesn't look like fun.
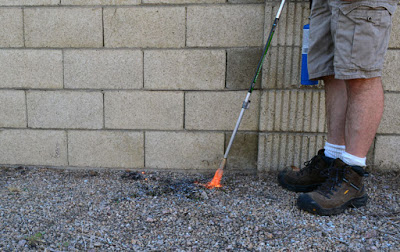
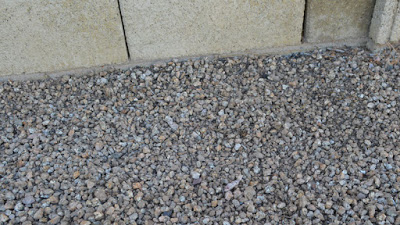
A quick touch up with a landscaping rake cleans up the ash and smooths the ground out a bit.
The weeds never existed. I was never here. You didn't see anything. Go back to your drink.
Some safety tips:
- I shot most of these photos in low light and shadows. Still, notice how difficult the flame is to see. Watch where you point this rascal. There can be 8 - 12" of flame you cannot see, especially in brighter light. It would be easy to set something on fire by mistake.
- Take extra care around plants you don't want to kill. I have a buddy that murdered his shrubs by letting the flame lick at their stems for a few moments. His wife was not pleased.
- This is seriously not flipflops or sandals work, especially with near invisible flame. I recommend wearing boots. There were a couple times I missed a small leaf of twig which then caught fire. I stomped those out before moving on. Boots are good.
- Keep your head on a swivel and mind your surroundings. Watch for flame ups where you don't want them. Make sure there is not anything smoldering before you leave an area. When in doubt, squirt the area with a hose.
- Keep a fire extinguisher nearby, or at least a garden hose.
- If you go time-traveling and end up facing one of those nasty, Victorian villains with a sword-cane and a twirled moustache, I heartily recommend lighting up this flame thrower cane while they are still pontificating. They'll never expect it.
- Don't torch weeds in your best clothes before a meeting with your priest, pastor, children's teacher, or boss. While any of the weeds may leave a slight burnt aroma on your clothes, others leave a definitively wacky scent, a scent I remember smelling in the area of lawn seats of certain rock concerts of my youth. Probably not an impression you want want folks to have of you.
That's it. The Bernzomatic JT850 Lawn and Garden Torch helped effortlessly wrap up the cleanup. I just can't help myself. I just keep going out and flaming other parts of the yard, whenever I see a few weeds crop up,
Flame on my friends.
This is a sponsored post. I am a proud to be a Bernzomatic Torch Bearer, though all opinions expressed are 100% my own. I won't recommend products I don't believe in.
The Torch Bearers are a group of tradespeople, DIYers, culinarians, adventurers and artists brought together to create projects using Bernzomatic torches and share their knowledge and ideas with you. Check them out here and get inspired to create with fire.
No ants were harmed in the making of this post, except perhaps a few of those toe-knuckle biting suckers, but they deserved it.
Removing Rusted Bolts with a Torch - Fire it up!
The old diving board must go. Unfortunately, the weathered, rusted bolts holding it down were frozen tight. I'd tried WD-40 in the past with no luck. I didn't want to spend a lifetime burning through reciprocating saw blades trying to cut through them. This was the perfect project to try a new technique, fire.
We're probably not going to replace the board during the pool remodel since it's a basically an inevitable trip to the emergency room, just waiting to happen. As fun as it is, we've had some close calls with the kids over the years. Now that the pool is empty, anyone that walks on it isn't just risking falling in a nice pool of water, they're risking a nine foot swan- dive onto the concrete below. Now that's a trip to the emergency room.
Since we're currently enjoying the horrors of Arizona summertime heat,and there was absolutely no shade on the diving board area, I waited until after dinnertime to head outside as the sun started to dip towards the mountain.
Not only was the diving board an injury magnet, it was in horrible shape. The base was a rusted eyesore. It sat on the section of deck where I had done my experiment in removing the horrible, slippery stone our predecessors had laid on top of the deck.
It was really more of a problem with the nuts, seized onto the bolts protruding up from the concrete deck. There was a bunch debris around those nuts, concrete dust, pebbles, and rusty corrosion. A wire brush cleaned it up reasonably well so I could get a clean shot at the nut and bolt.
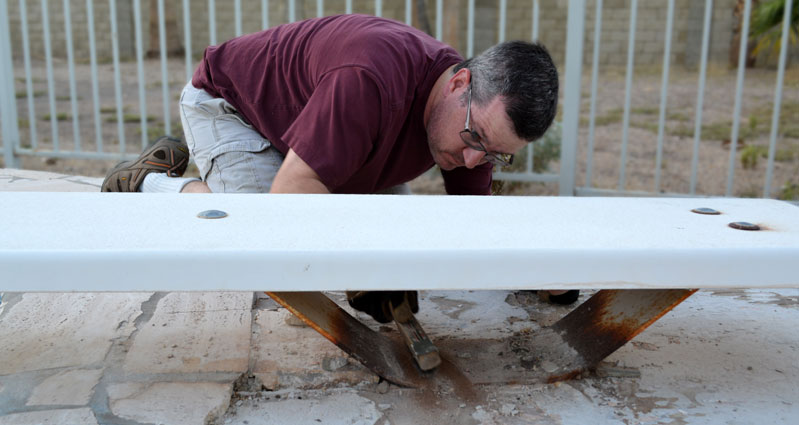
I tried, one last time, to macho-man those rusted nuts off with sheer brute force. No luck. The lower jaw of my crescent wrench actually flexed a bit and seemed like it was going to break. Looking at the photo, I realize my hand would have slammed into the base of the board if the wrench had broken. Gloves or not, that may have resulted in some broken fingers. You may argue with me, but I consider broken fingers undesirable. I'm kooky like that.
Torch time! For this awkward location, I chose the Bernzomatic Trigger Start Hose Torch. I could keep the gas bottle back from my work area and use the smaller torch head to reach into the space below the board and still see what I was doing. This particular torch also has the ability to use MAP-Pro gas in addition to normal propane.
MAP-Pro burns hotter, 3,730° F, over Propane's 3,600° F. Propane should do the trick, MAP-Pro will just do it faster. I like faster when I'm sweating out in the heat with a handheld flamethrower and there are frosty beverages to be had when the job is done.
Check out the cool holster. It even has a metal sleeve for a hot torch.
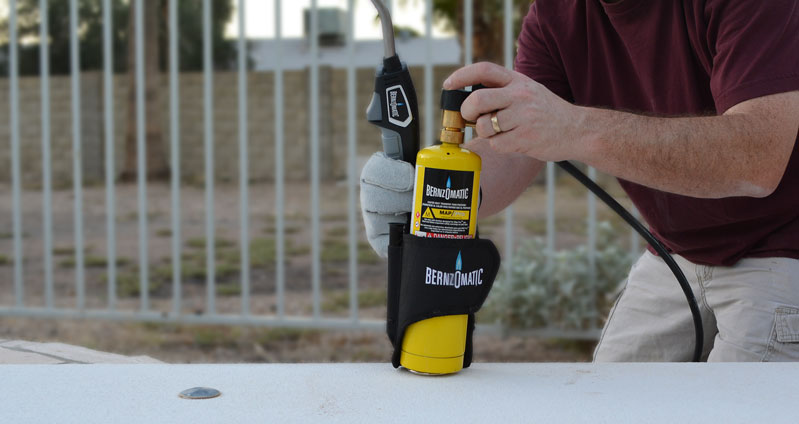
The BZ8250HT - Trigger Start Hose Torch
The BZ8250HT - Trigger Start Hose Torch
With some WD-40 residue still on the nut, I laid down some fire on it. I got it HOT, blasting flame and slowly moving it around for 30 seconds or so. The idea is that the metal expanding breaks down the corrosion. The heat draws the WD-40 into the threads, similar to the way solder gets sucked into a plumbing joint when a fitting is heated.
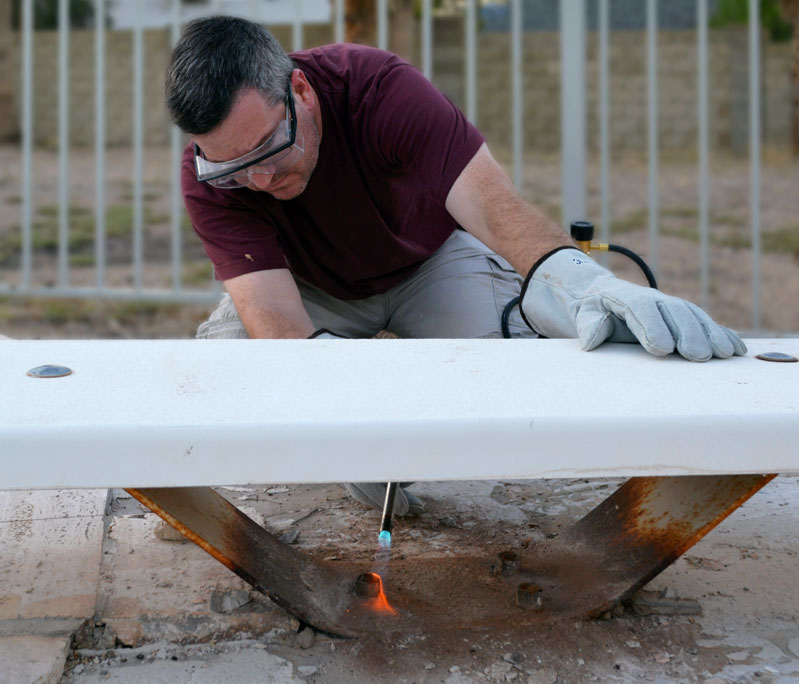
I slipped a monkey wrench into a steel pipe (actually an electrical conduit bender handle), to make a "cheater bar" for leverage, and rocked the nut back and forth a bit before putting some muscle to it. It broke free fairly easily and began to unthread.

Done deal. The nut un-threaded easily once I got it going. The threaded stud didn't snap off with the herculanean force I applied using the cheater bar.
The garage sale monkey wrench and the loosened nut, still warm.
I continued, using the same method for the other two nuts. It worked perfectly. Check out the clean threads on the left bolt below. I suspect with a little cleaning it could be re-used if I was simply replacing the board.

Free Tip of the Day: Don't touch!!!
The ancient art of leverage.
With all three nuts off, the board popped up easily.
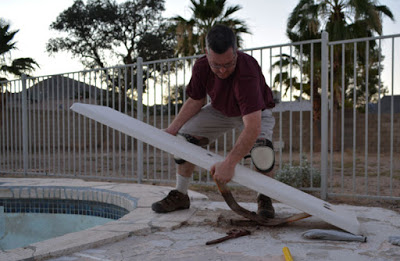
I guess it's something you never think about in the course of a normal day, but if you ever wondered, I can assure you first hand that a diving board is heavier than it looks. As the sun slipped behind the mountain, I lugged the beast all the way to the front curb to throw it on the quarterly bulk trash pile...
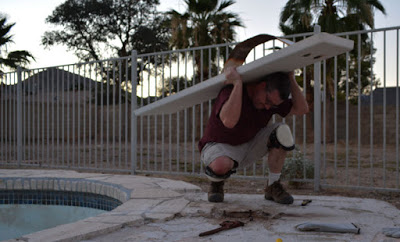
Atlas AZ DIY Guy
...and lugged it all the way back, when I realized the city had already cleared the pile. I guess I'll have the pool demo contractor dispose of it or for the next bulk pickup.
This torch technique is definitely going in my DIY playbook. I'm also looking forward to more projects using the flexibility of the hose torch.
Frosty beverage time!

This is a sponsored post. I am a proud to be a Bernzomatic Torch Bearer, though all opinions expressed are 100% my own. I won't recommend products I don't believe in.
Re-Plumbing an Exterior Hose Bib - Fun with Fire!
Soldering new, in-wall plumbing for a future hose bib. Step-by-step, how to solder copper plumbing tubing.
Read More