Cutting with Fire: DIY Metal-Cutting with an Oxygen Torch

This year, I've been trying out all kinds of handheld torches, using several types of fuel. The tool geek in me really wanted to challenge myself and move up to something even more serious. Luckily, I got my hands on a

Cutting, Welding, and Brazing Torch Kit , the big, hot Mamma of the Bernzomatic line.

I've done recent torch projects with butane (up to 3,150° F), projects with propane   (up to 3,600° F), and projects with hotter burning MAP-Pro (up to 3,730°).

The Bernzomatic OX2550KC, is the next step up. It uses a dual-gas fuel setup; burning both MAP-Pro and pure Oxygen. This compact, fire-breathing beast can produce a flame up to an incredible 5,300° F!  It's not even a commercial tool; it's something you can pick up for yourself at a hardware store or home center.

I wanted to try cutting metal with fire. I'd never done anything like it. I think this torch in cutting mode is probably best suited for metal stock, perhaps around 1/8" thick or so. So, naturally, I decided to push well past that on my very first task. I'd been wanting to remove an old, bent fence hinge from our block wall. It was there when we bought our home and has always been an eyesore. The trick would be to cut it off behind the face of the block, so I could patch over it. A reciprocating saw would be difficult to use in that spot. I'd bend the heck out of some blades, chip the wall up, and rattle the heck out of my arms.

It's time to go, Mr. Bent Hinge Pin

This torch doesn't work like a standard handheld torch, it takes a bit of fiddling to get the hang of it, but it's incredible when you do. After a little practice, I was able to perform the fine dance of easing more and more gas into the flame, making it hotter and hotter, a blue/white blade of flame.

The Bernzomatic OX2550KC Cutting, Welding, and Brazing Torch Kit

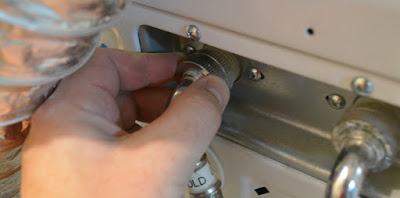
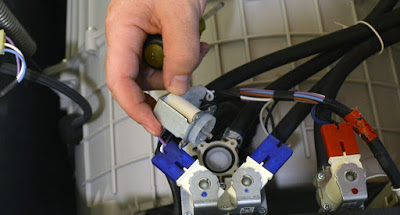
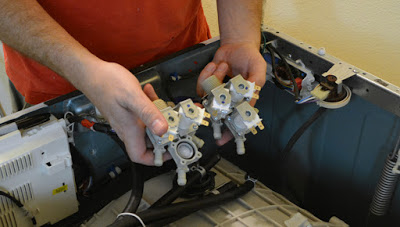
The Bernzomatic OX2550KC Cutting, Welding, and Brazing Torch Kit This is a hose style tool, with fuel cylinders placed remotely, away from the torch head. Starting the torch requires opening the MAP-Pro valve, ever so slightly and using a handheld sparker to ignite it. 

Come on Baby, Light my fire.
— Jim Morrison

It takes a different approach, too much gas flow and the flame will go out with a quick blast and a "pop!" 

Since I'm used to using a standard, handheld torch which can be instantly lit with a hearty blast of flame, it took me a several tries to figure out that I needed to use a very light touch. The MAP-Pro fueled flame needed to be quiet and soft, waving gently like a stick pulled from a camp fire. I learned to ease the MAP-Pro flow down even more, until the base of the flame barely touched the torch nozzle.

Isn't it soft and cuddly?

Next came the oxygen. Its valve appears to be finely threaded, because you can turn it quite a bit before the oxygen gets flowing. It's great for controlling the release of a very small amount of gas and easing it up slowly. Too much oxygen, too quick, and "pop" out goes the light. In that case, everything has to be shut off to safely start again.

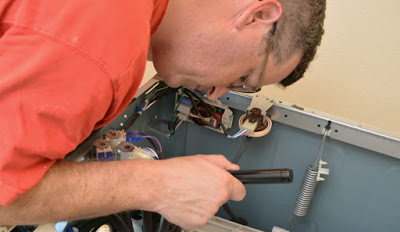
Speaking of safety, you'll note I stepped up my gear a couple notches for this project. First,since there would potentially be sparks and molten metal, I wore long pants and shirt sleeves (in Arizona even!). Beefy, long-wristed welding gloves would protect my hands if anything spattered. I capped my natty ensemble off with some Mad Max eye-protection, exchanging my normal safety glasses for a shaded, welding mono-goggle. I wouldn't take any chances with my already crappy eyes and a blinding, white-hot flame.

Fire, when you can't see the whites of my eyes.

As I slowly eased more oxygen into the flame, it snapped from the slowly waving, orange flame, to a crisp jet of blue-white fury. To cut with this rascal, I had to get it as hot as possible. It took a few tries, but I got the hang of dancing my hand between the MAP-Pro and Oxygen valves, until I got a real tight blast going. 

The perfect flame of awesomeness

With my finely-tuned fire-knife ready, I eased the absolute hottest point up to the metal hinge. The tip of the innermost cone of blue flame was the sweet spot. It was a 1/4" of legendary dragon-fire.

I slowly eased the cutting tip of flame back and forth, ever so slightly, watching the metal turn red-hot. Soon, the surface was liquified and starting to flow. I could move a gelatinous blob of molten metal around with the tip of the flame. 

I was really getting going when the flame died out. Getting the initial feel for working the tool sucked down quite a bit of oxygen. I'd run out, just when I was having fun. I ran out to the hardware store and grabbed another, which was perfect, because they had just finished making the first batch of popcorn for the day.

The second time, with the learning curve behind me. I got my flame ripping in no time. I was once again in the molten metal business.

"Hot"

As I cut, it seemed like the liquid metal helped accelerate the process, it kept the hinge piece stay glowing hot. 

The camera, just doesn't do it justice. Even through the shaded goggles, it looked incredible, like a movie scene from a steel mill. It was too fun to be work.

Hotter

I tapped on the piece few times with a pair of pliers and could easily bend it. A couple flaming minutes later, I grabbed ahold and snapped it off without effort.

Hottest

Although the red glow faded very quickly, the piece was still dangerously hot. I could feel the heat radiating from it on my weekend-stubble chin.  Even after cooling on the ground for several minutes, it still scorched the board I set it on like a wood burning iron.

It was a shame I was done. It was just too much fun.

Naturally, the kid in me decided I really needed to push the remaining bit of metal back, just a little deeper into the block face, because,... molten metal!

I sparked up some fire again. I really had the hang of lighting the torch by this point, quickly getting the flame into good cutting shape. With the flame concentrated in a recessed hole in the block, it created an oven of incredible heat, liquefying the metal in seconds. 

The Bernzomatic Cutting, Welding, and Brazing Torch Kit really is a cool tool. I pushed it hard on my first foray, not only cutting, but cutting a really thick piece of metal. I think I may do a more crafty-dude project with thinner metal at some point. I'm also looking forward to using it to try brazing, basically a big-kid version of soldering, to weld metal together. 

What do you think? Ready to try this powerhouse of flame?

This is a sponsored post. I am a proud to be a Bernzomatic Torch Bearer, though all opinions expressed are 100% my own. I won't recommend products I don't believe in.

The Torch Bearers are a group of tradespeople, DIYers, culinarians, adventurers and artists brought together to create projects using Bernzomatic torches and share their knowledge and ideas with you. Check them out here and get inspired to create with fire.

Visit the other awesome Torchbearers and see what they are up to on the Bernzomatic Torch Bearer Site.

10 DIY Tips for Troubleshooting and Repairing Appliances

One of the best things about being a rabid (crazy) Do-it-Yourselfer is the confidence slowly gained to tear things apart and repair them (or attempt to). Home appliances are no exception. They can be expensive to replace or have repaired. Why not save some money and DIY it if you can?

I just worked through a repair and have some general tips that can help with whatever busted appliance you may need to tackle.

For the second time, our washing machine needed the fix-it treatment. Of course, a problem appeared right in the middle of the closet renovation project, so it was another weekend lost to on that project.

The first time I'd cracked open this washing machine, the inner drum had leapt off its hanger springs and smashed two of the three stabilizing pistons. It wasn't a physically easy repair due to the massive, heavy drum, but it wasn't all that complex to figure out either. It's been two and a half years and that fix is still holding.

This time, it was a leak, indicated by a peculiar, growing stain on the concrete. By the time we realized it was an honest to goodness leak and not a spill, it had destroyed a framed painting stored beside the stackable units.

Water Damage

I'm not the Maytag Repairman, or anything of the sort, but I do have at least four, serious household appliance repairs under my belt over the years. I've saved thousands of dollars in the process. As a result, I'm not afraid to take a crack at a repair, even if I don't know 100% what I'm doing.

Risk vs. Reward

When considering if I'm going to DIY a repair, I look at risk versus reward. In the case of the washing machine, I figured that a new, front-loading washing machine costs somewhere between $650 to $1,200. Home Advisor states that professional repair costs normally range from $120 to $500. My thought is that, as long as I don't damage or destroy anything worse than it is, I can still fall back and call a real repair service,.. and make an appointment,... and hope they show up,... and don't try to scam us. Of course, I could also just run out and pick up a new machine. After all, that is why we have credit cards, a right?

My usual approach is that I am at least going to try to DIY it first. I'm going to share a few of my tips that have led to several, money-saving success stories.

Tip#1: Clear the area.

Seriously, open up the area where you are going to work and give yourself some elbow room. Don't waste any mental energy worrying about bumping into or climbing over stuff. A cluttered work area wastes time, too. It's so easy to lose parts and tools as you mindlessly set them down on or around piles of stuff that are simply in the way.

Tip #2: Centralize your Tools

It's bad enough that I cannot do any  home improvement project without misplacing at least two tape measures per hour. I think half my time is spent looking for where I set them. It's the same for these repair projects, I set tools down everywhere, even leaving them in the kitchen when I go in to grab a snack. 

I've started keeping an empty tool tote under my workbench. When I'm off to another location around the house, I'll load it with what I think I may need and take it all with me in one trip. It saves a ton of back and forth wasted time. Also, I try to get myself in the habit of dropping tools back into the box every single time I set them down, instead of scattering them around me on every horizontal surface I can reach.

Tip #3: Turn off / Disconnect

Unless you are specifically testing a particular system (electricity / water / gas), turn it off and / or disconnect it. None of this stuff is good to mess with in an unknown troubleshooting situation.

Electricity: It's important to unplug an appliance before working on it. Electrical terminations inside are not always shielded from contact. It's usually a big, electrically-conductive metal box you're working on. Trust me, electrical shock isn't cool.

With your hands inside a machine, it's best that the chance the machine turning on be prevented. Surprise moving parts could cause injury. 

Water: At the very least, turn off the valve feeding the machine. There's no reason to be faced with a geyser of scalding, hot water. I disconnected the feeds too. I'd have to hook them back up later to ensure I found the leak, but initially, I wanted the area clear without stuff to tangle me up.

Gas: I don't have any gas appliances, but it stands to reason that it's a good idea to turn off the gas to an appliance before you start monkeying around inside. I can imagine a host of disasters that can be caused with live, flammable gas. 

Tip #4: Nothing but the 'Net

Nowadays, it's just the dimwit, living in a van down by the river, that doesn't do a little online research first. In my search, I found common sources of leaks for our exact brand of LG washer. The most likely culprit was a bellows looking piece of plastic in the drain area. There were even step by step videos and part numbers.

According to the videos, that repair could be done through the rear access panel, which meant I wouldn't have to disconnect and remove the heavy dryer, stacked above. That was one pain-in-the-ass maneuver I really hoped to avoid.

The access hatch to the detention level

Unfortunately, when I started poking around inside, I realized the water was not coming from that commonly failing drain piece in the lower front, but dripping down from above. It was coming from the vicinity of the water connections, but I couldn't see where.

The effects of gravity on water.

That was an awesome discovery. Just awesome, because,.. this...

Do it yourself back-pain.

Searching the web, I found the exact way to easily open the exterior case without breaking anything. Most appliances have a specific order of things that have to be done, like one of those wooden puzzle boxes. Trying to figure it out on your own is time consuming and can lead to busted plastic tabs, bent metal, a surprising amount of scraped knuckles, and the spewing of remarkably filthy language.

This particular front loading LG opens up by removing some screws from the back, sliding the top backwards a few inches, then swinging it up and off. With the right instructions, I didn't waste time taking too many screws off, just the couple I needed.

Tip #5 - Speaking of Screws... Don't lose them.

There is nothing worse than the losing small parts as you work.

Whenever I'm taking an appliance apart, I always use a magnetic metal bowl / dish thing.

to keep my small metal parts in. It's not a sexy power tool, but trust me it will save you more heartache than you can imagine by avoiding lost screws and metal parts. The one I use has a rubber padded magnet so it doesn't scratch a painted surface. I just slap it on the side of the appliance and toss the screws in it.

Tip #6: Sherlock Holmes time

Take your time and do a thorough inspection looking for clues to the problem. Take your time.

Think

If there had been a mechanical problem, I'd be looking for rub marks, dents, or something bent or out of place. Remember when this very same washer tried to self destruct? That didn't take much sleuthing with the drum laying on the floor of the case.

Read about that fun repair from 2013 here:

An Emergency Washer Repair Challenge.

If it was a suspected electrical or electronic problem, I'd be looking for heat damage, burned wires, scorch marks, or damaged circuit boards. Years ago, I found what I think was a over-heated sensor, obviously burned-up in a dead dryer. I replaced it and the problem was solved.

This time it was a leak. I was looking for the highest point I could find any evidence of water, because water is always going to flow down right? It could of course be a red herring, if I found moisture too high in the case. It was possible that there was enough pressure from a leak to spray upwards. 

A flashlight and and inspection mirror are handy in this step. Even sticking a cell phone camera into out-of-sight areas is a good trick. Snap photos and zoom in on them to see hidden problems.

Elementary, my dear Watson.

In this case, right up at the top, I noticed some discoloration in the metal on one of the parts. It really didn't look right, compared to the other pieces in the area,

That had to be it. I re-attached the water lines and turned the water on, thinking I'd run a test wash cycle.

As soon as the water was on, the leak appeared. This thing leaked under standard household water pressure,

constantly. I hadn't even plugged the machine in yet and rivulets of water were already streaming down the side of the plastic cylinder.

Tip #7: Decision Making Time - To DIY or Not to DIY?

Up until this point, I'd just opened up the outer shell and poked around. No real parts had been monkeyed with yet. 

This is the time for a gut check and decide if it's time to call in the professional. It's a decision you have to make for yourself, based on your level of confidence, tolerance for risk, and understanding of what you've found.  If you decide to call in a professional, no shame in that. 

At least (in this case) I'd located the problem. I could snap a photo and show it to a repair technician, lessening the time they'd be troubleshooting. Heck, I could even email photos to repair companies and ask for a quotation. 

Of course, my loyal readers know my tolerance for this stuff. Be it confidence or stupidity, I reach for the tools and start pulling stuff apart. In this case, it was a couple screws that held the part in place.

With the part in hand, I had the advantage of my brief career as an electrician to recognize it as a "solenoid."

A solenoid is a simple concept, it's simply an electromagnetic plunger. Basically, some control function sends a flow of electricity to a coil of wire inside the part which magnetically drives a piston in one direction or another. Usually there's a spring holding it down in an unpowered situation. This particular manifold of solenoids had control wiring to each one and a rubber water line leading away. All three were grouped against the cold water source. So this little bugger was supposed to be pushing down on a small water valve keeping water from flowing through until it was needed for whatever part of the wash cycle that needed it.

With water leaking out of it constantly, the part was in a condition known amongst the well informed as "broken" or "messed-up." I'd have to replace it. I popped the simple little wiring harness off and headed back inside to find the part online.

It didn't take too long to learn that I could not buy a replacement solenoid after all. I'd have to buy the whole cold water inlet valve assembly. I found them all over the place with various prices and shipping options. 

This time I made a couple calls and lucked out and supported my local economy. I guess it doesn't help to give Art's Parts  a shout out, since they are closing the location. They were great though, staying open a few minutes late, on a Sunday! with the part waiting for me when I got there.

Tip #8: Label, Label, Label!!!

When you are taking stuff apart that can go back together in different locations, it's a good idea to label it so it doesn't get crossed later. I like to number them from left to right.

I took a sharpie to the wiring harness clips.

I did the same with the water hoses as I removed them. I could read the black marker on the black tubes,...

while it was fresh. In hindsight I wish I'd wrapped them in masking tape to write numbers on. 

Tip #9: Plan for the mess

Water spills, greasy hands, steaming capacitor juice , or just trash, it's good to think ahead for the mess. I try to have a trash bucket nearby, some rags, and, as in this case, a catch cup for removing water lines. 

With the wiring and hoses disconnected, the act of removal was a piece of cake that took about one minute. I just had to take out a couple screws holding the assembly in place. 

Tip #10: Double check new parts

If you didn't take the old parts with you to the store, or you ordered your parts online, it's always good to make an eyeball comparison of  old and new before opening the package. If you open the packaging, you may not be able to return an incorrect part.

Even out of the packaging, I make a good comparison. There's no sense in installing an incorrect part that might cause problems.

Refresher: Remember that Label, Label, Label thing?

The black marker on black hoses disappeared of course. Even though I could see it when I wrote it, it was gone by the time I got to putting everything back together. I really had to make a guess, fitting them back on by length and the existing curves in their shapes. I got lucky.

Tip #11 Test and Check BEFORE Closing Up

I was fairly confident I'd put everything back together the way I'd found it, but there was a possibility that the new part was faulty, that I'd damaged a water line, or screwed something up. I hooked the water lines up and turned the valve. 

With full, city water pressure pushing against the repair, I spent a few minutes closely watching and feeling around for leaks. Now would be the time to find a problem, not after screwing everything back together. In this particular configuration, I certainly didn't want to go through the hernia inducing, back-breaking act of stacking the dryer back on top if I wasn't sure the fix was a good one.

Luckily, it was a good one. Thank goodness, no more leaks. Before I sealed up the case and restacked the two units, I left it overnight with a big floor fan blasting downwards. Both the concrete floor and the washer guts needed a good drying out. This repair was a success.

Tip #12 Know When to Throw in the Towel

Despite my successes, I've had failures too. I've also decided to purchase new, rather than attempting a repair.

I've irreversibly destroyed an expensive Keurig coffeemaker by poking around inside trying to find a blockage. Now, we've switched over to exclusively using distilled water in the replacement Keurig, it simply does not get clogged up. 

I've torn into an old refrigerator too, without ever being able to find anything obviously wrong. I don't know anything about refrigeration and I certainly don't have the specialized tools. The unit was old enough to be worth replacing anyway. I posted it on Craigslist for free and got rid of it.

I've cracked open an old water heater to find the damage too extensive and beyond my skills. Even a professional would recommend replacement.  After I replaced it, I performed an autopsy  and confirmed I'd made the right choice. The thing was toast.

That's it, tips for my approach to repairing appliances. Again, I'm not an expert and I'll certainly call in the pro's when I'm uncomfortable. 

In my home-owning life, I've saved thousands of dollars by tackling these repairs myself. I've fixed more than big appliances with this approach. I've repaired garage door openers, video game controllers, a vacuum cleaner. a treadmill, a vehicle audio jack, and other stuff. I have a friend that even repaired a flat screen TV, just by figuring out which circuit board had a burned spot on it and replacing it.

Let me know if you have any luck, next time an appliance threatens an early demise.